Trim Story: On my way to
the
CopperState Fly In October of 2014, I was doing a high speed (for a
Cub) descent towards a landing in St Johns, AZ for a fuel stop. Trimmed
nose down, I noticed the stick alternately cycling fore and aft, then
suddenly something broke. I had a sudden high speed flutter in
the tail with the stick shaking hard fore and aft with the flutter.
I was still 12 miles out from St Johns. I slowed to Minimum
air speed and reduced to minimum power. Neither seemed to help.
I was about to set the plane down in the dirt 6 miles out from St
Johns when my passenger suggested I try pulling in flaps. The
flaps moderated the speed of the flutter, so it was a bit less violent.
At that point, I decided it would be safe to continue on into St
Johns to evaluate the situation and make repairs. Once on the
ground, I found that the single bowden cable used for trim control as
shown in the Wag Aero plans was pushing the trim tab up while trimmed
nose down. The aerodynamic load on the trim tab was causing the
bowden cable to bend back and forth. The fore and aft cycling I
had felt in the stick was the cable to the trim tab bending under load.
Then the cable broke, which was the impetus for the trim tab to
go into a high speed flutter. By the time I landed at St Johns,
about half of the pulled rivets holding the piano hinge mount for the
trim tab to the elevator had sheered. The good people at St
Johns managed to find me a drill and rivet puller, and helped me locate
a new cable and some pulled rivets at an auto parts store. (the
new cable was a remote throttle for a fire engine and cost a minor
fortune!) I was able to replace the cable and continue the trip,
but it was obvious to me that if I ever intend to trim nose down,
something had to be changed.
On my other plane, I had installed a Ray Allen trim servo in the
elevator. It is simple and very effective, so why not install the
same in the Sport Trainer. So I ordered a Ray Allen T2-10A kit
with an indicator, installation wire, and servo relay deck. I
ordered a
pair of stick grips from Chief Aircraft that came with the "chinaman
hat" trim switch as well as a PTT. I also ordered some 1/2"
square 4130 tubing to use to modify the elevator for mounting the trim
servo.
I removed the left elevator and stripped the fabric from the elevator
and trim tab. The Trim servo is slightly thicker than the
elevator, so I welded in the 1/2" tube to form the bottom of the
elevator a bit to make sufficient space to mount the trim servo.
I added a brace into the trim tab for mounting the control arm
and welded in a tab aligned
with the servo so the servo can actuate the trim tab. When I
recovered the elevator, I made a customized access panel the same size
as the trim servo using a piece of acetate with a cut out in the center
that matches the servo.
June 2015 - modifications made during Annual Condition Inspection.
Unfortunately, I didn't take photos while I did this work, so the
photos are only the finished product. However, I did a similar trim installation on my KR-2S a
couple of years earlier, which may make a good reference for this.

Servo mounted forward against the leading edge tube in the elevator.
The two 1/2" square tubes I added are rib stitched just behind
the servo.
There are two thin 4130 plates welded to the bottom of the 1/2" square
tubes with nut plates riveted into them for mounting the servo.
The
square ring around the servo was cut from acetate sheet, then covered
the same as any other access panel, then cut out after the covering was
completed. The control rod is a 10-32 threaded rod covered with
gray heat shrink.
Full nose up trim.
Full nose down trim.
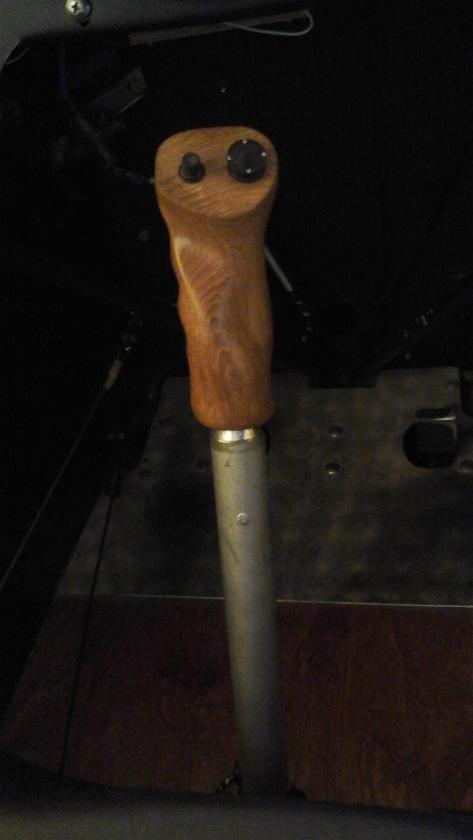
I bought two of these stick heads from Chief Aircraft. They came
complete with the switches.
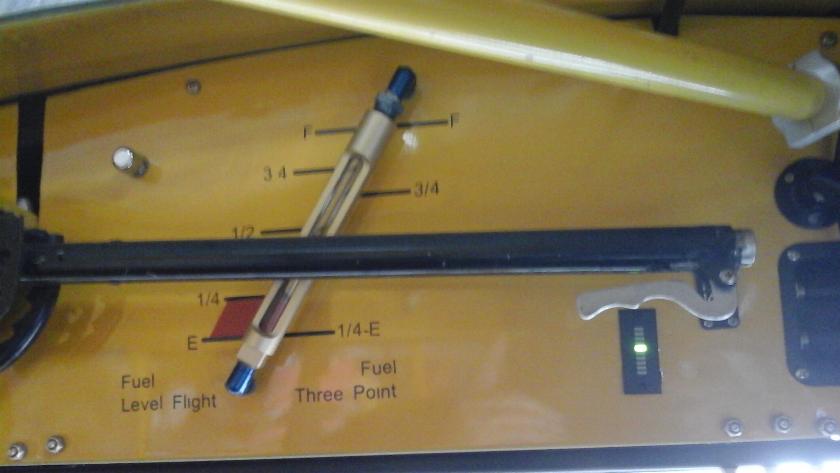
The LED that's illuminated is the trim indicator in the left wing root
just behind my flap handle. It's probably worth
noting that my switch setup required the Ray Allen Relay deck, which is
mounted behind this panel next to the trim
indicator.
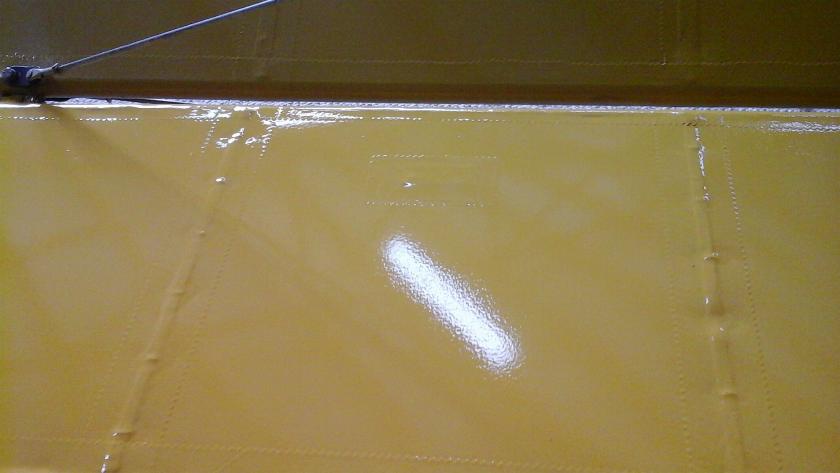
Note the tiny double fabric patch in the center of this photo.
That's where the top of the trim servo rests against the bottom
of the fabric. The
servo is actually a bit thicker than the elevator.
Finished product. Note the wire that comes out of the fuselage
and goes through the fabric into the elevator. That's the wiring
to the trim servo.
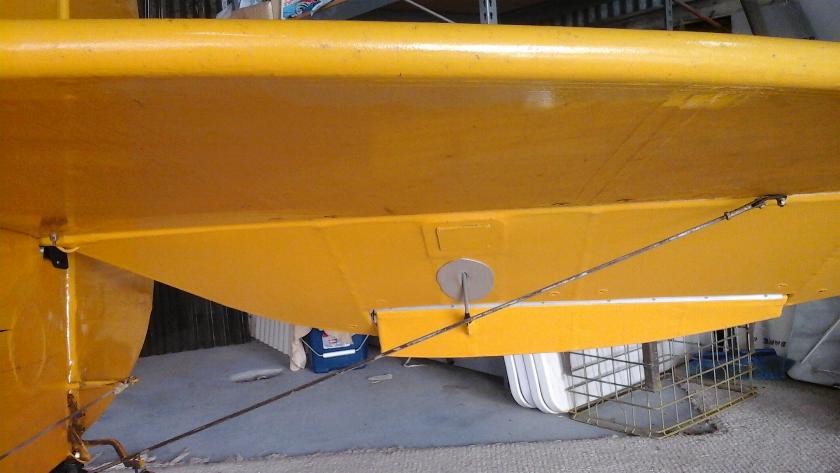
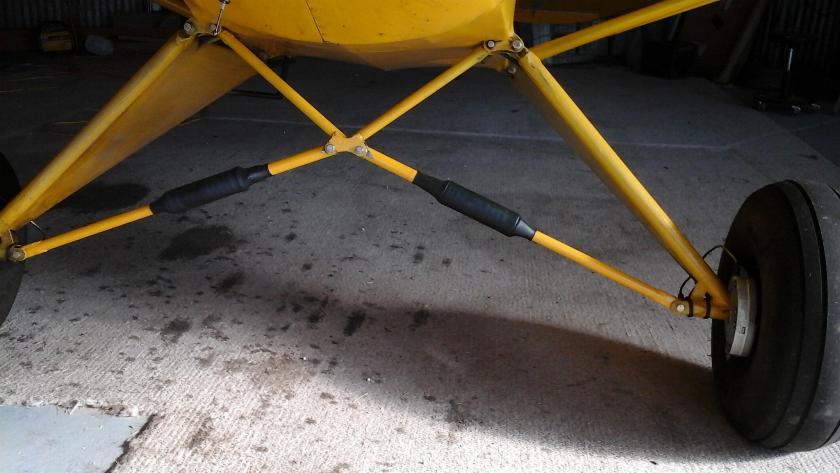
Bungees vs Die Spring Gear
Nov 2015 - I've shredded yet another bungee cover. Yeah, I know.
I could have made a teardrop shaped metal can to house the
bungees.
But I preferred the look of the leather black bungee covers. But
they don't seem to last more than about 2 years. I was at a
hangar sale and
ran across a set of die spring struts for a Sport Trainer.
Offered $50, so now I have the die spring struts. I'll give
them a try.
Clearly the die spring struts are goint to be a lot less drag than the
bungees.
You can see that I had to do a bit of grinding to get these struts to
fit up between my fittings. Clearly I need to touch up the paint
a bit before
I call them finished.
Short of touching up the paint here's the finished product. I
don't know the spring rate for these springs, but I like the way they
feel. On the
other hand, I haven't pounded the plane on or landed off field yet.
I'm thinking a set of safety cables may be in order in case of
failure.
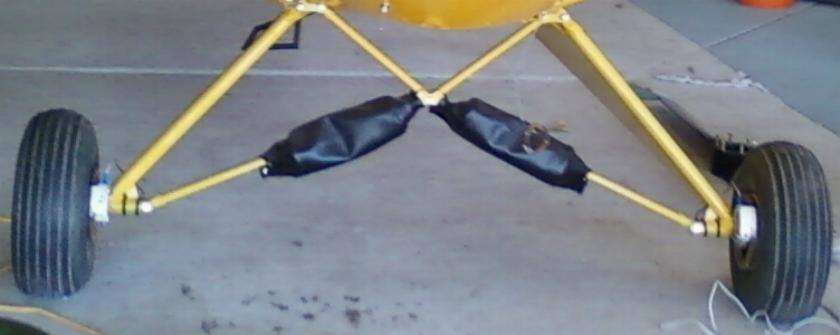
Seems a bit cleaner than the bungee installation here. Note the
brake installation in this photo as changing the brakes follows below.
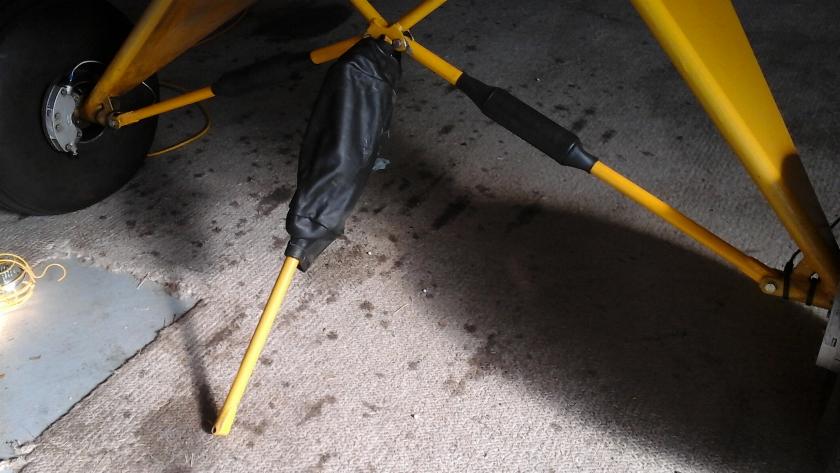
2/22/16 - I bought a set of safety cables for the
gear. After having flown with the die spring struts on the
gear for a couple of months now, I have to say that I really like them.
My bungees were always really stiff, and perhaps were
too tight for my plane. But if you actually landed on them hard
enough for them to stretch a bit, they would snap back and
launch you. The die springs have a gradual spring rate to them,
which makes them soft and springy, so even off in the rough
the bumps aren't transmitted to the airframe so much. It also
makes soft landings really easy.
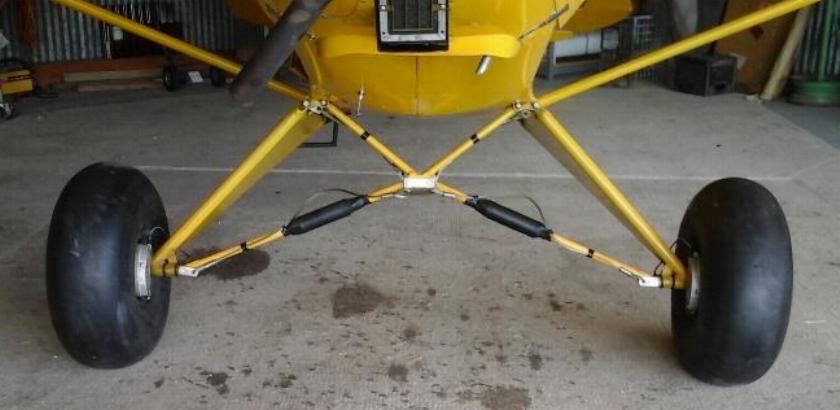
5/30/2016 - A photo of the safety cables. I also mounted a
set of GoodYear 26" smooth Blimp tires.
5/30/2016 - Also added hubcaps during the annual this year.
Brakes for Bushwheels
Nov 2015 - I bought a used set of 26" Good Year Blimp tires, typically
used as bush tires for planes that spend most of their time landing on
pavement and asphalt like I do. I haven't installed the tires
yet, but they came with a set of 40-60 Cleveland Wheels and
Brakes. One of the
wheels had significant corrosion, but cleaned up and is, in my
opinion, still airworthy. However, my SC clone has 1 1/2" axles
and the 40-60
wheels were made for 1 1/4" axles. They are typically
specified in most SuperCub bushwheel installations. I don't think
I really
need more
braking power since I have Matco master cylinders rather than the wimpy
Scott masters supplied by Piper in the real SuperCubs, but once I
looked at the 40-60 brakes, the reason they are
specified became obvious. They have roughly 1/4" offset in the
disks and torque plates to make
more room between the brake calipers and the
tire, which is really important when you stick a set of mushy balloon
tires on there. Additionally,
the brake calipers on my old 40-59D
wheels, while working well, are in less than ideal condition. So
I decided to see if I couldn't adapt the
40-60 brakes to fit my 40-59D wheels.
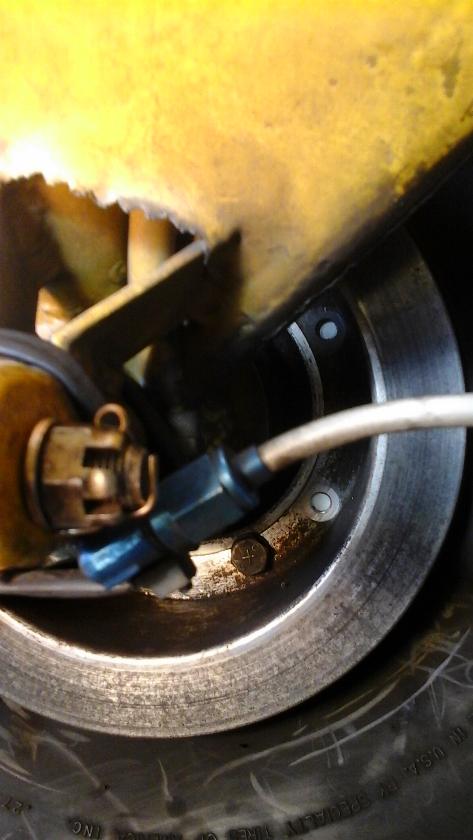
Here was the biggest problem. The 40-60 wheels use six 1/4"
bolts, while the 40-59D wheels use three 5/16" bolts. Also the
bolt pattern
has is about 1/8" tighter diameter, so I had to drill the 40-60 brake
discs to adapt to the 40-59D wheels. The discs did fit the wheels
and
center up properly, so the only issue was drilling the discs accurately.

Note the extra clearance between the tire and brake caliper with my
8:50/6 tires. That should
accommodate the fatter bushwheels when I'm ready
to mount them.
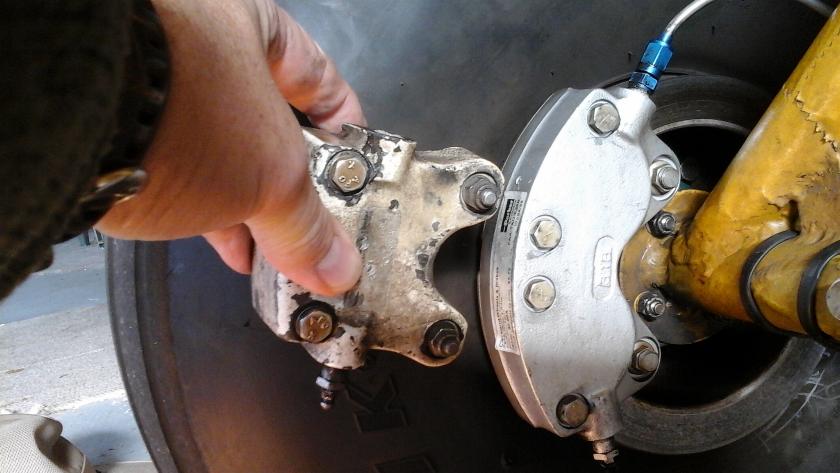
Note the difference between the double puck 40-60 brake calipers vs the
40-59D brake calipers. The extra braking power is kind of nice to
have, and I'm sure I'll appreciate it after I install the larger tires.
But the feel of the brakes with the double puck calipers actually
feels about the
same.
I now have a spare set of 40-60 Cleveland wheels with all new bearings,
races, felt seals, washers, and circlips. Additionally, I have a
set of
40-59D brake discs, calipers, and torque plates. Drop me a line
and make an offer. If one wants a set of Cleveland wheels for 1
1/2" axles,
I also have access to a new set of wheels discs that will work with the
40-59D brake calipers. They come complete with bearings,
seals, etc.
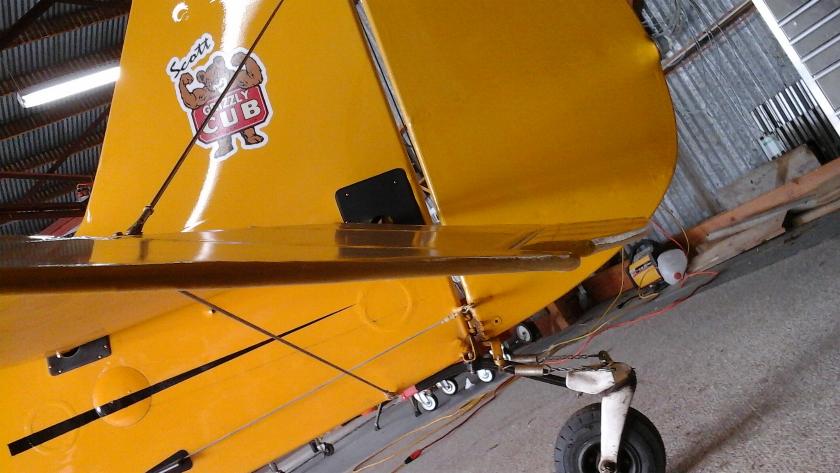
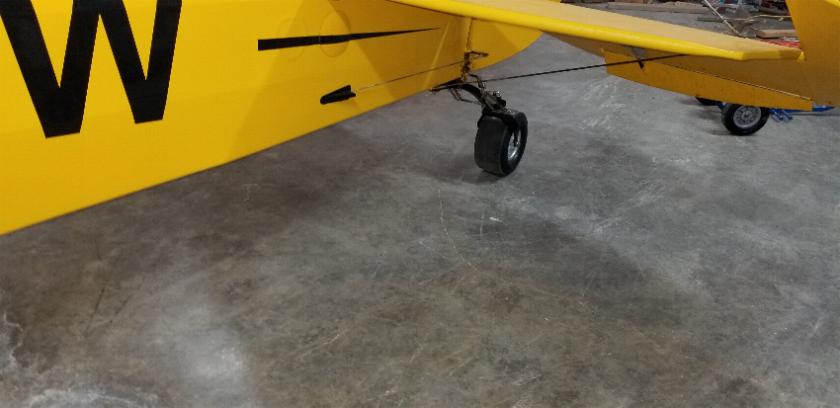
July, 2022 - Battle of the tailwheels. I have been battling with
a chronic tailwheel shimmy issue off and on with the Cub for 10 years
now. I replaced the original 3 leaf spring with a 4 leaf srping
from Univair and that seemed to help for a while. Then it was
back. I replaced it again, but every time I put any load in the
back seat, the tailwheel shimmy was back. I'm fed up with it.
I was wanting to move the Scott 3200 over to my biplane, so
ordered a new Matco 11D tailwheel. That's the 11" diameter wheel
with a 4" wide slick tire on it. Yeah, it's a go cart racing
slick, but it looks great on there. I installed it on the Cub and
move the Scott 3200 to the biplane. It shimmied like mad on the
biplane as well, so I switched it back to the Aviation Products 6"
tailwheel. The Matco tailwheel seemed to behave, right up until I
put a load in the back seat again. Dang. As big as that
tailwheel is, when it shimmies, it really hammers the tail. I
decided I have to put thi sproblem to bed. So, I took the spare 4
leaf tailspring and some simple wooden tooling I made up on the band
saw and bent a much more acute arc into the tailspring, one leaf at a
time. The tailwheel looks almost silly with so much caster in it,
but that seems to have addressed the issue. I need to put a load
in the back to know for sure. the Scott TW became a spare, so I
sold it to a friend for his Stinson project, although I probably should
have bent a new arc into the tailspring on the biplane and installed it
there.

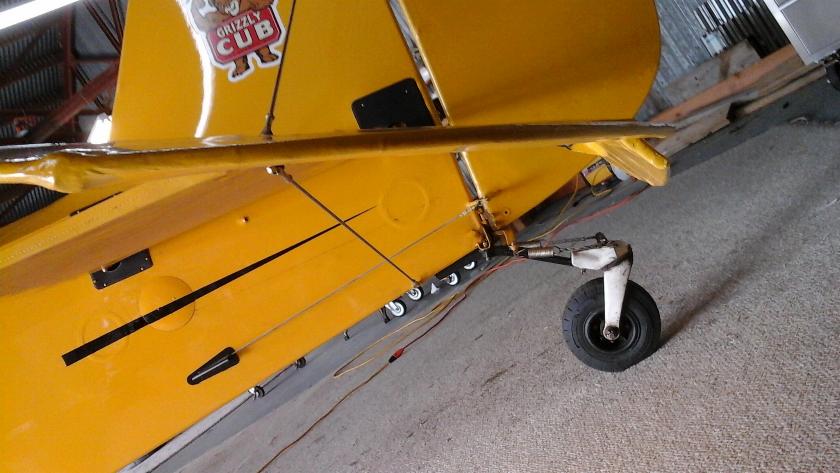
Scott 3200 still mounted to the Cub.
New Matco 11D tailwheel. I like the looks, but still shimmies.
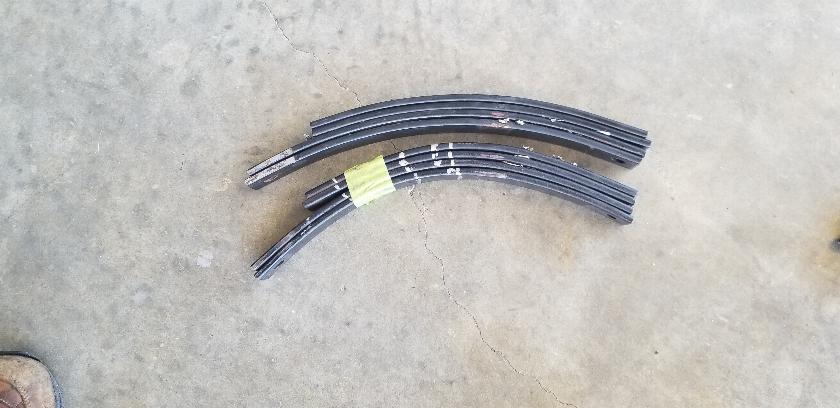
The upper spring is the 4 leaf spring in new condition from Univair.
The lower spring is the set I reformed in the press. This
appears to have killed the shimmy, but I need to test with a load in
the back seat to know for sure.
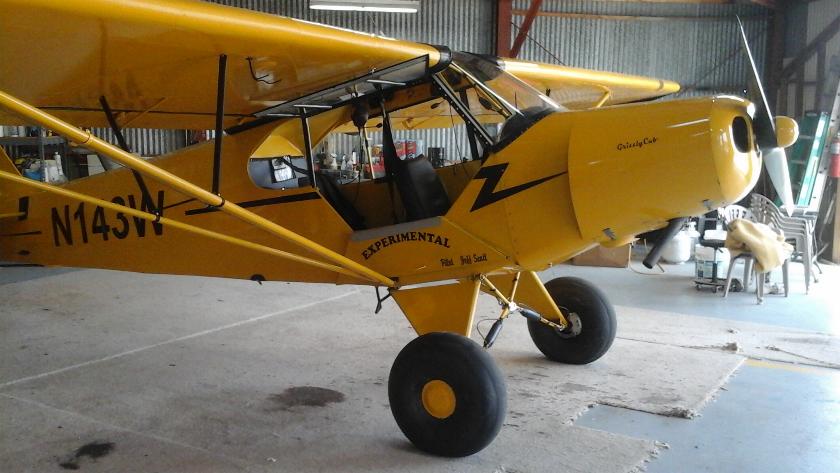
Page 1 - The Cub
Project
Page 2 - Fabric
Page
3
- Firewall Forward
Page
4 - Firewall Forward (page 2)
Page
5 - O-320
Overhaul (for the Cub)
Page 6 -
Final Assembly (2010)
Page
7 - Final Assembly (2011 page 2)
Page
8 - Final Assembly (2011 page 3)
Page 9 - Completed
Aircraft
Page
10 - Later Updates and
Modifications
Page 11 - MOGAS vs
Composite Fuel Tanks
POH
for Scott Grizzly Cub N143W
Feel free to email me at jscott.planes "at" gmail.com