Completed Plane
Page 1 - The Cub
Project
Page 2 - Fabric
Page
3
- Firewall Forward
Page
4 - Firewall Forward (page 2)
Page
5 - O-320
Overhaul (for the Cub)
Page 6 -
Final Assembly (2010)
Page
7 - Final Assembly (2011 page 2)
Page
8 - Final Assembly (2011 page 3)
Page
9 - Completed
Aircraft
Page 10 - Later Updates and
Modifications
Page 11 - MOGAS vs
Composite Fuel Tanks
POH
for Scott Grizzly Cub N143W
May 14, 2011 - Weight and balance day. I leak checked the
fuel
system. Did the fuel flow check and measured
a rate of 36 gph with the tanks nearly empty. There are 2
gallons
of unusable fuel in the aft collector tank.
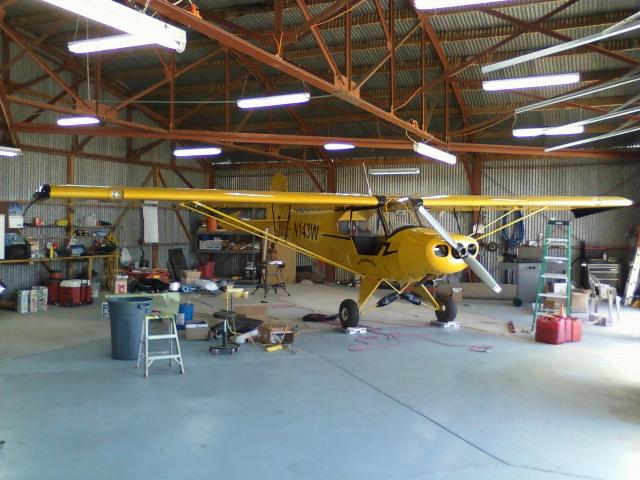
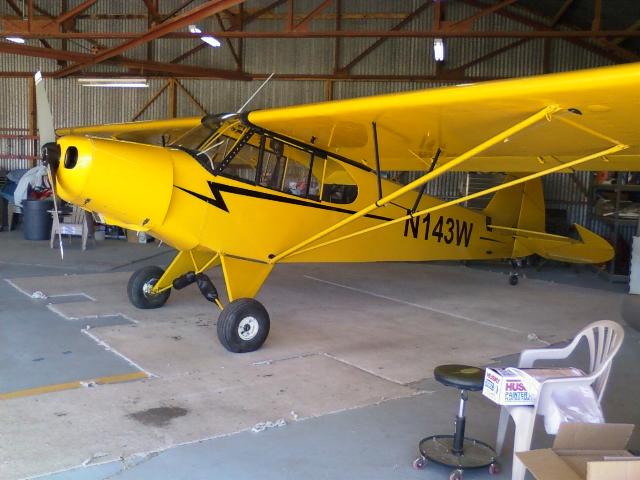
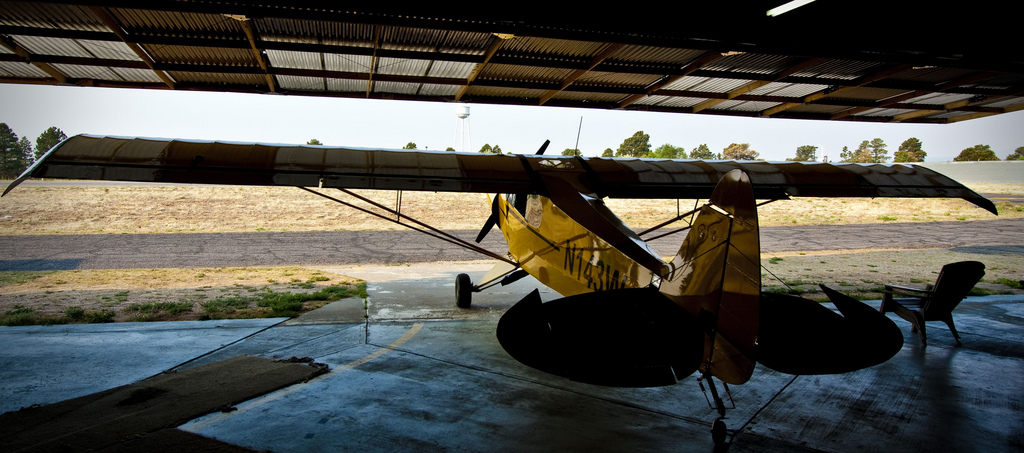
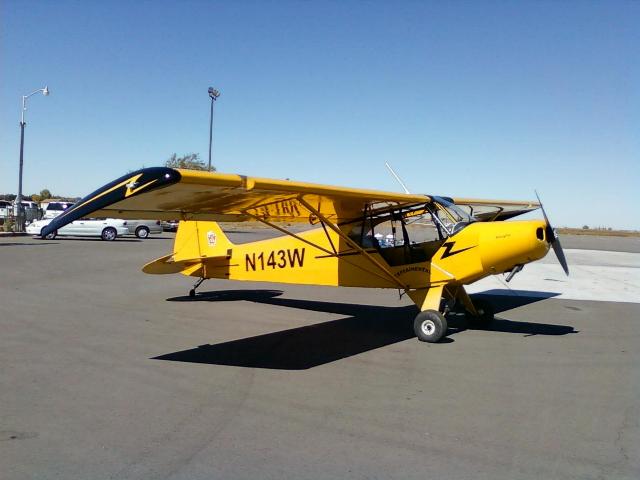
This photo was taken during the Weight and Balance. The empty
weight came out at 1136#. The CG is such
that there is no way I can possibly get this plane out of the CG range
no matter how I load it with me flying solo
from either seat. The same applies with both seats occupied.
Click
here to see
the W&B Work sheet.

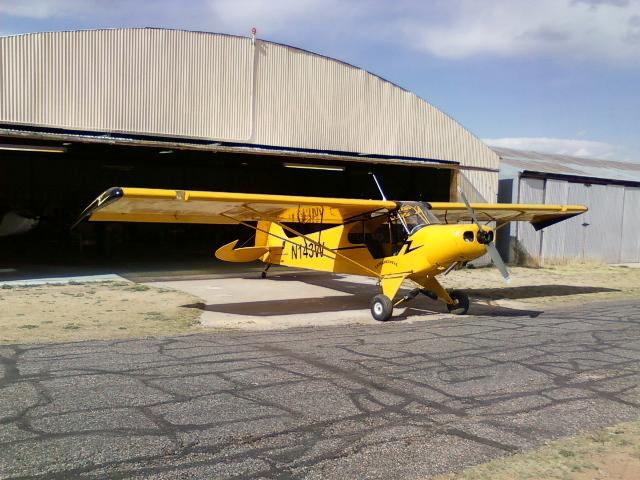
Finished views.
I pulled the plane outside and fired up the engine. It ran
well... for about 45 seconds. Then it ran out of fuel.
Apparently the float is sticking in the close position.
However,
while it was running, I noted that all of the
gauges and systems appeared to function normally.
Unfortunately,
tomorrow I'll be pulling the Carb off to
see why the float shut off and stayed off.
My 15, 2011 - My mind tends to ruminate on problems while I sleep at
night. I woke up at 5:00 this morning
with an answer. The carb has an inlet filter behind the inlet
fitting. Maybe some of the PTFE thread sealant
migrated into the inlet filter. I went to the airport at 6:00
a.m.,
pulled the fuel line and inlet fitting off the carb
and found the inlet screen was completely packed full of junk.
A
lot more than could have come from my fuel
system. I pulled the inlet screen, washed and blew it out,
reassembled, and took the plane out to taxi around
the airport. The engine and all engine related systems
performed
flawlessly. The oil pressure was only at 52 psi,
so I pulled the oil pressure relief spring and added 4 washers
behind it. It now produces 70 psi, which is perfect.
Both magnetos run smoothly with a minimal mag differential drop.
The Grumman exhaust I installed on this plane
is quiet and the heat exchanger produces ample heat in the cockpit even
taxiing around on the ground.
The wrecked Grumman Cheetah that this engine came from was apparently
wrecked because the pilot ran it
out of gas. With this morning's discovery, I strongly suspect
it
was wrecked due to the carb inlet filter being
completely packed with debris. This stuff sure didn't come
out of
my fuel system.
OK, Now it's time to finish the paperwork and get this plane inspected
and in the air. First flight is expected to
be in late June due to the Los Alamos Airport closing for repaving
until then.
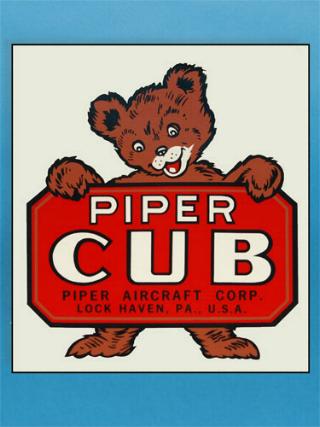

May 20, 2011 - When my buddy in Tennessee that got me into this project
saw that I was putting an O-320
on the Cub, he gave it the moniker of "Grizzly Cub". Another
good friend in Santa Fe is a graphic artist and
volunteered to morph a Cub logo into a "Grizzly Cub" logo.
Yet another long time friend in Iowa has a vinyl
graphics business and will make this into a logo for the tail of the
Cub. I'm thinking this is a pretty awesome logo.
Thanks for the contribution of ideas and work guys! Where would I
be without my buddies?
I am working my way through the post construction inspection.
Much of the inspection checklist is pretty easy as
I just write NEW and check off the item. I did find that the
plane had about 10 degrees too much down elevator
available, which was causing the back seat stick to drag against the
back of the front seat with the stick in the full
forward position. This was caused by a missing stop from the
elevator and was remedied by installing a stop bolt
in the tail. Otherwise, the inspection is going well.
May 31, 2011 - I also found that I had miswired the alternator charging
lead bypassing the 60 amp breaker. I had
to dig the sealant out of the firewall and pull a new wire from the
alternator to the breaker.
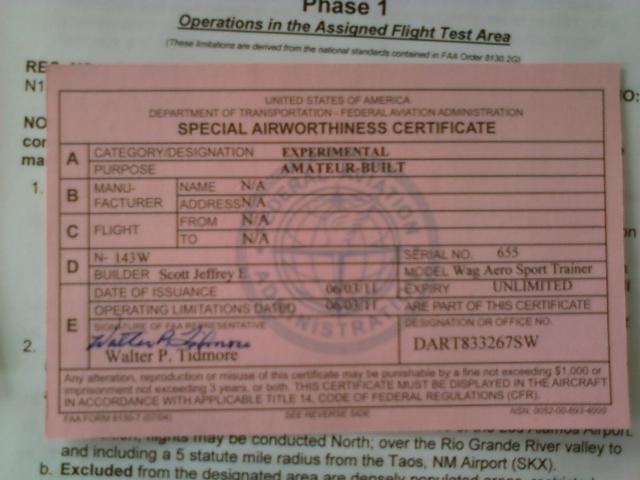
June 3, 2011 - Finally, I've got the Airworthiness Certificate.

June 4, 2011 - The winds were calm, so despite the heavy smoke from the
wildfires, it was time to see if I couldn't teach this plane to fly.
Mouser Williams volunteered to do the photos of the first
flight.
The pilot of the chase plane said he couldn't make it, so
Mouser
ended up shooting from the ground. However, when I was ready
for
departure, Will Fox called in, then landed in his Questair Venture just
after I was airborne. He and Mouser jumped into Will's
Pegazair
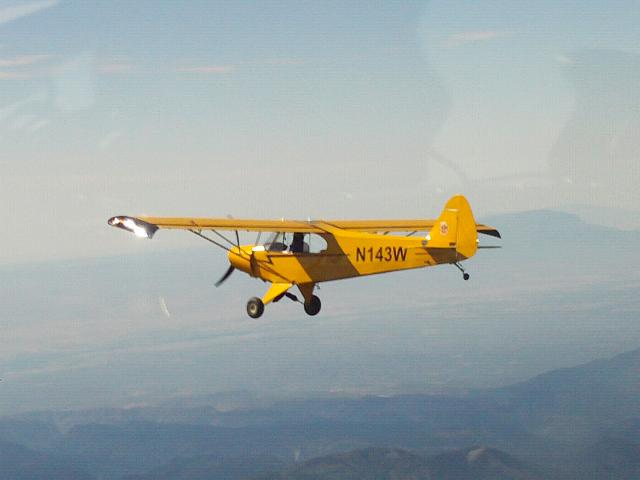
to fly chase, so we got some air-to-air photos as well.
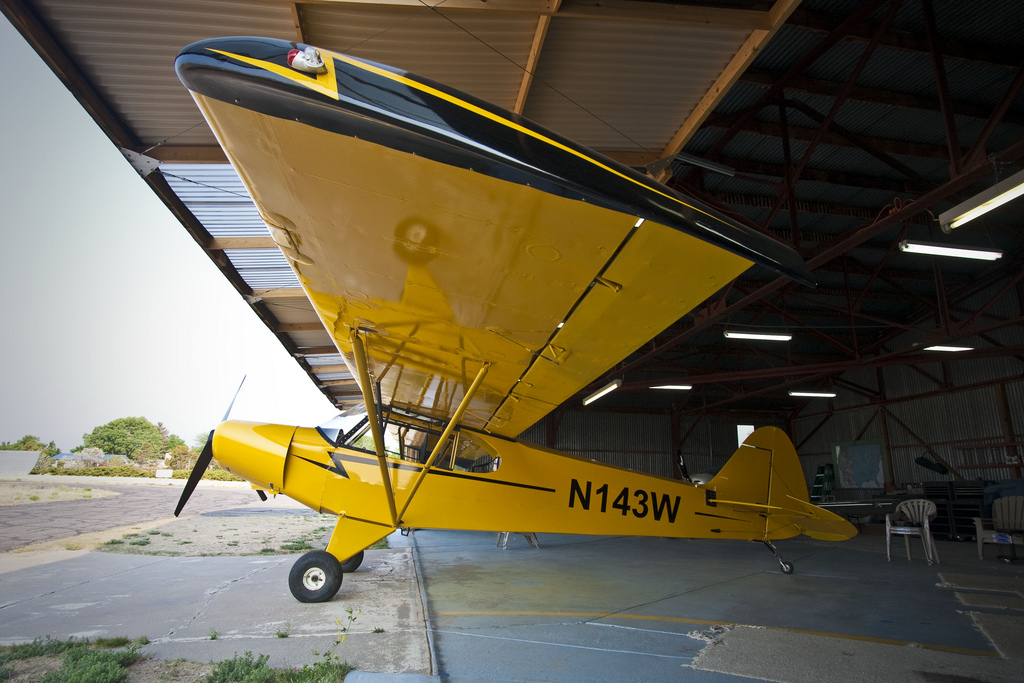
Shiny!
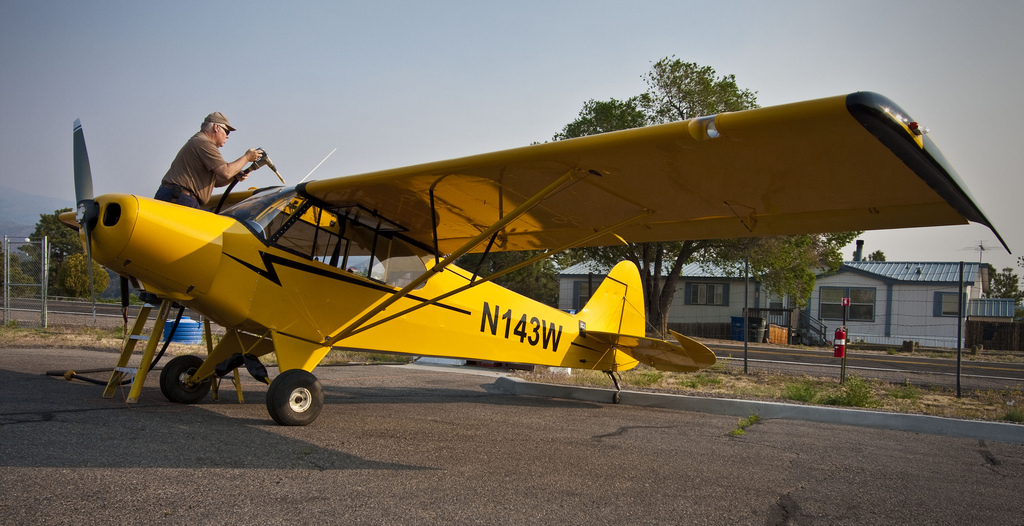
A little go juice for the flight.
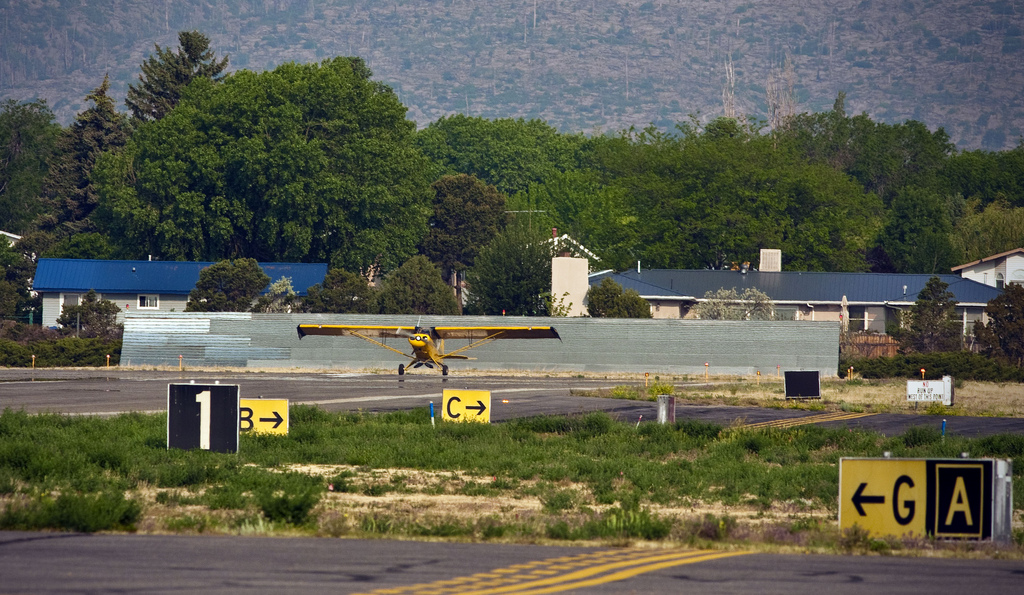
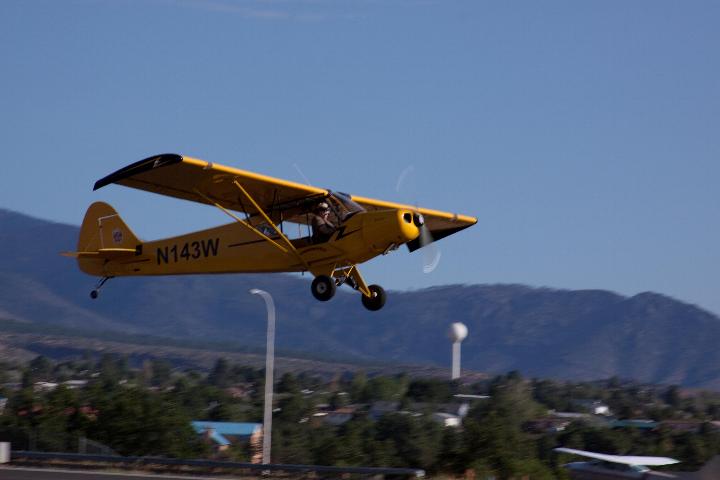
Ready for departure on Runway 9 at Los Alamos.
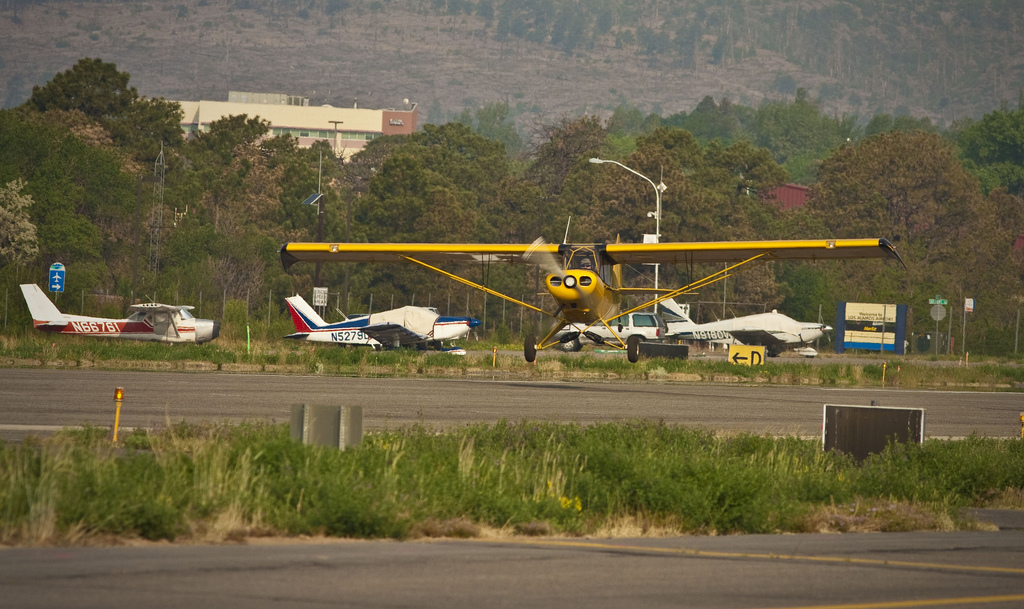
There's Air under those tires!
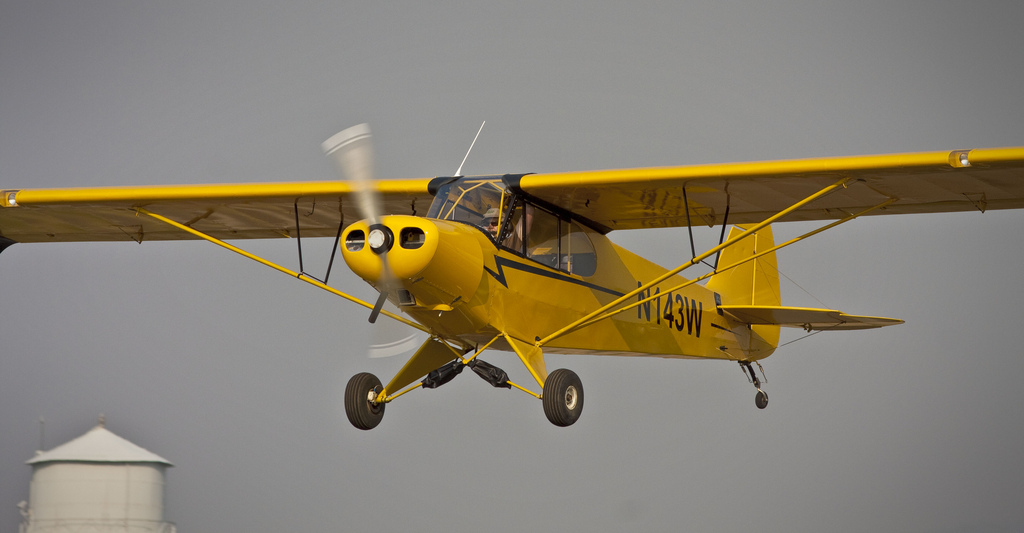
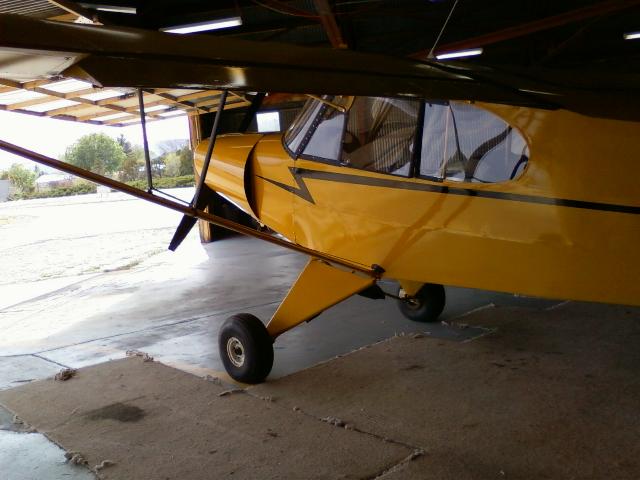
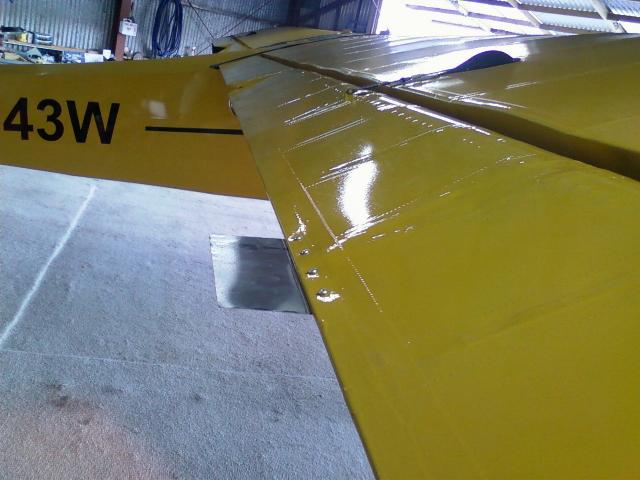
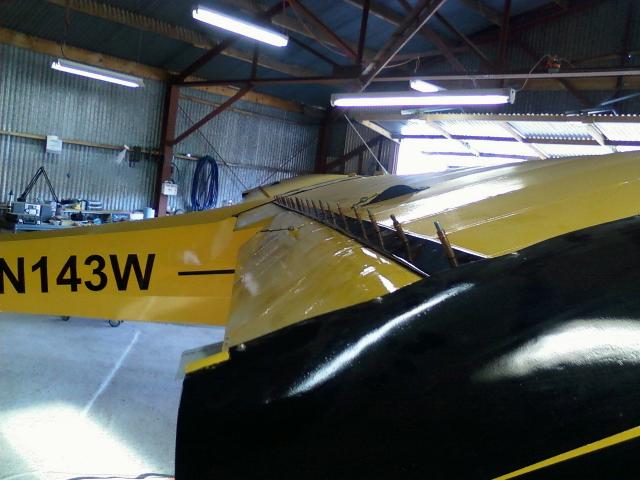
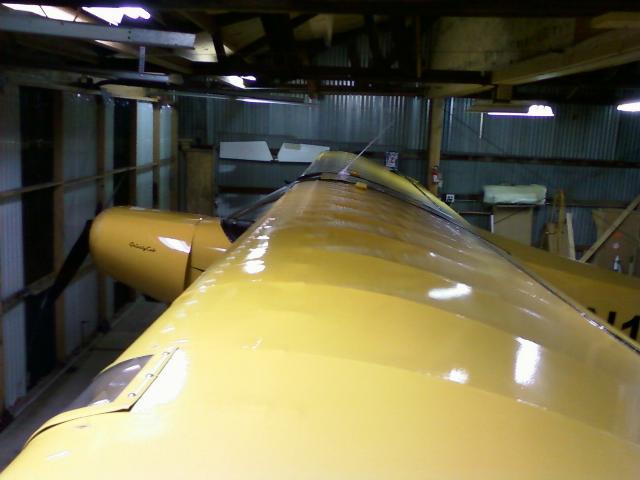
I was horrified when I first saw this photo as I thought the side of
the boot cowl had caved in and all the structure was showing through
the fabric. That's not the case. What looks so odd, is
actually
all reflections off the shiny paint on the sides of the fuselage.
As you can see in the picture below, all is well with the
boot
cowl and fabric.

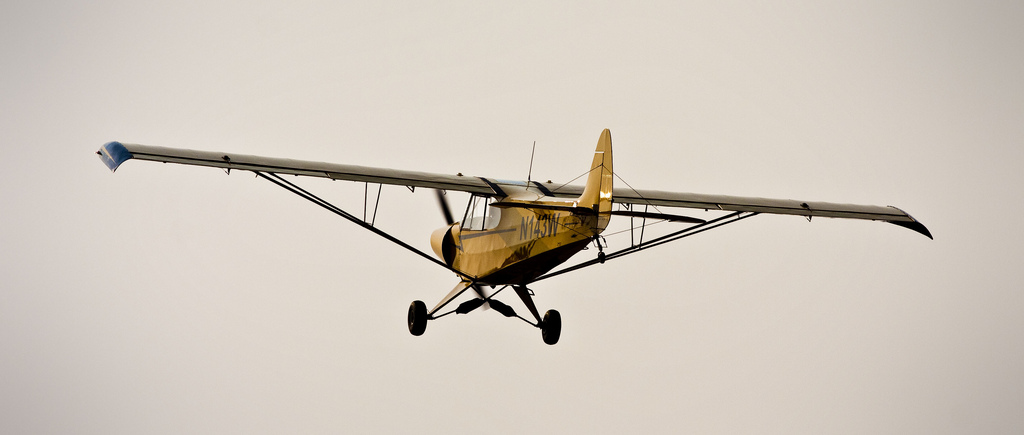
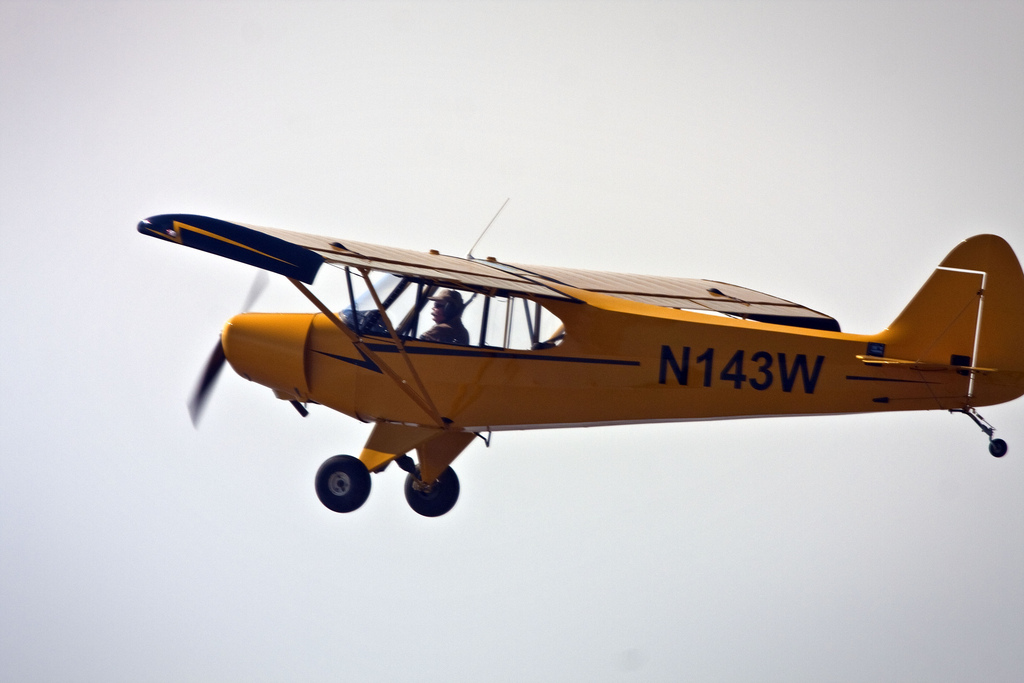
Air-to-Air from Will's Pegazair.
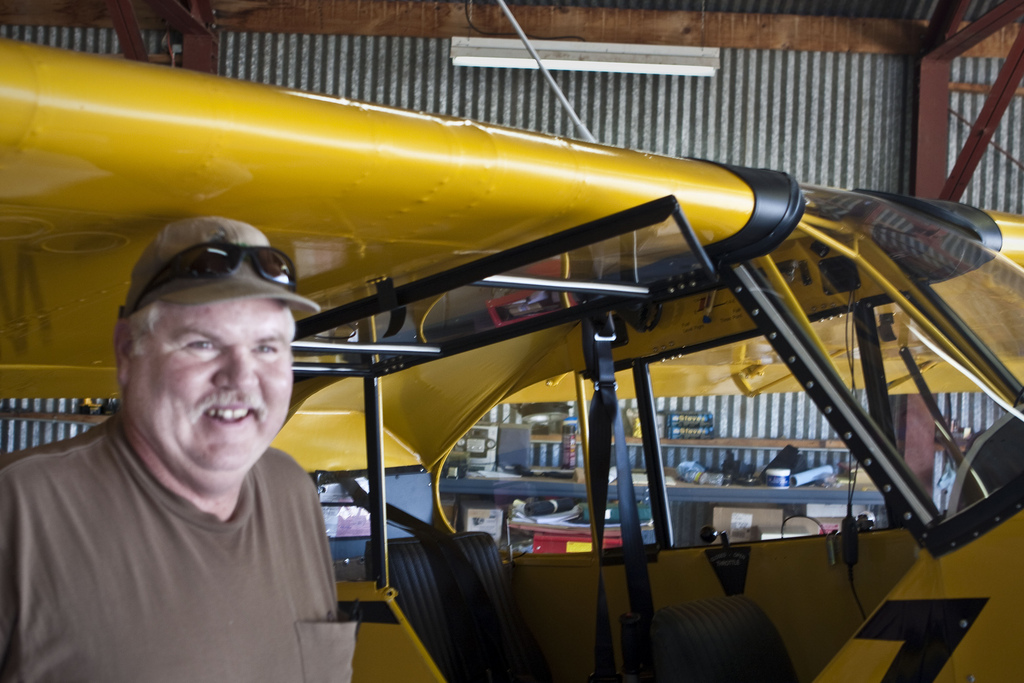
Here's a happy camper. I'm so glad to have this flight behind
me.
My analysis and results
from the first
flight.
June 4, 2011 - First Flight 1.0 hr. - 1 hr Total Time
This was probably the best of the first flights that I have done in
that there was only one issue with the plane flying a bit heavy on the
right wing. Measurements taken during assembly indicated that it would
fly a bit wing heavy so I was expecting it. I began the take
off
roll very gently on the throttle, lifting the tail at ~25 mph
indicated. At 35 mph I rocked the ailerons back and forth to
confirm positive aileron control, then accellerated to 50 IAS before
rotating and was off. Not knowing the actual stall speed of the
aircraft, I accelerated to 60 mph before climbing and allowed the
plane to climb at 70 - 80 mph. With a fresh overhaul on the
engine, I wanted to run it full throttle and get lots of cooling air
through the engine. I maintained a steady climb to 9500' and
flew
a continuous orbit near the Los Alamos Airport. I maintained full power
on the engine for the first 30 minutes. The CHT ran at 350F
for
the first 30 minutes, then slowly worked it's way down to 320F. The oil
temp made it's way up to 188F for the first 30 minutes, then drifted
down to 180F as the engine started to break in.
The Aeronca style trim was very effective. Full throttle cruise was 95
mph IAS at 9500' and 2500 rpm. After I throttled back to 2400, cruise
was 86 mph IAS. I was a bit surpised at the slow flight
characteristics, mostly in that it can fly slower than I expected. The
book on the SuperCub says stall should occur at 45 mph IAS with
flaps. I didn't touch the flaps during this first flight, nor
did
I stall the aircraft. However, the plane was quite content to
fly
at 1500 rpm and 35 mph IAS. I felt some slight buffeting at 33 mph, so
chose not to explore slow flight any farther on this flight.
For the latter half of the flight I had Will Fox in formation with me
in his Pegazair, which is a superb STOL aircraft. While I was
in
slow flight with the Cub clean, I looked over at the Pegazar and noted
that the aerodynamic slats had deployed and he was flying with the
flaps extended. I can see that we'll have to have a slow
flight
show
down some day soon. :o)
I terminated the flight after 1 hr flight time with a real greaser of a
landing. Will asked me later if I wheeled it on or three
pointed
it. Heck, I don't know. I just held it off in slow flight
until it landed itself.
Mouser and Will, Thanks for helping make a good day into a great day!
June 5, 2011 - Second
flight series, 1.1 hr 2.1 Total Time
OK, I just had to play with the plane a bit. I flew it over
to
Santa Fe for breakfast as there were some people that had to see it.
George in the tower knows my voice and expects me to come
screaming into the pattern in the KR at 160kts or faster.
Instead, I came cruising in with the Cub at about 80.
In
all fairness, I did call in as Experimental SuperCub 143W.
Totally jammed up the pattern as he cleared me to land miles out, so
had planes turning 360s for spacing while I flew a painfully slow
approach.
After breakfast, I went back out to confirm the data taken on the first
flight. The plane jumps off the ground quite crisply at 45
mph
IAS with no flaps and climbs out at about 700 fpm at 60 mph.
Ok,
700 fpm isn't so hot until you realize this is at a density altitude of
about 8500'. The flaps haven't been tested in the air yet, so
they are still off limits. I flew back to my prefered test
area
over the valley northeast of Los Alamos and went back to recording
data. Oil temp and CHT matched the last flight. Oil
pressure went up to 85 psi, then dropped back to 75 psi as the temps
came up. I worked on slow flight a bit. At 9500'
MSL and
1500 RPM, the plane would hold altitude at 28 mph IAS. The
plane
was wallowing at that speed and the controls were very sloppy, but
there's just not much air moving over the controls at that speed.
Now it was time to test the flaps. At 60 mph IAS, I pulled in
the
first notch of flaps. The flaps hardly moved and there was no
noticeable effect. I attempted to pull in the second notch of
flaps. I found the flap handle to be very stiff. I
had
prepared for a worst case scenario where one flap cable fails leaving
me flying with assymetrical flap deployment, so that was in the back of
my mind. As I pulled the flap handle down to the second
notch, I
heard a loud bang, the flap handle popped loose, and the engine dropped
to idle. Fly the plane first! The plane is flying
straight
and level. I turned my head and checked each flap.
Both
were in the fully retracted position. I noted that the
throttle
had closed as when the flap control broke, I hit the rear seat
thrrottle with my elbow. I throttled back up. All
was
normal with the plane other than the flap handle hanging down, so I
continued the flight. I tested the nose up trim on the plane.
Hands off nose up trim would only trim up to 60 mph.
I also
reconfirmed that the plane flies quite heavy on the right wing.
Once back on the ground I started looking for the cause of the failure.
I found that the builder that started the project had fabricated
a clevis
fork to
attach the flap cable to the flap handle. It looked good, but
I
hadn't noticed that it was made from aluminum. The ears had
torn
out of it. I ordered a clevis fork from Aircraft Spruce that
is
rated at 2400#. That weak link will be fixed. I'll
have to
test the flaps again once the flap handle is re-attached to
the
flap cable.

The red arrow points at the clevis fork in the flap mechanism.
This was taken before it failed. I should have
seen that it was the wrong material.
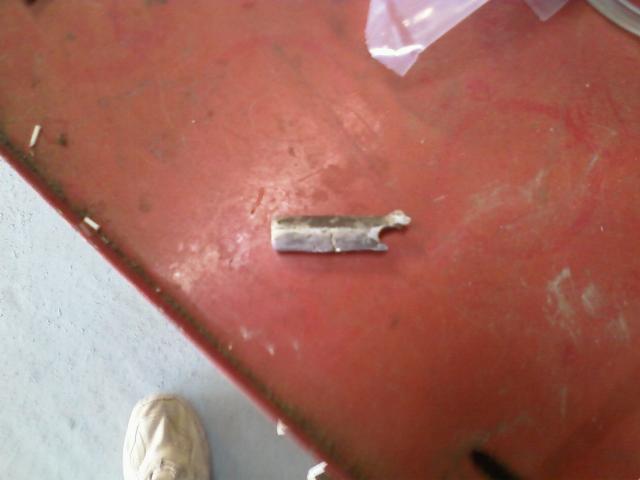
Failed home made clevis fork.
I added a 3 x 6 trim tab to the right aileron to correct the wing heavy
condition. I adjusted the elevator trim cable to provide more
nose up trim. I discovered that the engine is drooling oil
somewhere at the front of the engine. Although the source
hasn't
been confirmed, it appears to be either the front main seal or the plug
that goes in the front of the crankshaft. Either should be an
easy fix as I have the parts on hand. I had also noted a
standing
wave at certain speeds in the right aileron cable that runs up the back
of the lift strut. I adjusted the tension on the aileron
cables.
I also filed the flap stops to align the flaps properly.
Aileron Trim
June 8, 2011 - Third
flight series, .4 hr, 2.5 Total Time.
Today was about testing the modifications I had made. Note
#1.
I still haven't done anything about the heater valve leaking
hot
air into the cockpit. It's danged hot on a summer day even
though
I can clearly see that the heat valve is closed.
Elevator trim test. Full nose up trim now trims to 40 mph IAS
hands off. That is probably sufficient.
Aileron trim. The success of the trim tab on the right
aileron is
hard to determine. The slower one goes, the more the air flow
seperates at the back of the air foil, so the less effective the
ailerons are, and even less effective is the trim tab. So,
now
the plane flies straight and level at cruise. A little faster
and
it wants to add a slight roll to the left. As I slow down, it
adds a slight roll to the right. Additionally, now the stick
is
offset to the left. I'll have to adjust the aileron cables to
pull the stick back to the center.
I only got in .4 hr as a wall of heavy smoke from the forest fires in
AZ was moving in. I saw the wall moving in from the south, so
landed just ahead of it settling across the airport. Touch
down
speed on this landing was 30 mph IAS.
June 9, 2011 - Fourth
Flight series, .5 hr, 3.0 Total Time
No smoke tonight and the airport is closing tomorrow for repaving.
I went out just to enjoy the plane a bit and test the data
taken
during the short flight yesterday. I'm happy with the trim
tab on
the right aileron. The plane seems to fly straight and level.
I flew over to the Santa Fe area and did a couple of turns.
As I turned back towards the sun, I noticed a fine mist of
oil on
the windscreen. While it was far from an emergency, I decided
it
was time to head back for home to see if the oil leak was sufficient
enough to show itself. I have been chasing an oil leak since
the
first flight and had it narrowed down the either the front main seal or
the plug in the front of the crankshaft. Now I know for sure
that
it is definately the plug in the front of the crankshaft.
There
was oil coming out between the prop and the ring gear as well as
between the prop and the prop cover plate, so there was an oil track
the length of the front and back of both prop blades. This is
an
easy fix and I have an extra plug in the hangar. But I do
have a
fine mist of oil covering much of the front of the plane, so I have a
bit of a clean up job to do.
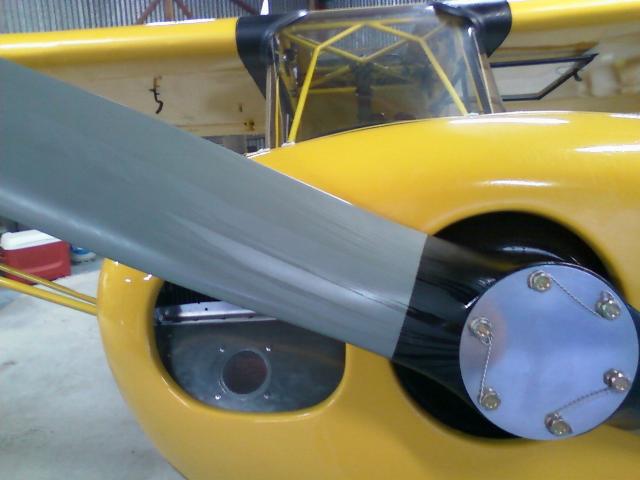
Leaking just a bit of oil through the plug in the front of the
crankshaft. I lost maybe a cup of oil, but it was
everywhere on the plane. It's a good day for a wash job.
June 11, 2011 - Airport is closed for repaving, so it's time for
maintenance. I pulled the prop and removed
the plug in the front of the crankshaft. Cleaned and
installed a new plug. I dimpled this plug in much better.
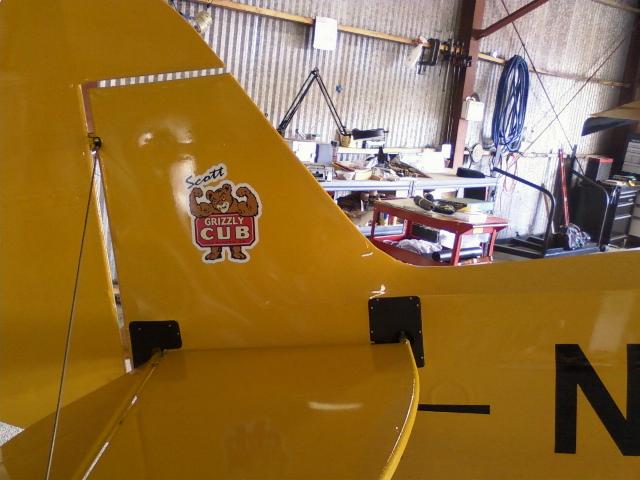
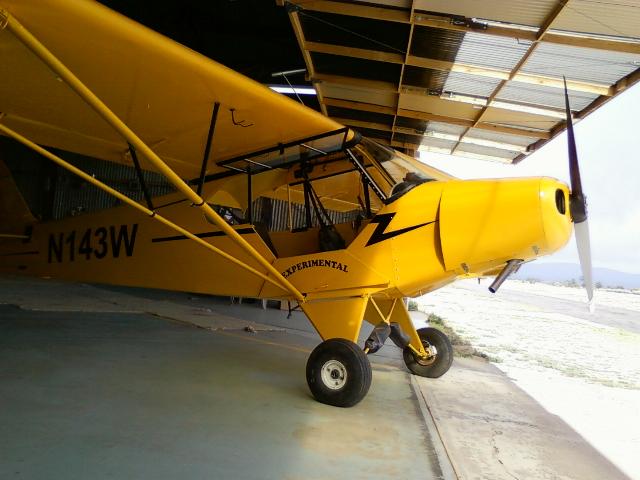
June 11, 2011 - I added the Grizzly Cub logos to the tail and the cowl.
Thank you Steve for the name and
David for morphing the Cub logo into the Griz. The printed
vinyl logo and vinyl graphics are curtesy Cameron
at Ultra
Industry.


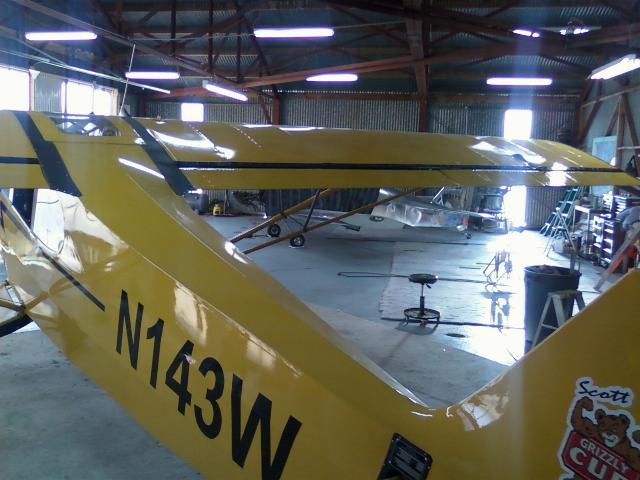
June 23, 2011 - The airport is closed for repaving, so I decided this
was a good time to add gap seals to the
Ailerons and Flaps on the Cub. I bought several sheets of
.020 2024-T3, then drove to Moriarty to visit a friend
that has a 4 foot shear and brake. Here I'm fitting the top
seals to the wings.
June 25, 2011 - Gap seals are painted and going back on for a final
fit. Why did I paint them black? Well,
The plane already has black trim, so I think the black gap seals look
nice. Additionally, the black paint that
I have is much easier to shoot than the yellow and it covers much
better than the yellow. I decided to make
it easy on myself when it came to shooting the paint. :o)
June 26, 2011 - Lower half of the gap seals installed on the right wing.
View of the upper half of the gap seals. Now the Cub
doesn't really need gap seals, but the aluminum on the
trailing edge wasn't quite up to snuff which caused scalloping of the
trailing edge when I shrank the fabric. While
the gap seals should improve the effectiveness of the ailerons and
flaps and should reduce drag which should
increase the climb performance. The real reason for
installing them was to hide the uneven scalloping of the trailing
edge. It's a great way to hide the sins of the builder.
;o)
The airport is due to re-open this Friday, so hopefully
I
can get started flight testing again. Unfortunately, with
only 3 hours time on the plane, I may not know it well
enough to recognize whether the gap seals make a significant
improvement or not.
July 25, 2011 - 7 hours of testing on the tach now. It seems
like
it has taken forever, but the reality is that the airport
was closed for 3 weeks for repaving. In the middle of that,
we had a jim-dandy forest fire that tried to take out the town
causing another couple of weeks of closure. After 5 weeks, I
finally got the Cub out, taxied to the run up pad, clamped
down on the brakes and felt the seat break. Rats.
No flying
that weekend either. I taxied back to the hangar and
removed the front seat. I found 3 broken welds and three
cracked welds. I have no idea what was used to weld this
seat, but when I heated the first weld, the whole weld slumped into a
pool of molten metal without melting the steel. It's
like it was brazed, but I don't see any brass in the joint.
Anyway, I wasn't happy with this seat in the first place, so
wasn't
really unhappy about needing to rebuild it. I raised the back
up
1 1/2" to make the seat sit up in the plane a bit better, then
replaced all except for the frame of the seat back. The
everything got either doublers or bracing added to it. It is
much
stronger and much more comfortable to sit in.
This weekend I finally got to get serious about flying some time in the
plane. It was a blast to fly. I had it at 14, 500' over
top of
the TFR that covers much of the Los Alamos area and got a good look at
the
fire damage in the mountains. Many
places are still smoldering.
I do have a small squawk list to work on. I had one piece of
window trim behind the right window come loose. It needed
a couple more rivets to be properly fastened. I found that I
had
failed to put all the screws in the left upper wing root fairing,
so will add them sometime this week. Then I need to remove
the
front seat again. This time I need to gain access to the
master cylinders that are mounted under the front seat. The
left
master cylinder keeps trapping air, so makes for a spongy
brake pedal. The right master cylinder is failing to return
all
the way to the stop causing the right brake to drag a bit.
I'll
add
external springs to the master cylinders to correct the dragging
problem. I'll also service both master cylinders and try to
get all the air bled out of them.
Morning departure from Los Alamos on July 24, 2011. Now this
is Cub flying with the windows and doors open!
Aug 8, 2011 - I'm half way through my test time now with 12.5 hours on
on the tach. Only a few squawks to work on:
I have a pesky oil seep somewhere near the front of the engine.
It doesn't leak a lot; just enough to make the bottom of
the cowl messy.
The cheap Chinese vertical card compass does a continuous spin any time
the engine is running. The compass correction
card is easy to fill out. All is need is stear + or - 180
degrees
for every direction. :o) I don't think it's electro/magnetic
interference as I can shut down all the electrical loads and
alternator and it continues to spin. I think magnetism must
work
a little differently in China. ;o) That's what I get for
buying cheap.
The GPS power connector is being very finicky. Every time I
touch the GPS it loses power. I eliminated an unreliable
connector.
Problem fixed.
I need to put new markings on the Air Speed indicator. Due to
the
longer wings, this plane flies very different numbers from
a stock SuperCub. I initially marked the A/S indicator with
the numbers out of the SuperCub book.
The last problem is that some of the pulled rivets used to hold the
plexi into the frames have popped the heads and had to be
replaced. I may need to use a couple more rivets to hold them
properly.
Testing Notes after completing the test flying.:
The oil pressure runs at 85 psi while the vernatherm is bypassing
the oil cooler. When the oil reaches temperature, the vernatherm
directs the oil through the oil cooler. The resistance created by
forcing the oil through the cooler before it gets to the engine is why
it drops to 75 psi once the engine is warm.
The oil leak turned out to be the front main seal. I removed the
split seal, worked over the sealing surface on the crank with crocus
cloth as recommended in a Continental service bulletin, then installed
a one piece seal. End of problem.
The vertical card compass was replaced with a SIRS compass. End
of problem.
The power off stall speed was determined to be 30 mph IAS clean and 27
mph IAS with flaps. Is the air speed accurate? Probably not.
But that's what I'm reading when I fly the plane, which is what is
important. I can truthfully say that the stall on this plane is
darned slow.
I've had a cronic problem with popping rivets out of the plexi on the
side windows. I added several more rivets, which fixed most of
the issues, but still find them missing out of the right side window on
occasion.
July, 2011 - At 14,500' over the Valles Caldera checking out the burn
area before
the TFRs were lifted.
Oct 15, 2011 - I used the Cub for Young Eagles rides in Taos, NM.
For one ride we attached a Contour
Camera to the tail spring.
It's a
nice flight out over the Rio Grande Gorge near Taos. Come
along for the ride
by clicking on the movie links below.
 Take off from Taos
Flying South down the Rio Grande Gorge
Flying North along the Gorge to the infamous Taos
Gorge Bridge
Landing back at Taos
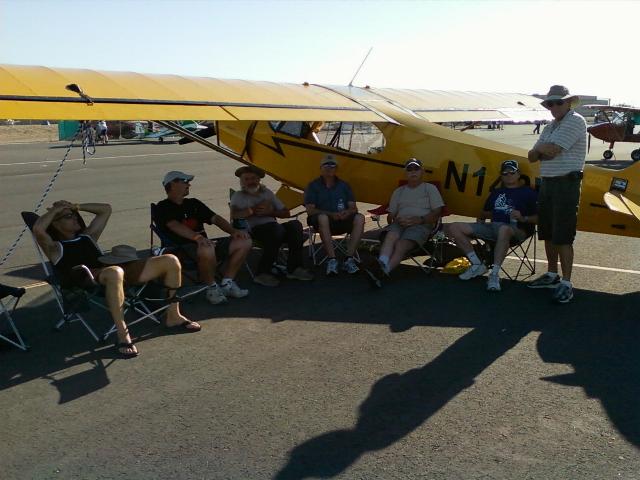
Oct 22, 2011 - Copperstate Fly In. That long wing makes great
shade out in the Arizona sun.
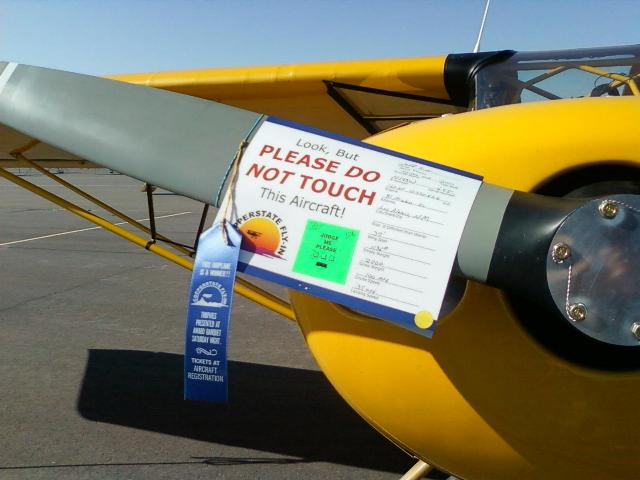
The Judges apparently also liked the Cub.
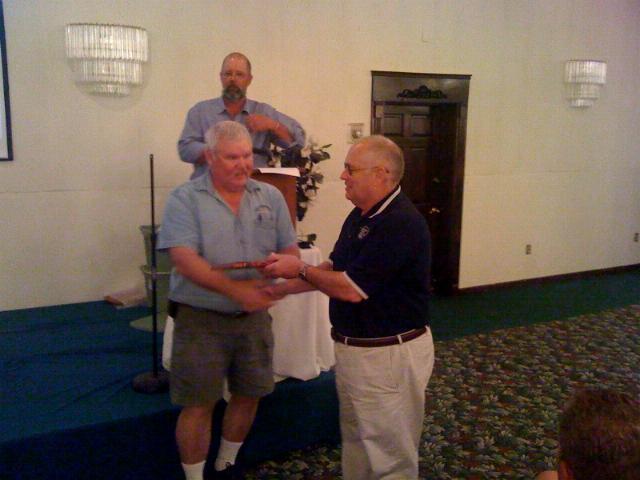
I was presented a plaque for "Best Custom Built Replica". Ron
Wagner from the National EAA handed out
the plaques and congratulations.
Since I didn't get a good photo of the Cub at Copperstate, I took this
one at St Johns, AZ on the way home.
I was plesantly surprised at the average speed of 95 mph for the trip.
I also found a real need to repack the
front seat with Tempur Foam. After about an hour in the front
seat, it gets pretty uncomfortable. The most
impressive thing was the climb on departure from Casa Grande.
With Casa Grande at only 1500' MSL, even
with two people, baggage, and full fuel, the initial climb out just
blew my socks off. Wow!!!
Oh yes. At this point in time, the plane now has 58 hours of
flight time, with 55 hours in the last 3 months. I'm
getting to be pretty good friends with this plane now. :o)
Dec 14, 2011 - The Cub is up to 68 hours now. I've slowed down
the flying to conserve some funding. I have
put the plane on 8:50x6 tires now, have a rebuilt Scott 3200 Tailwheel
ready to install this weekend, and have a
Firmin cargo pod on it's way for installation. The front seat has
now been repacked with Comfour Foam, which
makes it much more comfortable to fly.

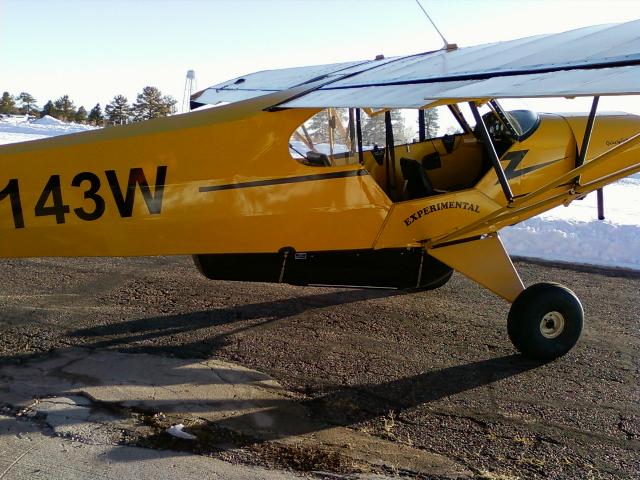
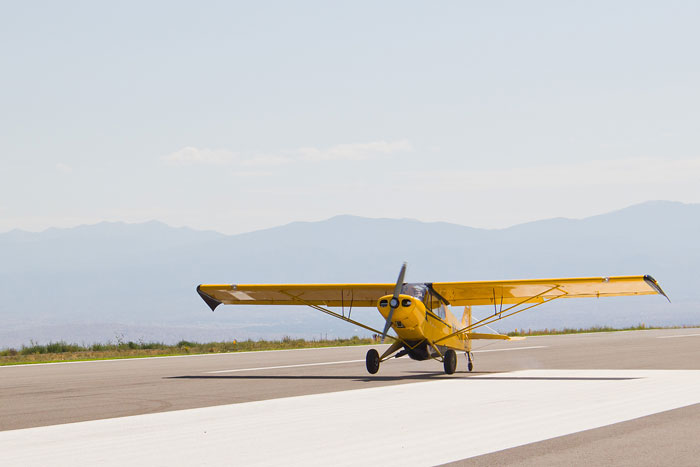
Dec 10, 2011 - Cub on the larger tires parked at Jack Gallette's
Fly In Ranch just outside of Santa Fe. Jack's
place is a 1400' dirt strip at 6900' MSL. Note I got the
8:50 x 6 mains mounted in place of the 7:00 x 6 tires.
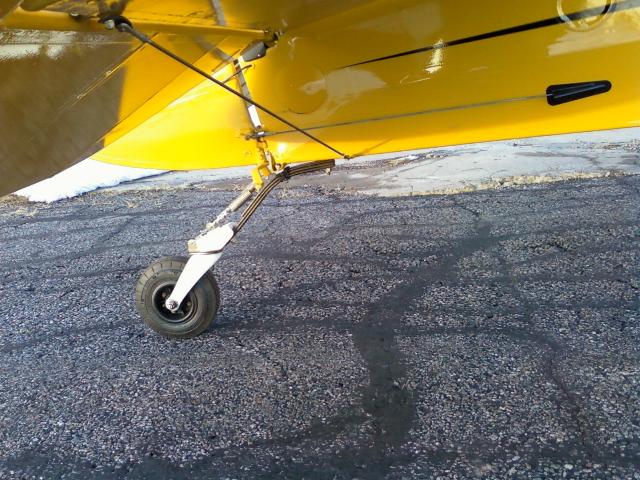
Dec 18, 2011 - Installed Scott 3200 Tailwheel rebuilt with Alaskan Bush
Wheel Parts.

Dec 24, 2011 - On the snowy ramp at Santa Fe for breakfast.
Notice the plane is now sitting on the 8:50x6
mains and the Scott 3200 tailwheel.

Dec 26, 2011 - Installed Firmin Cargo Pod ordered through CubCrafters.
Dec 30, 2011 -Installed Vortex Generators from StolSpeed on the wings
today. I got in a quick test flight after
sunset this evening. I didn't note any significant change in the
stall speed, but what I did notice was how solid the
plane feels climbing at 35 mph IAS.
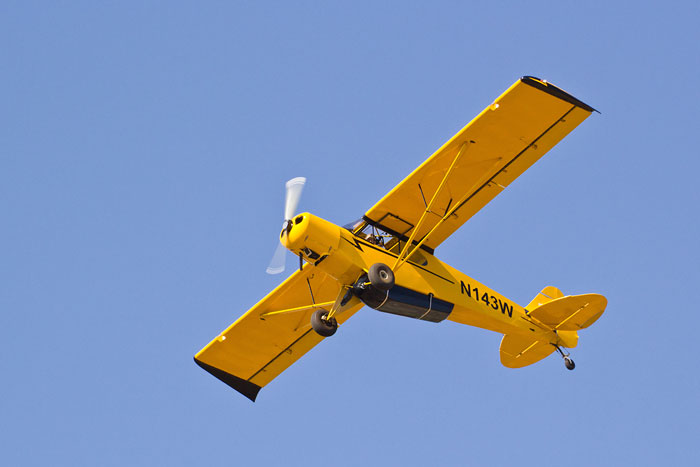
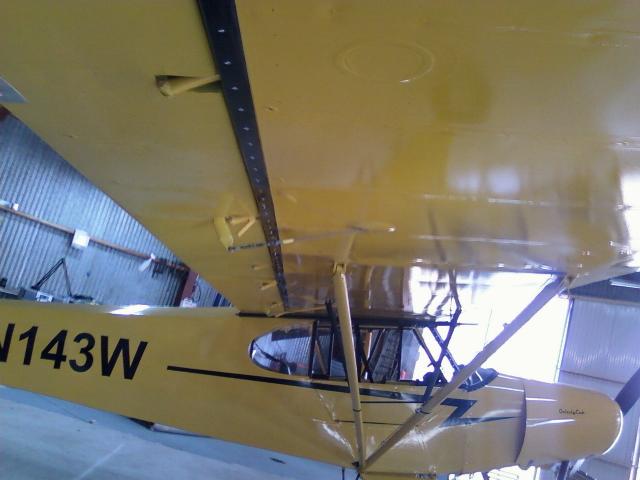
August 11, 2012 - EAA Chapter 691 Annual High Altitude Dead Stick Spot
Landing Contest. Good view of the
Cub from underneath. If one looks closely, you'll note a number
of oddities about this plane as compared to a genuine
SuperCub. Longer wings thanks to the squared off spars and droop
tips. Ailerons moved outboard 18". 18" wider
Flaps. Swing out left window. The closer you look, the
more oddities you'll find.
Yeah, I can hit the mark, but the 300 foot bounce kind of did me in on
the spot landing. OK, so my landings in the
Cub still stink.
Page 1 - The Cub
Project
Page 2 - Fabric
Page
3
- Firewall Forward
Page
4 - Firewall Forward (page 2)
Page
5 - O-320
Overhaul (for the Cub)
Page 6 -
Final Assembly (2010)
Page
7 - Final Assembly (2011 page 2)
Page
8 - Final Assembly (2011 page 3)
Page
9 - Completed
Aircraft
Page 10 - Later Updates and
Modifications
Page 11 - MOGAS vs
Composite Fuel Tanks
POH
for Scott Grizzly Cub N143W