MOGAS vs Composite Fuel Tanks
Page 1 - The Cub
Project
Page 2 - Fabric
Page
3
- Firewall Forward
Page
4 - Firewall Forward (page 2)
Page
5 - O-320
Overhaul (for the Cub)
Page 6 -
Final Assembly (2010)
Page
7 - Final Assembly (2011 page 2)
Page
8 - Final Assembly (2011 page 3)
Page 9 - Completed
Aircraft
Page 10 - Later Updates and
Modifications
Page 11 - MOGAS vs
Composite Fuel Tanks
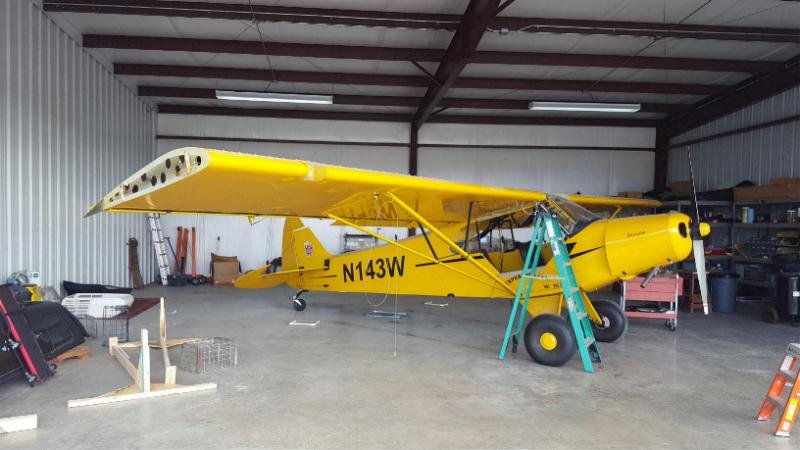
POH
for Scott Grizzly Cub N143W
Ever since this plane was new, I have typically run it on a mixture of
80% Alcohol Free MOGAS and 20% 100LL Avgas. But in December of
2017, I retired and moved from Los Alamos, NM to Cherokee Village, AR.
In New Mexico, I always bought my MOGAS from Honstein Oil as they
were the only jobber that carried Alcohol Free MOGAS.
Fortunately, my new home is in an area with lots of lakes and
boats, so every gas station carries Alcohol Free Premium fuel. As
always, I tested and confirmed there was no alcohol present.
However, in June, I took a month away from the planes and the
hangar while I had a knee overhauled. When I returned to that
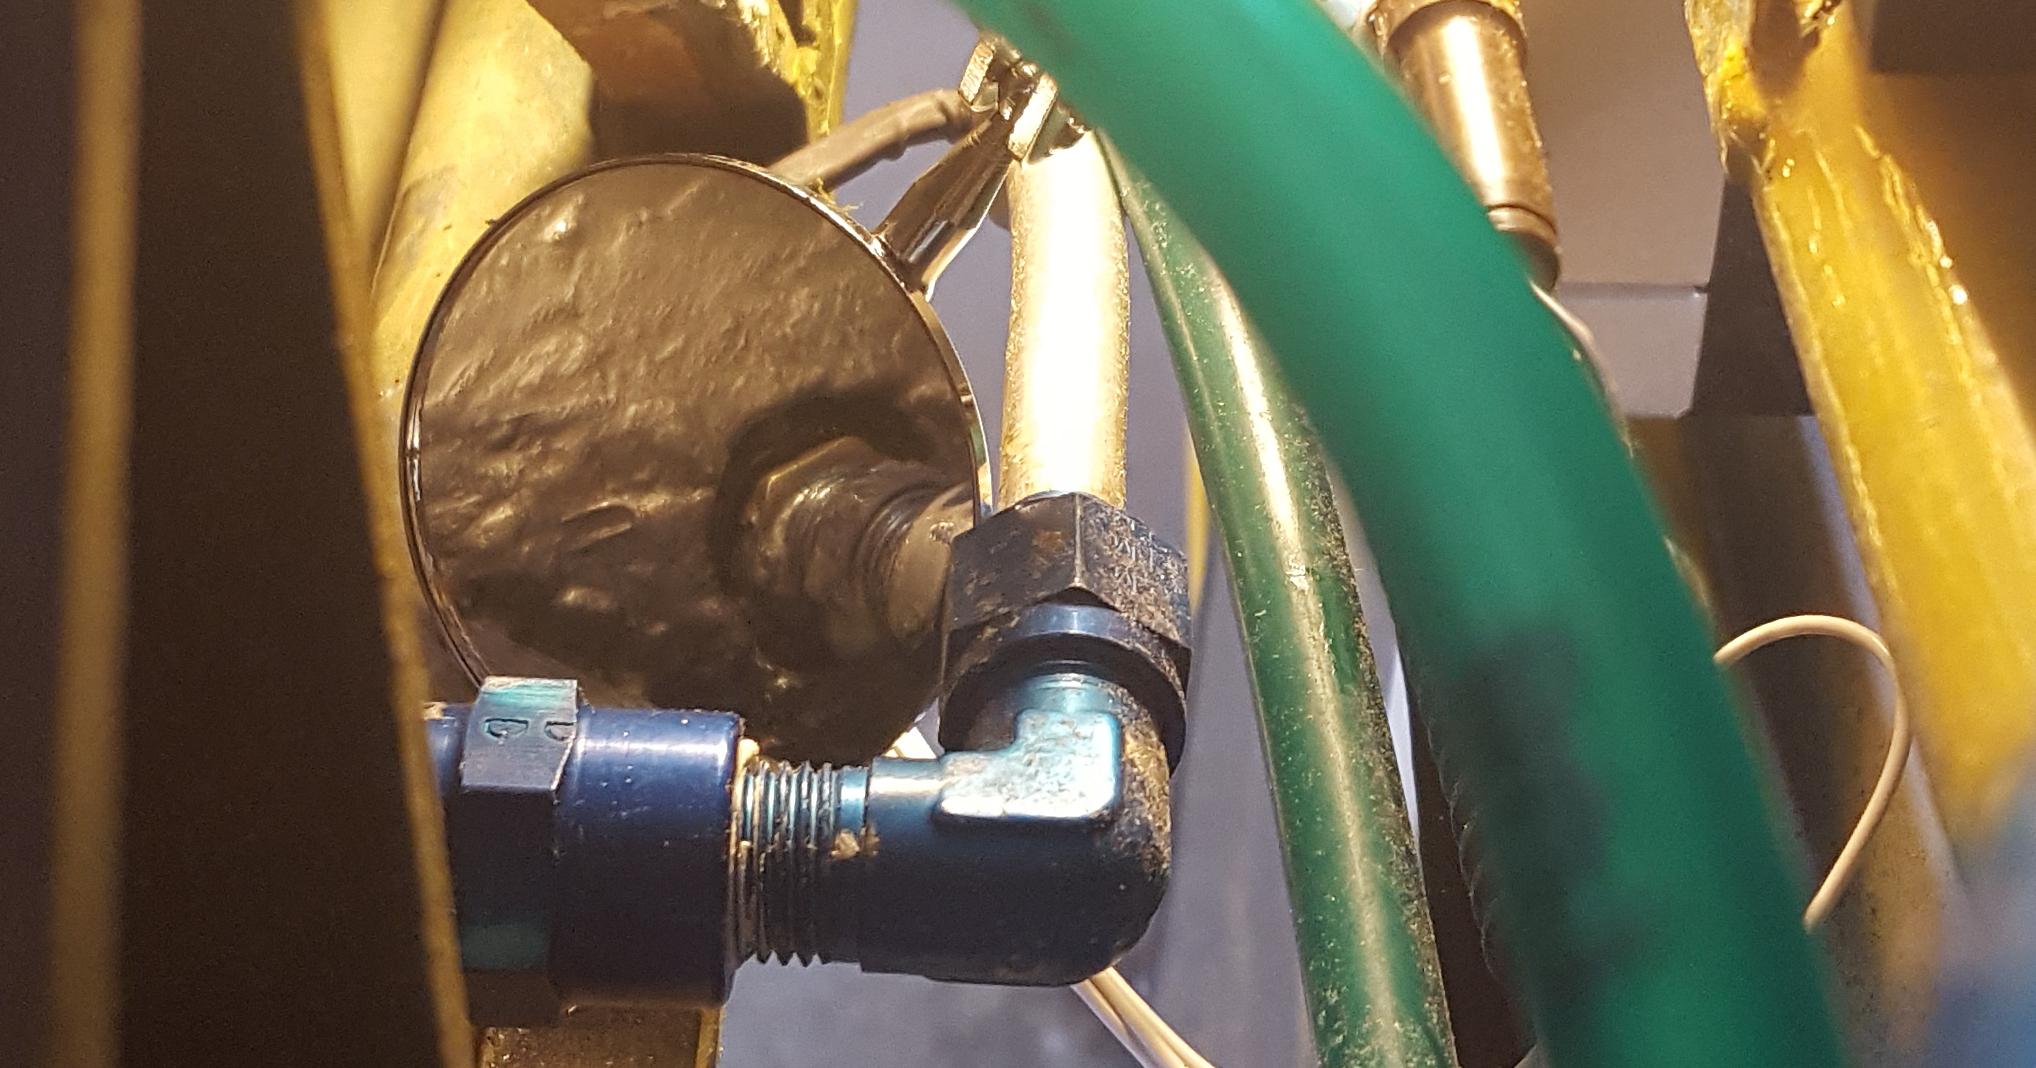
hangar in July, I found the Cub leaking fuel, the O-rings in the primer
had failed,
the hoses on the fueling rig had failed and were leaking, and the flow
meter on the fueling rig on the truck had also failed. Man, that
was a lot of failures at once, and the common thread was the fuel.
I worked on the Cub to seal some leaky threads, then topped it
off with 100LL only to come back and find it leaking from both tanks
enough that it was running down the sides of the plane and dripping off
the belly and tail. It was clear that the tanks in the Cub had
been breeched and would require rebuilding or replacement.
Additionally, while this damage was not from Alcohol contamination,
there was clearly something in the fuel that was causing damage.
While I may not know what to test for, I could devise a test to
see if the fuel would cause problems. One of the things I noted
was that the fuel appeared to attack the Rectorseal (TM) Pipe Dope I
used on all the pipe fittings. So, I made a stop at some of the
local gas stations and pumped 2 gallons of premium fuel into my old
truck to clear the hoses at the pump, then 1/2 gallon into a clean gas
can. Fuel samples were taken from the gas cans and placed into
baby food jars. Then I placed a new O-ring into the jars. I
laid up a single laminate of epoxy resin and 5.85oz glass and cut into
test strips to go into the jars. Then I took a 1/8" pipe fitting,
worked some pipe dope into the threads and allowed to cure overnight
before placing the fittings into the jars.

Fuel testing. I have two controls here. Jar #1 is 100LL,
and Jar #6 is the fuel that damaged the fueling rig and the composite
tanks in the Cub. The other jars are from local fuel stations.
The pipe dope test was a very quick test and apparently accurate.
The fittings with pipe dope on them had the dope dissolve on
contact in jars 3, 4, and 6. The dope did not dissolve in jars 1
& 2. After 2 months and repeated swirling of the jars, the
pipe dope has still not dissolved in either jar. After 2 months,
the fiberglass test strips in jars 3, 4, & 5 are showing
significant degradation, while the test strips in jars 1 & 2 are
not. It appears that the clear fuel in Jar #2 is just as safe
with composite tanks as the 100LL. Unfortunately, the fuel I had
been using in my planes was from Jar #6.
4 months later - The fiberglass parts in jars, 3, 4, & 6 appear to
be significantly degraded while the parts in jars 1 & 2 appear to
be unchanged.
Terminology for this blog:
Micro - microballoons,
microspheres, glass beads - microscopic hollow glass spheres,
mixed with resin to form a smooth, super light weight non-structural
filler.
Flox - Flocked cotton - finely
ground cotton mixed with resin to make a putty like structural filler.
Milled Fibers - Finely ground
glass fibers mixed with resin to make a stronger, but heavier, putty
like structural filler.
AeroPoxy - A brand name Epoxy
resin used with either fillers or to laminate glass cloth.
West Epoxy - A slightly faster
setting (24 hrs) brand name Epoxy resin used with either fillers or to
laminate glass cloth.
Vinylester Resin - A different
type of non-epoxy resin using MEKP as a catalyst with different finish
properties. In this case, the most important one is that it will
not break down when exposed to alcohol and other chemicals that may be
found in fuels.
Divinylcel - in this case, a
1/8" core material used with laminating resins.
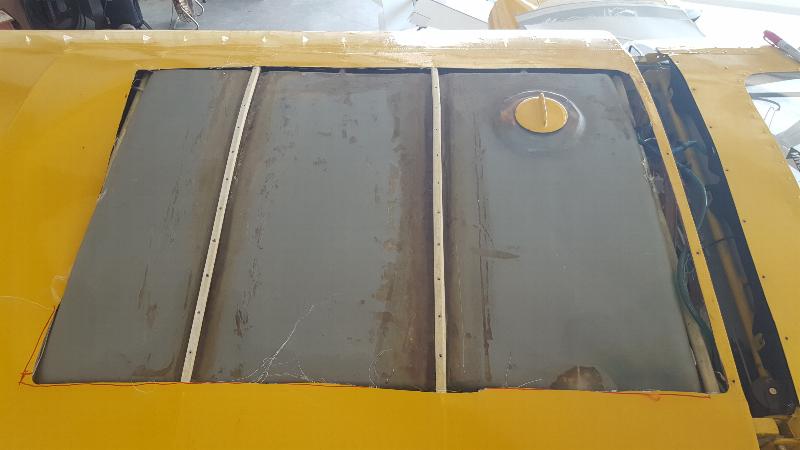
July 2018 - I've cut the fabric away from the top of the fuel tanks,
but I need to give my knee more time to heal (partial knee replacement
in June), and it's just too hot for
this kind of work in Arkansas in July.

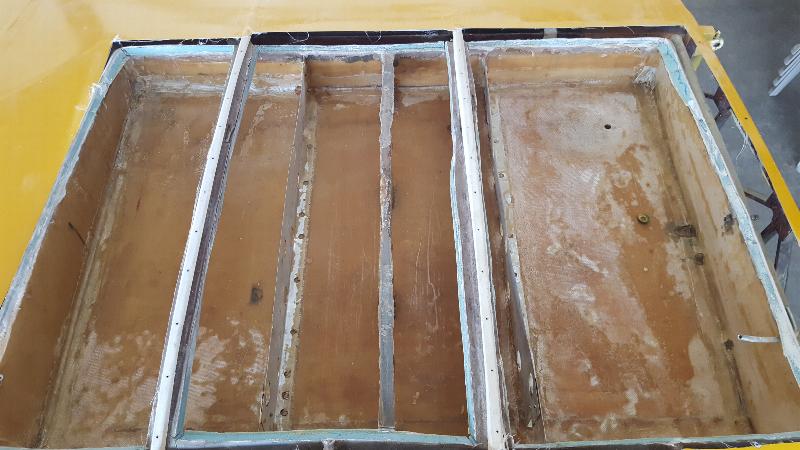
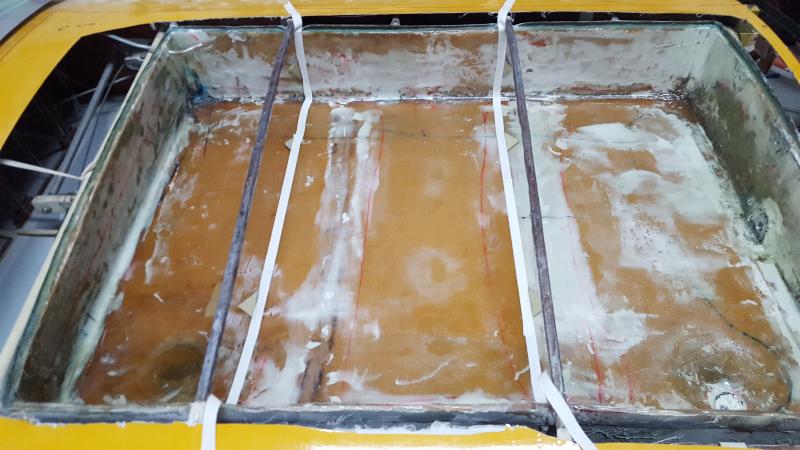
September 26, 2018 - It's fall weather and my knee is healed. So,
I cut the top from the fuel tanks. Wow! All this debris is
apparently a coating of epoxy resin painted onto the inside of the tank
to seal it. It simply broke down and peeled off inside the fuel
tank. It's somewhat horrifying to know this is what the insides
of my tanks looked like while I was flying!
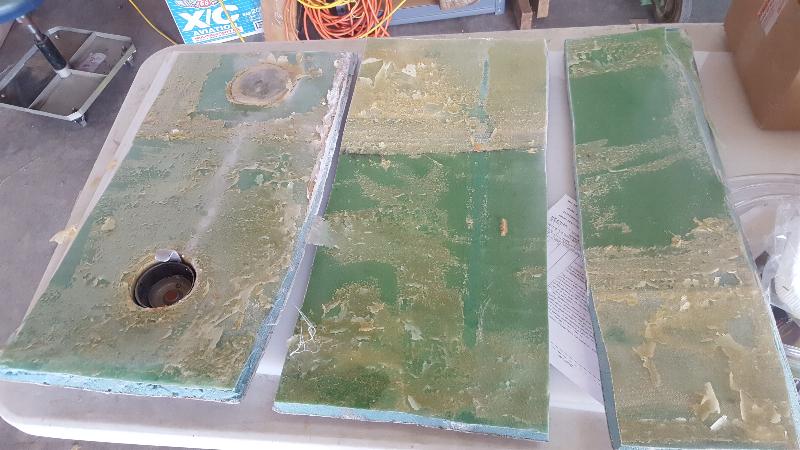
The inside was also peeling from the bottom of the top of the tank.
The tops fell apart when I cut them off, so will need to
fabricate new tops.

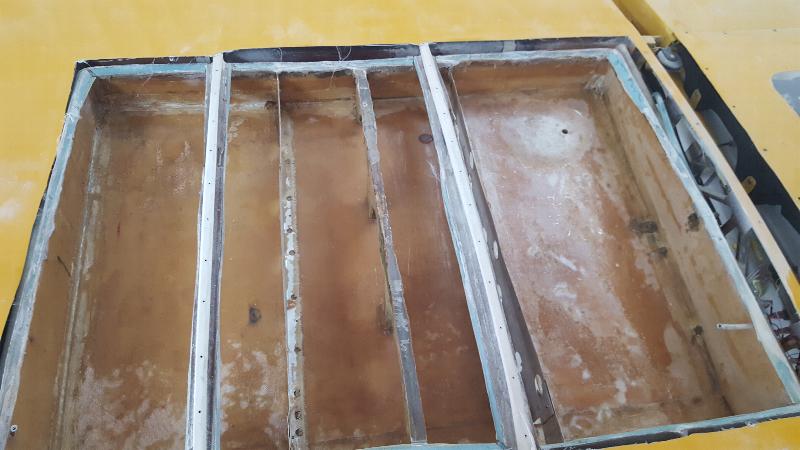
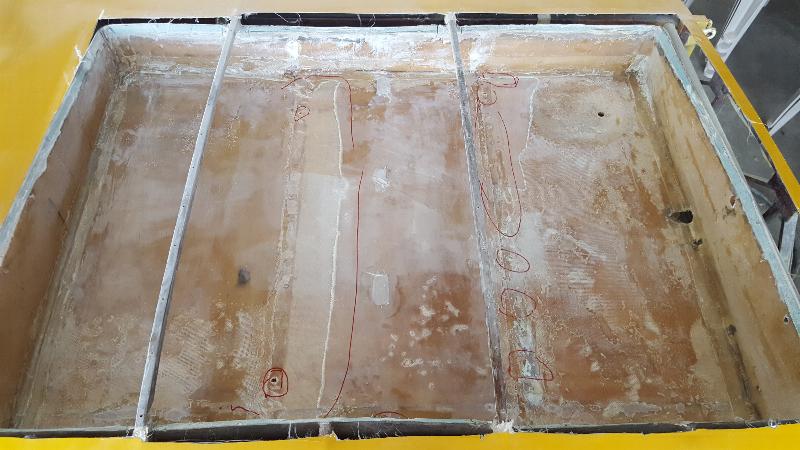
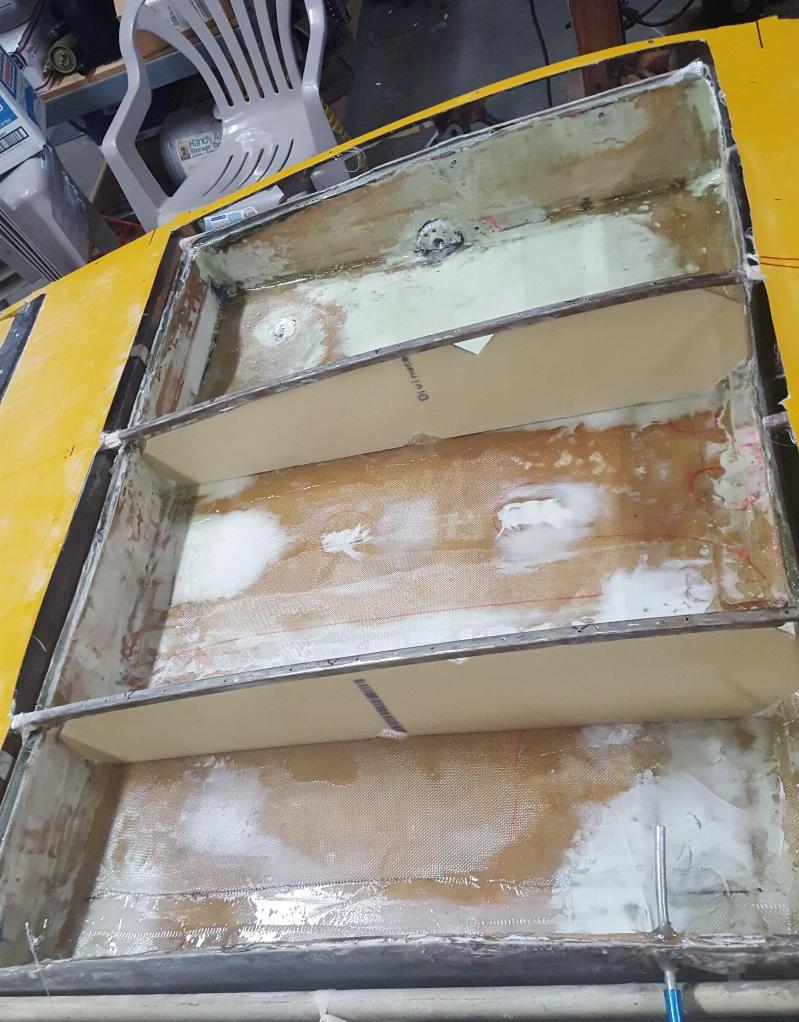
This is the left tank after cutting away the top in three sections
leaving the ribs in place.

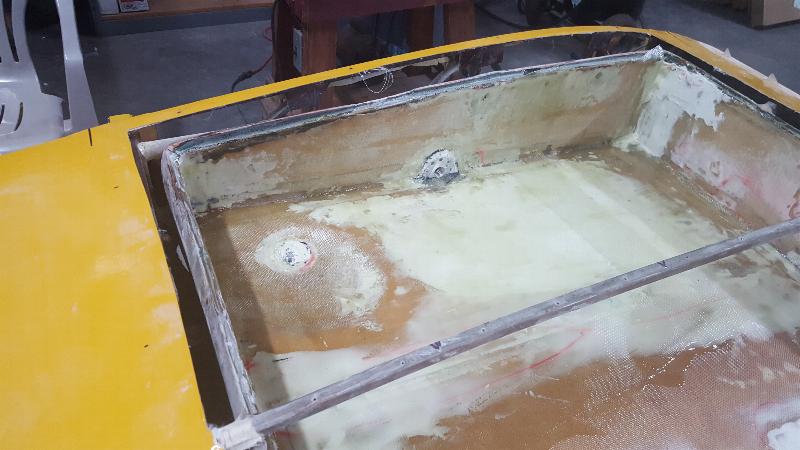
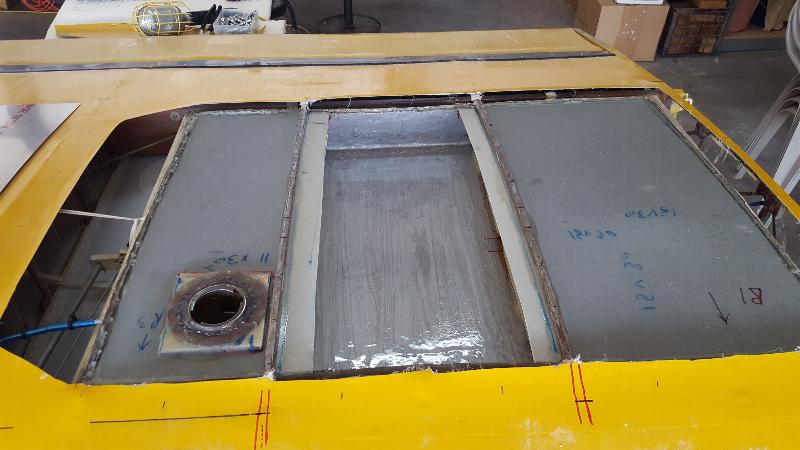
This is the right tank after cutting off the top. It's not
quite as bad, but it's still pretty ugly.
This is the right tank after cleaning it up. It still needs a bit
more clean up, and will require laminating some glass on the inside to
build it up some before sealing it with slosh compound, but it will be
repairable.
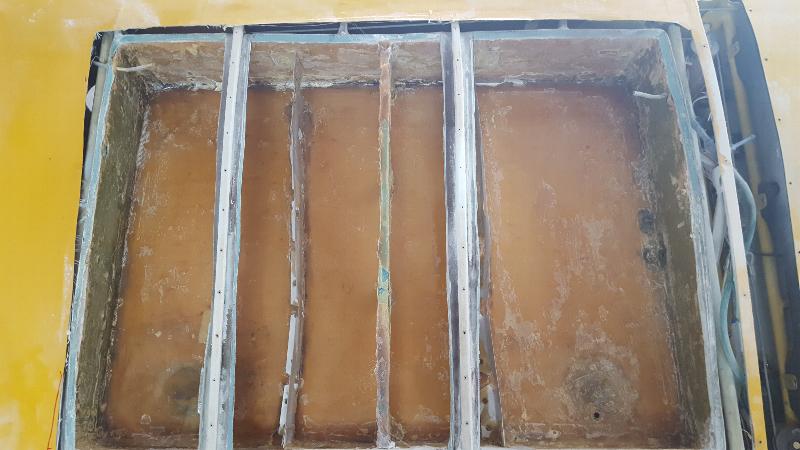
Here is the left tank after the initial clean up. These tanks
were built with 3/8" blue foam as a core material. It delaminated
while cutting it away, so I am likely going to need to fabricate new
tops for the tanks. I'm still mulling over how I plan to
accomplish that task.
Sept 28, 2018 - I've had a couple of days to consider the repairs on
these tanks. I really don't trust the various penetrations into
the tanks to be sound. As you can see in the photo above, most of
the penetrations are at the butt end of the tank for obvious reasons,
and I simply do not have access to them with the wings on the plane.
So, the wings are going to have to come off to gain access to the
butt end of the tanks, and to give me better overall access to build
these tanks new. At this point in time, I am still undecided
about whether to build with epoxy resin and slosh to seal, or build a
new tank within the existing tank using VinylEster resin.
Fact is, VinylEster is the only resin that will not deteriorate
due to fuel and fuel additives. On the other hand, I have epoxy
tanks in my KR with slosh compound that have served me well for 21
years now. Additionally, I have a lot of epoxy resin and the
slosh compound on hand, and would need to buy the VinylEster.
That's not a huge expense, but the final factor is that I really
don't like working with VinylEster, which is probably the biggest
factor. So, for now, it's undecided. First I need to get
these tanks off and do some more clean up before I make the call.
I also have to take a closer look at cutting out the ribs and
fitting a metal tank into this space. That may yet also be a
possibility. But the one conclusion I can make is that this plane
is not going to fly again in the near future. Glad I gave the
engine a full treatment of Cam Guard at the last oil change.
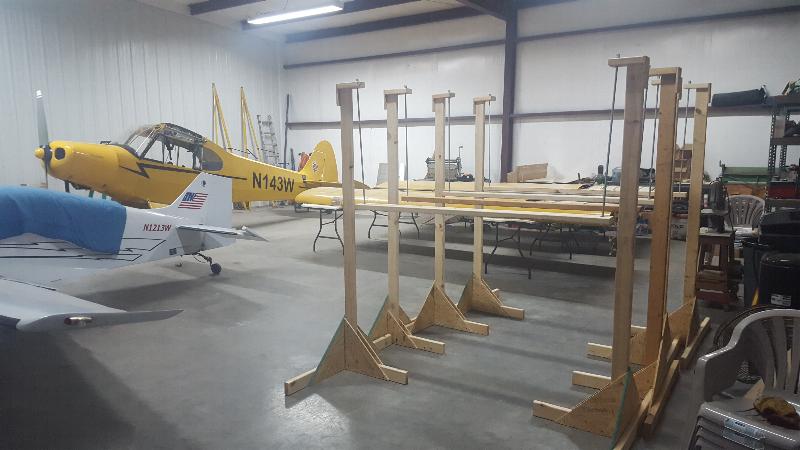
October 1, 2018 - Wing tips are off, control cables disconnected,
electrical disconnected, and fuel lines are removed. I've built a
set of wing jacks to hold up the wings while I remove them. Only
thing left to do is pull the bolts from the lift struts and wing attach
fittings, and the wings will be off. Then I can get serious about
rebuilding the fuel tanks. The decision on the resins is made.
I have to rebuild these with vinylester if I want to ensure that
this type of problem doesn't happen again.
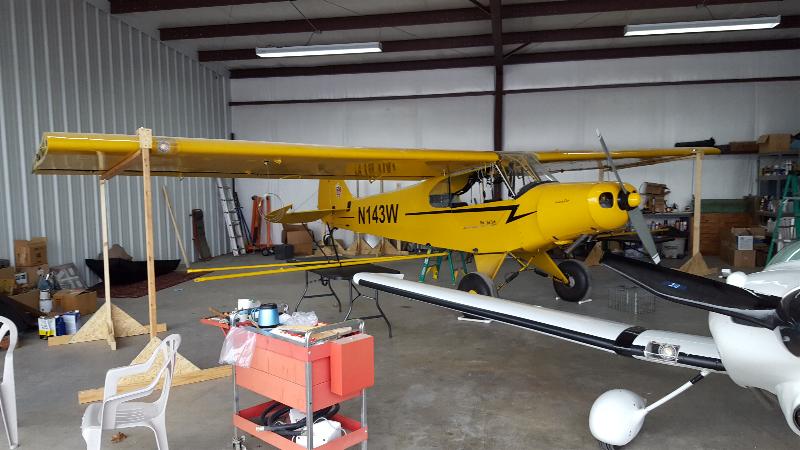
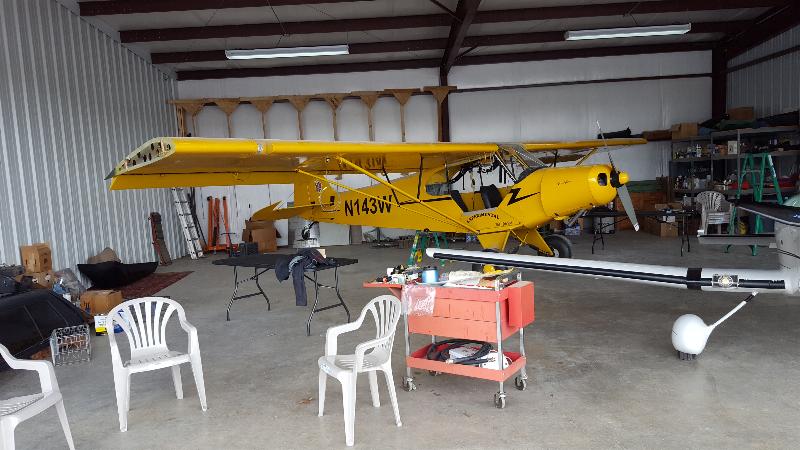
October 3, 2018 - OK. Here she sits looking like a plucked
chicken.  The wings are on
the bench to have the tanks rebuilt.
The wings are on
the bench to have the tanks rebuilt.
The epoxy resin in these tanks is badly degraded. You can see a
lot of bare cloth as well as a lot of peeling resin and cloth.
All the various penetrations into the tank (fuel pickup, fuel
site gauge ports, fuel drain) are all compromised and leaking, so they
all have to come out.
The baffles are all out. There are a lot of really rough areas in
the tanks that need to be sanded, and some holes that need to be filled
with micro before laminating the inside of the tank with vinylester and
cloth. You can see several of the penetrations have now been
removed from the tanks. The tank drain won't be removed until I
get the new welding flanges in so I'll know how big or small of an area
to cut to install the new flange.
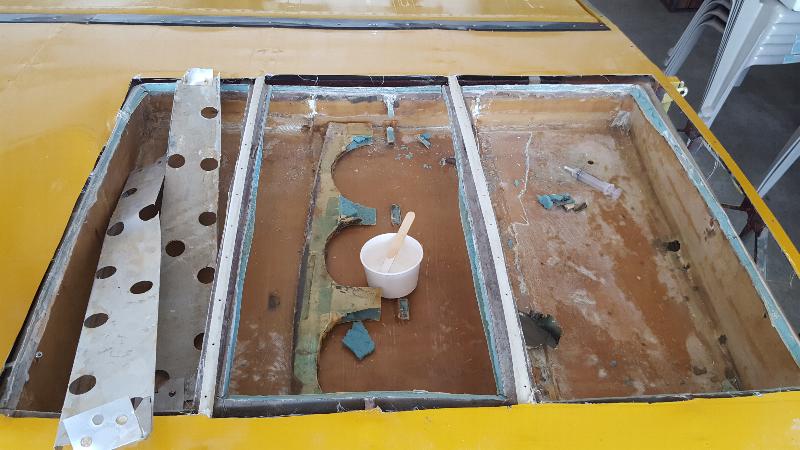
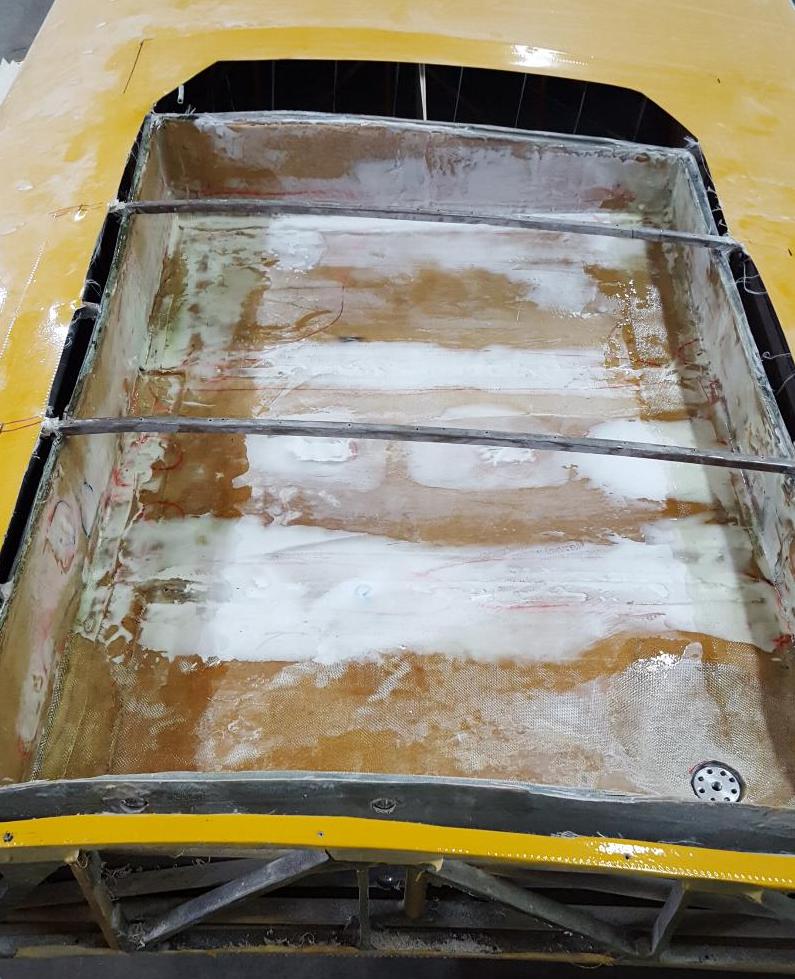
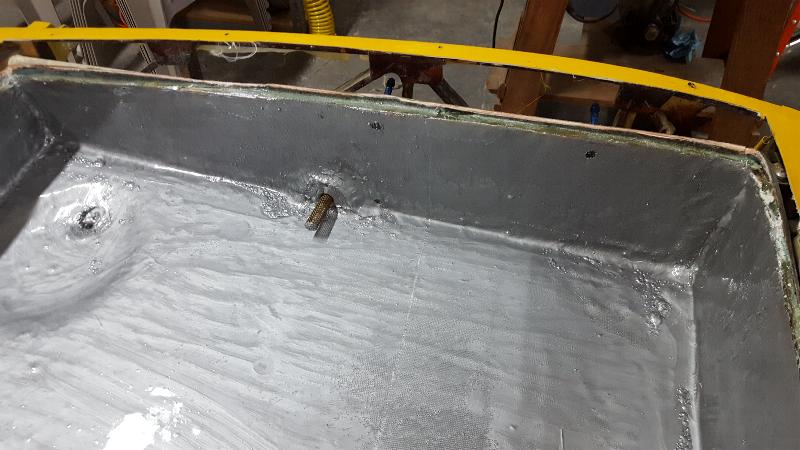
October 4, 2018 - Today I ground away a ton of flox, foam and other
materials from the the rib former spanning the top of the tanks.
I also ground down all the stubs and flox points from the various
baffle plates and supports that had been in the tanks. The new
tops will fit under the steel rib formers and get floxed to the
formers. The red markings in the tank are areas that will need
some repair with micro-balloons before I start laminating with
vinylester. In this photo, you can clearly see the penetrations
where I knocked out the fuel pickup and the tank gauge ports.
Those will eventually get aluminum flanges floxed into place for
the fuel and vent ports. Tomorrow... More sanding. Woohoo!!!
Oct 5, 2018 - I've completed the rough sanding of most of the tanks.
I filled some of the really rough stuff with Micro today.
Will sand more tomorrow. The idea here is to get the
surface smooth enough that I can laminate over it with vinylester resin
and tooling cloth to start building a tank within the confines of the
old tank.
Oct 8, 2018 - Started fitting up the new tank covers. With the
Aluminum tank covers, I can easily gain access to the new tanks to
inspect or repair if there is a problem in the future. Also
cleaned up the filler necks and welded a new flange onto one to prepare
for installation back into the tanks.
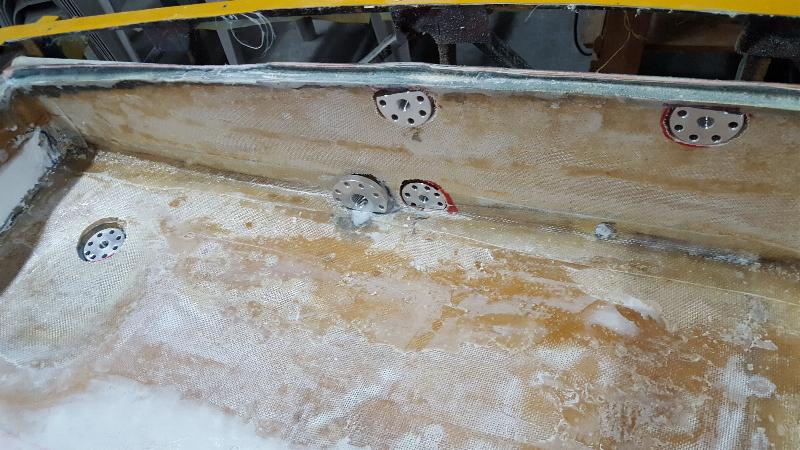
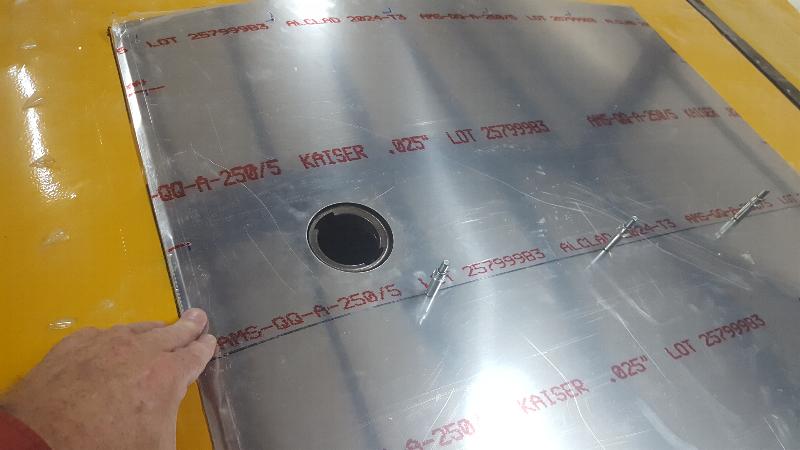
Oct 9, 2018 - Today's project was to drill and fit the aluminum welding
flanges for the various tank penetrations. These will get floxed
into place, then glassed over. Left to right these are Fuel Sump,
Fuel Pick Up, Vent return from header tank, lower port for the Fuel
Sight Gauge, and the
far right side at the top is the upper port for the sight gauge.
These flanges had to be drilled with numerous holes so the
flox will have something to bite into, then cut down to fit along the
upper and lower edges. I also drilled out the sump drains.
I left the bottom plate from the drains in place as I had
overdrilled the fitting to where it won't be in the way.
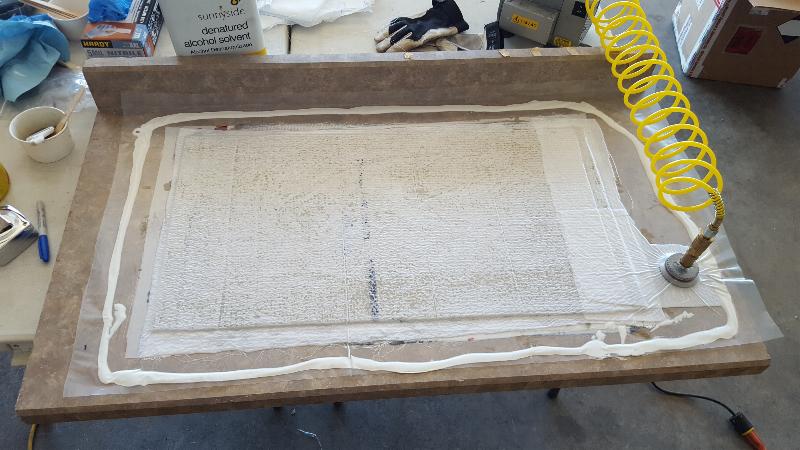
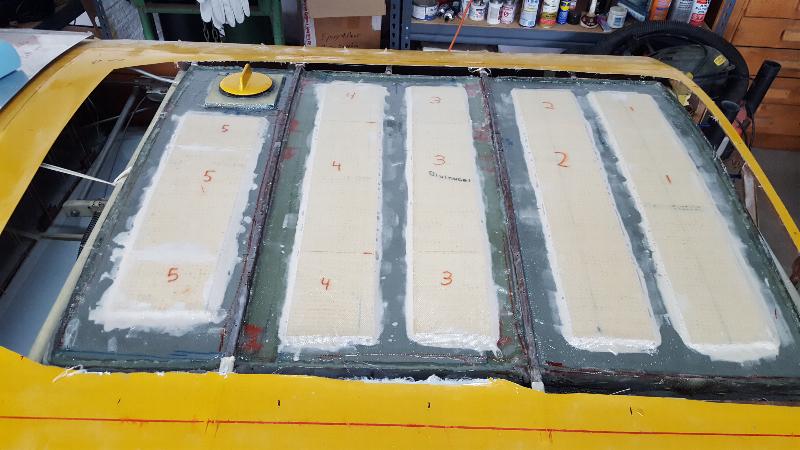
Oct 10, 2018 - Cheap Vacuum bagging (a.k.a. vacuum garbage bagging).
I am laying up the baffle plates to go into the fuel tanks.
I'll cut them out of flat sheet, so need a sheet of material
strong enough for the job, but yet light. This material is made
up of one lay up of 5.85oz glass on either side of a piece of 1/8"
divinycel foam core. To make the piece easy to attach, it will
have a peel ply finish on both sides. The lay up
from bottom to top is peel ply (dacron fabric), 5.85 oz tooling glass,
1/8" divinycell foam (perforated from both sides with a porcupine),
tooling glass, peel ply,and absorbant breather cloth. It is
covered with a plastic painting drop cloth from WalMart, and sealed
using latex caulk. This is laid up on an old piece of formica
countertop I got for the asking, then waxed with floor wax. This
makes for a really inexpensive vacuum bag, and works equally as well
for flat lay ups. This is also the beginning of building this
back up using vinylester resin. It's been 22 years since I last
used VinyEster, so I needed to refresh myself a bit on the amount of
catalyst to use and the flow qualities of vinylester. I still
don't like the stuff, but it's what I need if I want chemical proof
composite tanks.
Oct 11, 2018 - First lay ups of vinylester in the tanks. I
laminated the front and back walls with a single lay up of vinylester
and tooling cloth. The "plyfoam" part I laid up yesterday looks
good, so I laid up a second one today. That should be enough
"plyfoam" to fabricate two baffle plates for each tank.

Oct 13, 2018 - Floxed in the various tank penetrations; from left to
right - Fuel Sump, Fuel Pickup, Header tank return line, lower and
upper ports for fuel sight gauge. This is just the first pass to
get the welding flanges attached in the right places. They will
get more coverage and glassed over before I'm done.
Also laid up more pieces for the tank tops, but really nothing to show
picture wise. They all look the same as the vacuum "garbage" bag
lay ups on Oct 10.
Oct 15, 2018 - Punched a hole for the filler neck in both tank tops
today. Also drilled the finish sizes for all the attach screw
holes in the panels. I need to use a hole duplicator to locate
and drill the holes in the butt rib so they match up with the overlying
fairing. I had a hole duplicator before I moved, but don't seem
to have one anymore. Will have to order a new one. Once the
butt rib holes have been match drilled, Some corner clean up
accomplished and a little leading and trailing edge work completed with
my press brake, the tank covers will be ready to prep and paint.
Also still fabricating pieces for the tank tops. One per
day. Time to take the next week off for some family travel before
I continue with the work.
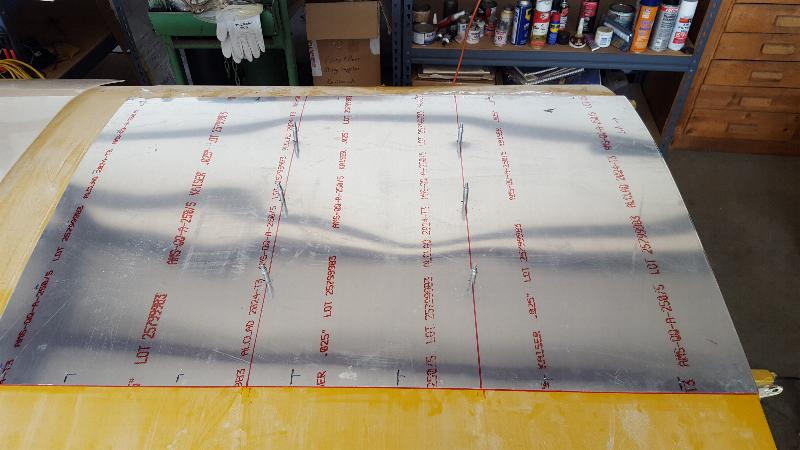
Oct 22, 2018 - Used my mini-Press Brake to bend a front and trailing
edge onto the aluminum tank covers. These covers are now ready to
be acid etched, primed and painted. Also used a hole locater to
locate and match drill the holes in the tank cover to the holes in the
butt ribs. Also laid up another section of the tank top.
Two more pieces to go before I can start cutting and installing
the tops.
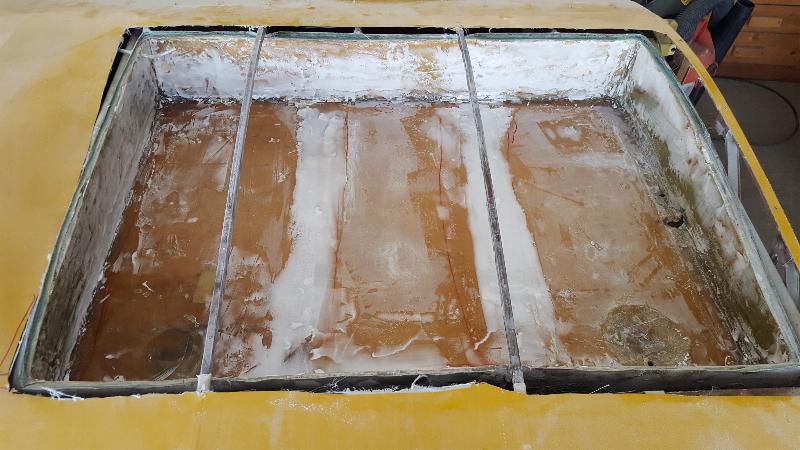
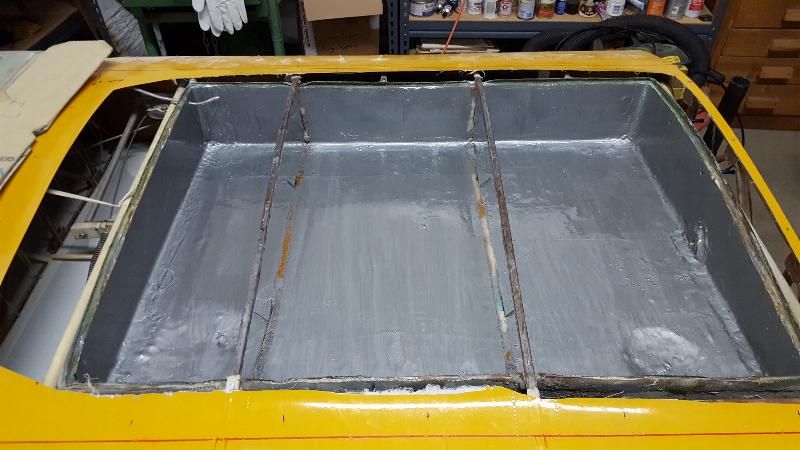
October 23, 2018 - I glassed in the remainder of the bottom of the tank
as well as the butt end of the tank with vinylester and tooling cloth.
This completes the glassing of the tanks themselves. They
will still get cleaned and prepped, then coated with KBS sealer before
I attach the tops. The green color of the vinylester resin
doesn't seem to show very well in the photos, but the insides of the
tanks are completely lined with a minimum of 1 layup of tooling glass
and vinylester resin, with 2 - 3 reinforcements layups in the corners.
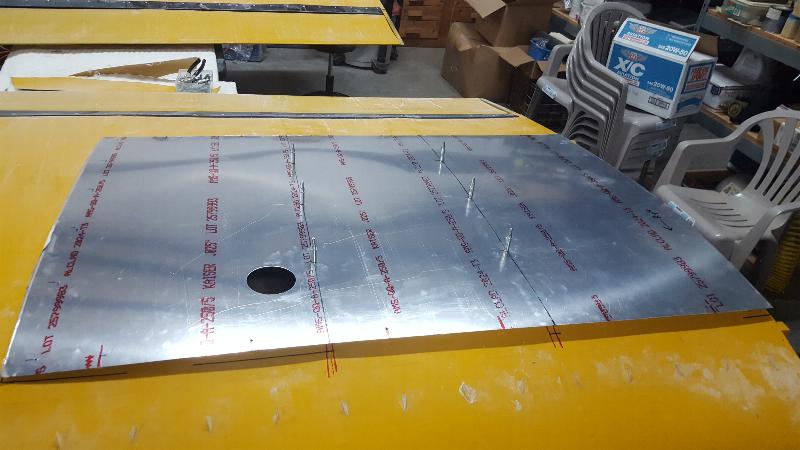
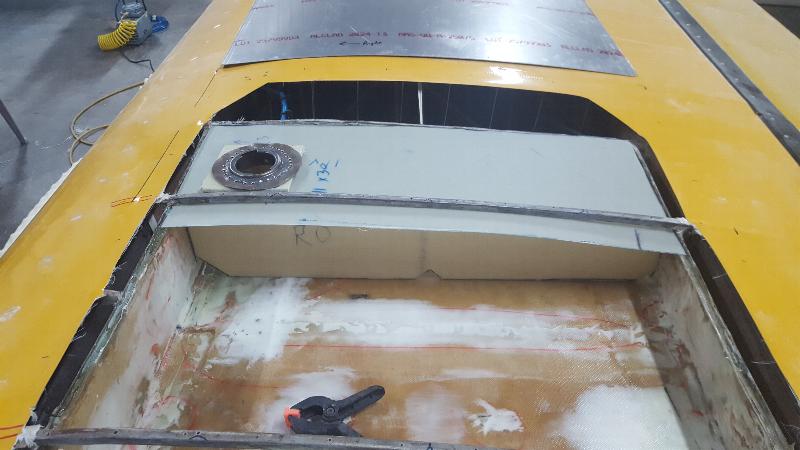
October 24, 2018 - This is a very big step that I have been worrying
about for a month or two now. I have fitted up the first section
of top and have it ready to go onto the tank once the tanks have been
coated with a slosh sealant. It's hard to tell from the photo,
but it fits very nicely. The small X at the top of the tank cover
is the centering hole for the filler neck, which is being relocated to
the outer cell of the tank.
October 25, 2018 - Today I cut out the tank baffles and fitted them to
the tanks. The baffles are made up of 1/8" Divinycell with a
single lay up of 5.85 oz tooling glass on each side with vinylester
resin.
Note that with the exception of the main fuel pickup, all the
welding
flanges are now glassed in. The main fuel pickup is also floxed
into place and glassed over. It just doesn't show in the picture.
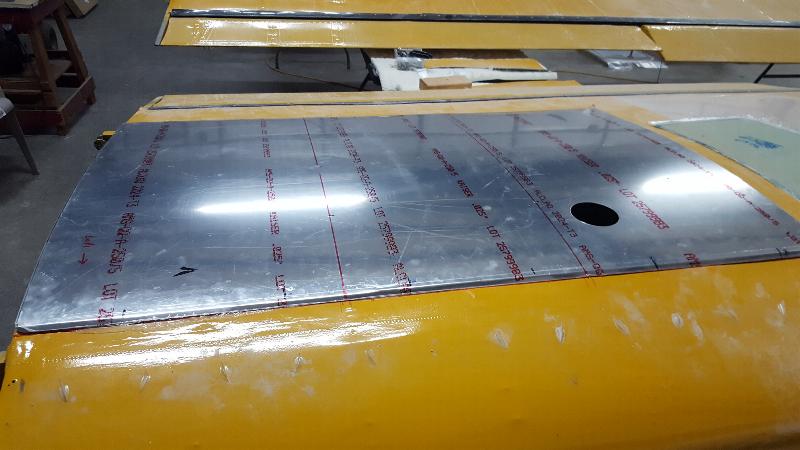
October 26, 2018 - I used my 3-1/8" punch to punch the hole for the
fuel filler neck into the outer bay. The top for the tank is
fitted, but
not attached.

I also cut out and fitted all the rest of the top pieces as well as the
shims to shim the fuel filler neck up into place to fit the tank cover.
Filler neck shimmed into place on the tank top with the tank
cover in place.
The tanks were cleaned and prepped, so are ready to apply the KBS slosh
sealer tomorrow. The white tape is masking to leave a strip with
no sealer where I'll bond the ribs underneath the tops when I attach
the tops. The angular wedges along the white masking are stops to
push the ribs up against when I install them.
October 27, 2018 - Fuel tanks have two coats of KBS slosh
compound/sealer.
October 28, 2018 - Slow day. Installed the finger strainers in
the fuel pickups.
Tomorrow I'll start attaching the top pieces.
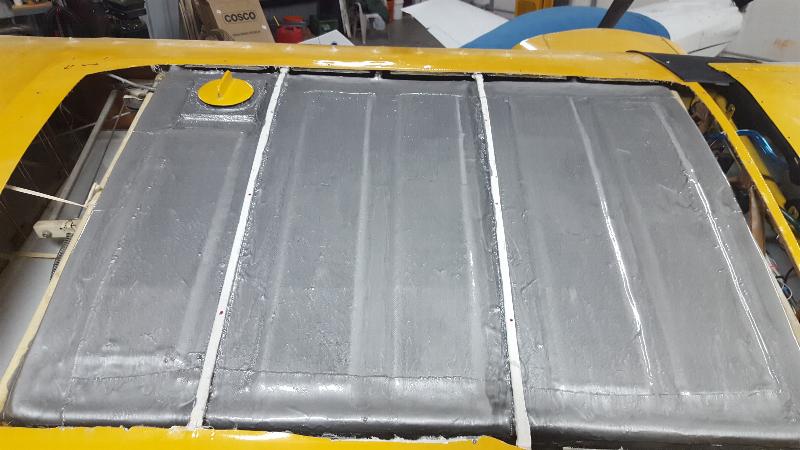
October 29, 2018 - The inner and outer bays have the tops on, and the
filler neck was installed in the outer bay. Note the gray color
of the tops as they are now coated on the inside with KBS tank sealer,
except where I will be bonding them to the edges and to the center top
piece.
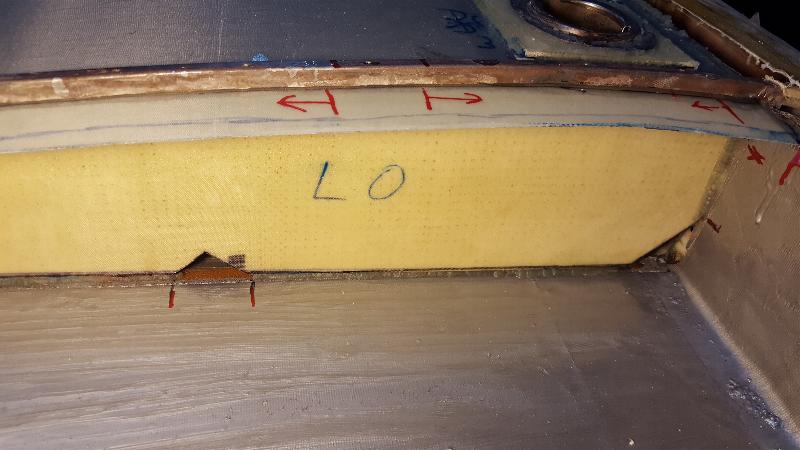
October 30, 2018 - I bonded the tank baffles/inner ribs into the tanks,
then closed out the tanks. (LO = Left Outer Rib)
The tops are on. The white strips are 1/8" perforated divinycell
with micro around the edges and a single lay up of glass over top.
These are there to stiffen the tops of the tanks and make them
rigid. At this
point in time, the tanks are done. Yippee!!  I still need to install the fasteners
in the wing to hold the tank covers on, and the tank covers need to be
primed and painted. And, of course, I need to put the wings back
onto the plane, rig the controls, and do some other reassembly and
repair work. I should be ready to put the wings back on early
next week.
I still need to install the fasteners
in the wing to hold the tank covers on, and the tank covers need to be
primed and painted. And, of course, I need to put the wings back
onto the plane, rig the controls, and do some other reassembly and
repair work. I should be ready to put the wings back on early
next week.
November 1, 2018 - I fabbed up a 4th pair of wing jacks. Copied
this design from a friend in Los Alamos (thanks Skip!). This
airport seems to be pretty sparse of pilots and pretty sparse on help
when I need extra hands. So, I have two sets of wing jacks.
I'll line them up with two jacks on either side of the plane,
then set the wings on them. When I run the threaded rod up, it
lifts the wings into place so I can put them on by myself. That
way I'm not trying to get the bolts into the spar fittings or hang the
lift struts while I've got helpers fidgeting about telling me their
arms are tired and need to set the wing down. The wing jacks make
life easier for everyone, and are a serious consideration when you live
in a community where everyone is over 60.
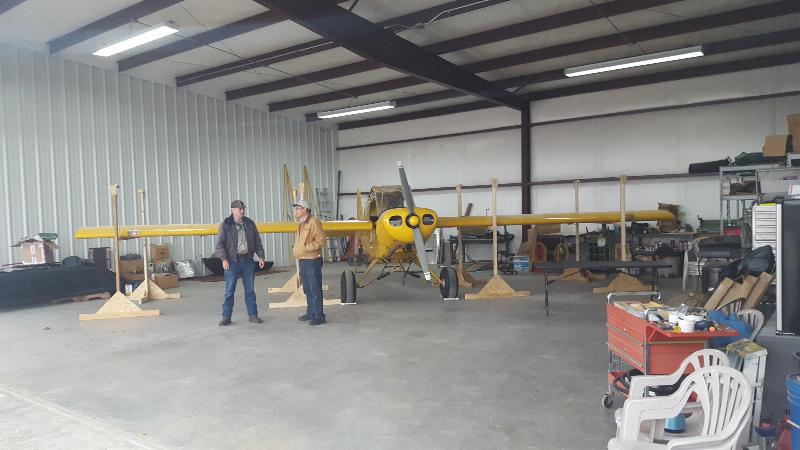
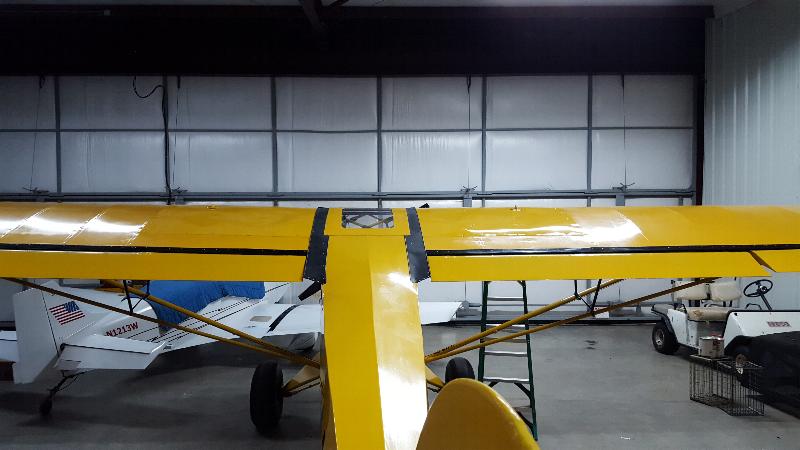
November 2, 2018 - Norm and Jim were kind enough to help me get the
wings onto the aforementioned wing jacks. Kind of resembles a
mutant Cygnet with the wings like that. It was a simple
matter to run the jacks up and slip the spar attach bolts in.
Spar attach bolts in. Lift struts laying on the tables. I
shot a bunch of boiled Linseed Oil into the lift struts as an
anti-corrosive/sealer before I put
them on.
Lift struts on. Only a few hundred more details to address before
it's ready to fly again.

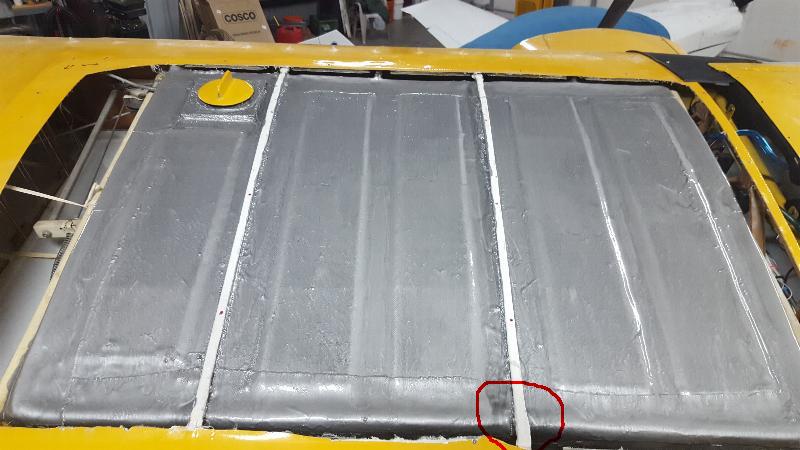
Nov 14, 2018 - Leak test failed, so the tanks are not done. I had
some weeps at the
top seam at the back of the right tank. After some
contemplation, I decided that I'm not entirely happy with the top
seams. The
weepy area of the seam was cut down, then
filled with a mixture of vinylester resin and milled glass fibers to
seal the seam. They look like a weak spot, and the floxed areas I
was
certain would seal, had some leaks. So, I used a mix of resin and
micro as a core, then laid up glass over top about 2 inches over
lapping the seams and wrapping down the side of the tanks. This
photo is after I beefed up the top tank seams.
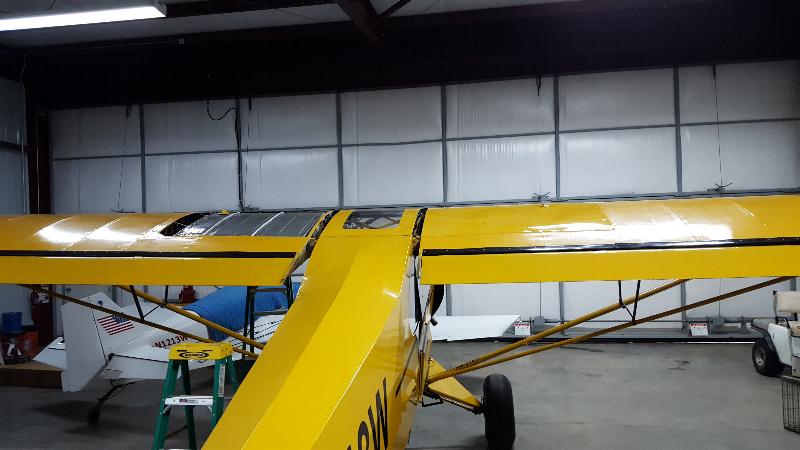
Nov 17, 2018 - We had a warm, sunny day, so after painting a second
coat of sealer on the outside of the tanks to address any potential
pinhole leaks, I rolled it outside to sit in the sun to promote the
curing
of the resins. Everything is ready
for leak testing on Monday. If it is leak free, I still need to
get the tank covers painted, and install the rest of the wing root
fairings and it will be ready to fly. Oh yes, it really needs a
bath to get all the fiberglass dust off. This is the first time
the Cub has been out of the hangar since July.
Click on the small pictures to see a larger version.


Start.
Delaminated mess.
Clean up and
rebuild. Coated with KBS Slosh.
Tops on the tanks. Completed tops.
It's probably worth noting that I relocated the filler neck from the
inboard front corner of the tanks to the outboard front corner of the
tanks during
the rebuild.
November 19, 2018 - Leak check passed! The tanks are good to go
now. I dropped the tank covers off at the paint shop. They
should get to them the last week of the month, so the Cub should be
ready to fly around Dec 1. Today I was finally able to pull it
out of the hangar to fire it up and warm up the engine. I hate
letting it sit for so long. It was last started and flown in
July. so the engine hasn't been run in 4 months. Sure glad I have
Cam Guard in the oil to protect the cam followers from corrosion.
Decmber 6, 2018 - At long last I got the tank covers back from the
paint shop. I have to say, they did a really nice job with a good
quality self etching primer on both top and bottom, and did a nice job
shooting the Acrylic Urethane finish paint I supplied to them.
It is all together again. This plane has been
grounded since I discovered the extent of the tank damage in July.
I can hardly wait to get a nice day to go play!
May 2, 2019 - I've had a really annoying, but minor weep in the right
fuel tank ever since I put this back together. It was never
enough to even drip. Just enough to smell fuel, and stained the
bottom of the tank with blue dye. I have intentionally run
nothing but 100LL in it in hopes the dye in it would reveal the weep
when I got to doing the annual. So, now it's time for the annual.
I found a bunch of dye all over the wing root bulkhead of the
tank, so washed it all out with solvent yesterday. After sitting
overnight, today there is a trace of dye showing the source of the weep.
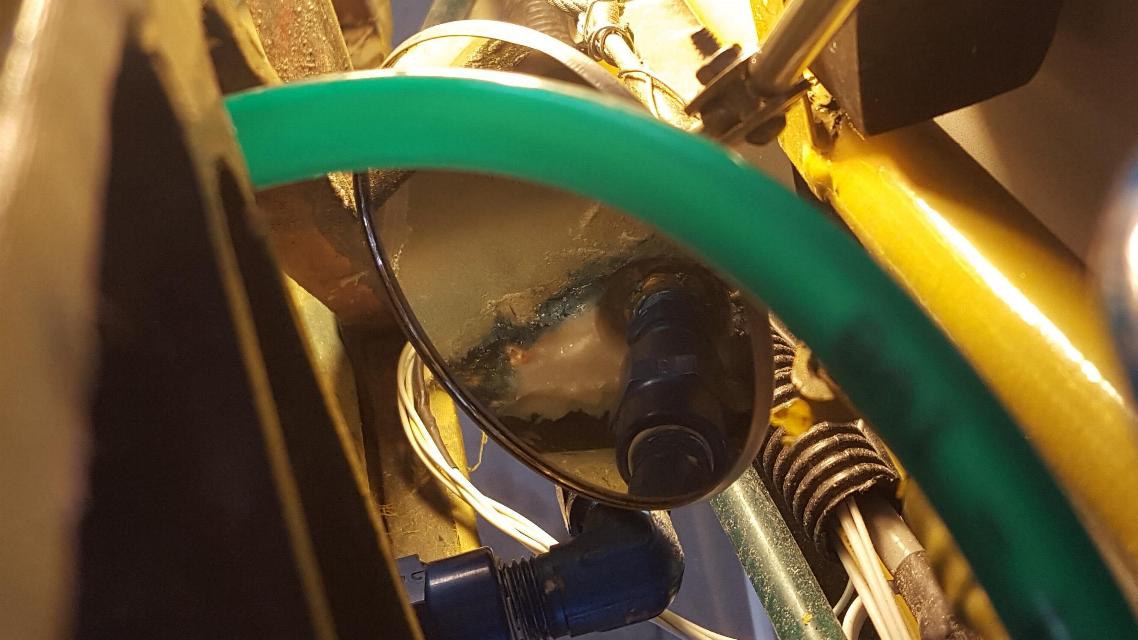
You can see the blue dye marking weep towards the top of this seam,
then the dye runs along the seam as the fuel creeps along the seam..
I drained the tank after this photo was taken, then washed it
down with solvent again, then a soapy prep solution, rinsed with water,
then an acid etch and another thorough water rinse. I'll let it
dry tonight, then will effect repairs tomorrow.
May 3, 2019 - I sanded, then painted with vinylester resin, then a
brushed on coat of vinylester with milled fibers, then 2 coats of KBS
sealer to ensure no more weeps.
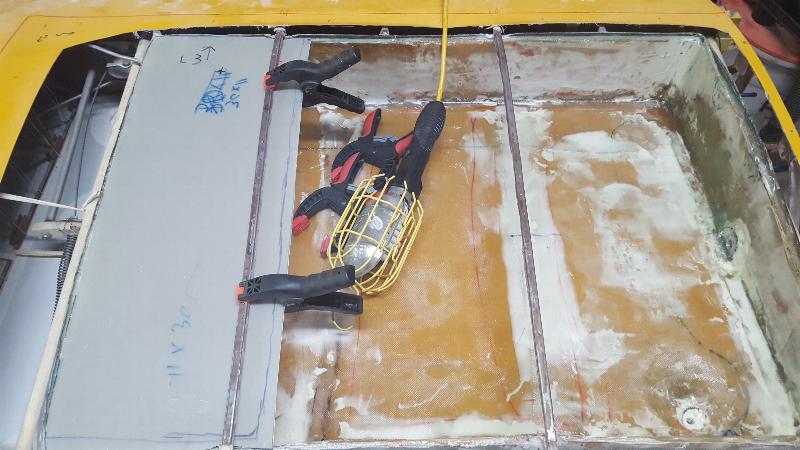
May 2020 - I still had some weeps in the same place as above on the
right tank. I cleaned and sealed some more. That
seems to have cured it.
Oct 2020 - I've been getting stronger and stronger fuel smells for the
last few weeks. The left tank started dripping fuel, so I
defueled the
plane and parked it in the back corner of the hangar until I had time
to deal with it. After removing the tank cover, I could see where
fuel
had been on the fabric, but didn't find any stains on the tank itself
indicating where it had been leaking. Above the fuel stains was
the
rib, which had been really difficult to work around while attaching the
top to the tank during the rebuild. So I decided to do a repair
there
even though there was no solid evidence as to exactly where the leak
might be. If that didn't fix it, I was going to buy a set of
Dakota Cub aluminum tanks and would be pulling the wings off to install
those tanks. The photo above is prior to doing the repair. I
didn't take a photo of the repair as I really didn't expect it to work
and was expecting to be pulling the wings off the plane. However,
after a couple of days for the repair to cure, I fueled the plane and
found no fuel smell and no leaks. It has now been a week and so
far, all seems to be well. No fuel smell and no leaks. I'm
not convinced that I won't still be replacing these tanks at some point
in the future, but for today, they seem to be good.
Page 1 - The Cub
Project
Page 2 - Fabric
Page
3
- Firewall Forward
Page
4 - Firewall Forward (page 2)
Page
5 - O-320
Overhaul (for the Cub)
Page 6 -
Final Assembly (2010)
Page
7 - Final Assembly (2011 page 2)
Page
8 - Final Assembly (2011 page 3)
Page 9 - Completed
Aircraft
Page 10 - Later Updates and
Modifications
Page 11 - MOGAS vs
Composite Fuel Tanks
POH
for Scott Grizzly Cub N143W)