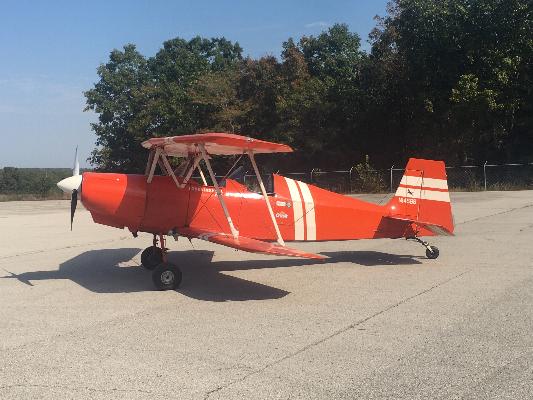
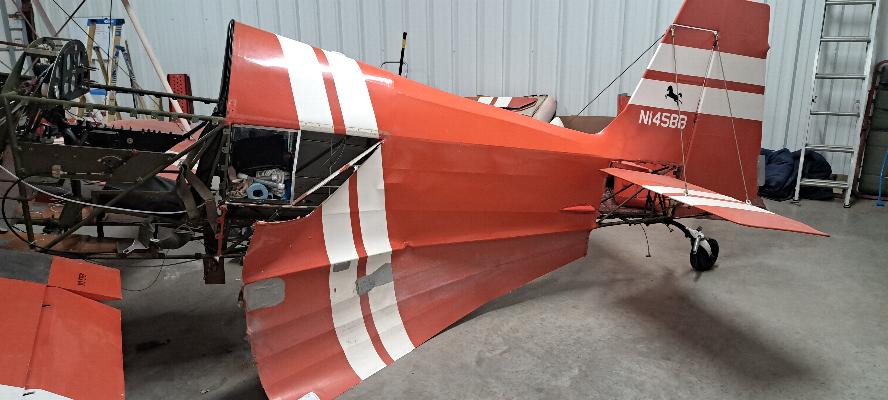
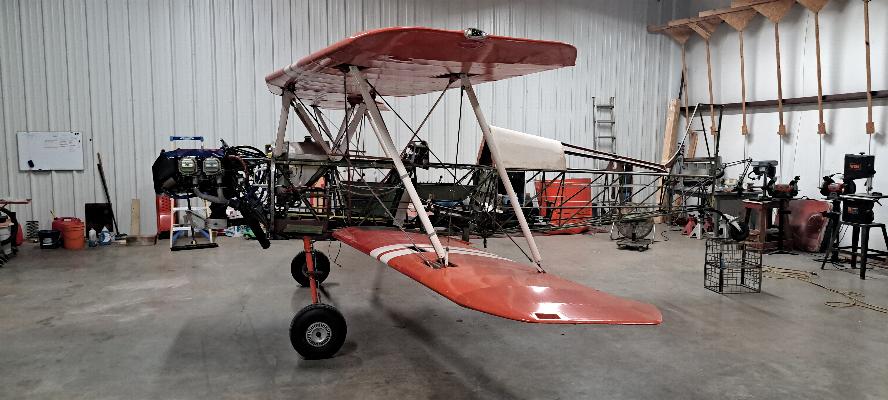
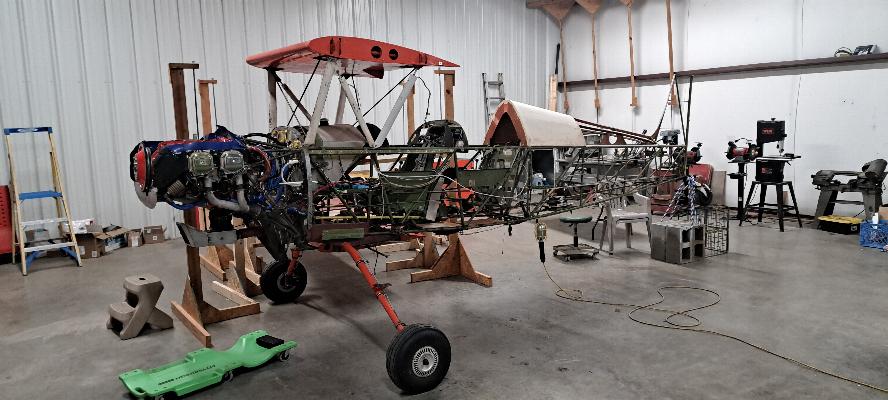
Let's start with the premis that this isn't a bad looking old plane. It's been around for a few years, as it is now over 42 years old according to the logs. While it looks good from a distance, up close the dope on the fabric is seriously degraded with loads of ringworm and failing seams, so requires a lot of patching and repainting to keep it in the air. I knew this up front when I bought the plane and it was priced accordingly. So, after 3 summers of fun with this plane, I've finally got enough space in my schedule that it's time to recover it.
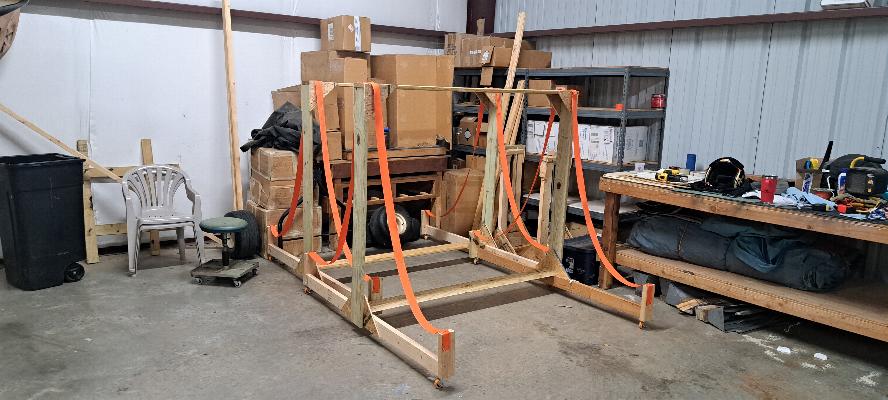
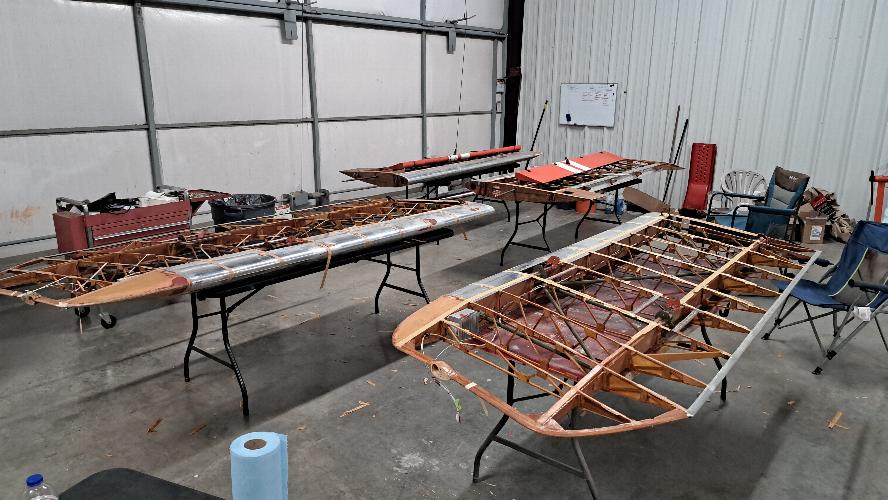
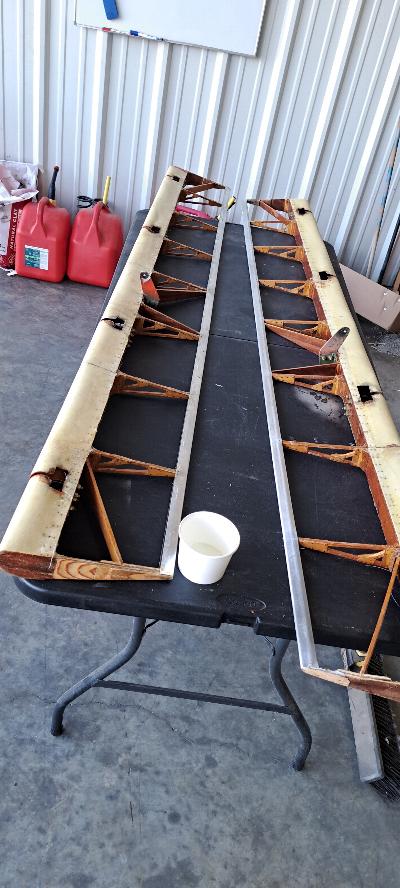
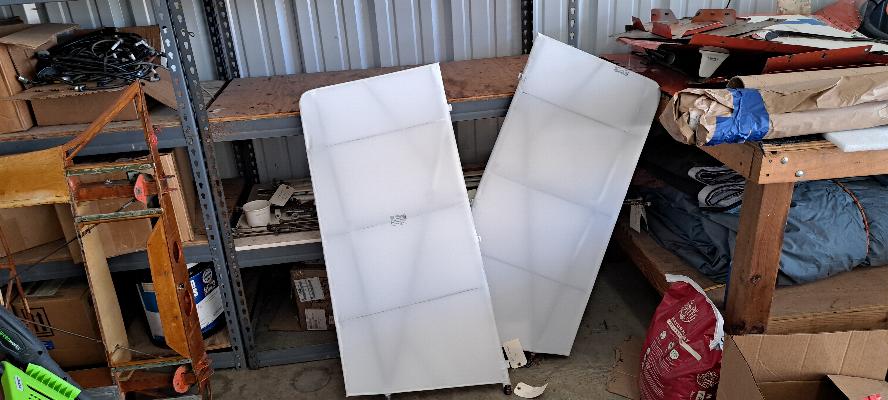
First off I built two sets of wing racks to store the wings while I'm not working on them. Behind the two wing racks, there are also 4 short wing jacks. I already have 8 tall jacks to support the upper wings for removal and installation, but needed a short set to deal with the lower wings.
11/6/2024 - I took the plane out for one last acro ride before grounding it. What a sweet flying plane. Sure makes it hard to convince myself to take it apart.

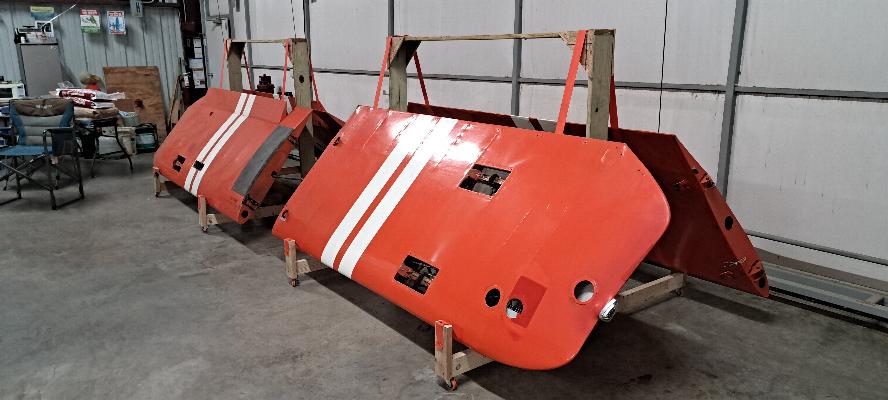
11/7/2024 - I removed all the fairings and covers from the wings. Once again, I am impressed with the quality of the design work in this plane. It is stout! All fairings and covers were tagged and placed into a storage bin. They will get cleaned and painted before going back on.
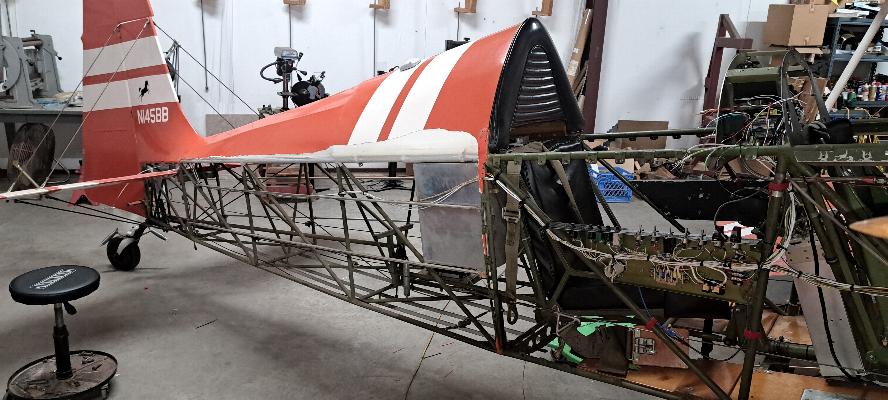
11/13/2024 - Well now she's looking kind of naked. All the sides, top deck and belly skins are removed. They will all need to be cleaned and repainted, but having them off will also give me much better access to the instrument panel, plumbing, and wiring as I change much of it.
And here is the top deck, side skins, belly skins, wing fairings, inspection covers, and the complete engine cataloged and put on the shelving until I am ready to get started on paint and reassembly. Tomorrow the aluminum covers on the tail come off and go into storage as well, Friday is commited to the EAA Chapter's J-5 restoration project, then this weekend the IO-360 will arrive for next week's fun and games.

11/14/2024 - I removed the rear access hatch and baggage door, then removed all the access panels and fairings from the tail. This is as far as I'll go with the airframe for now. I'll tear down the IO-360 from the Cardinal RG next week, then will likely start building my O-360 back up for this plane the following week. Some time in December, I'll start disassembling the airframe.
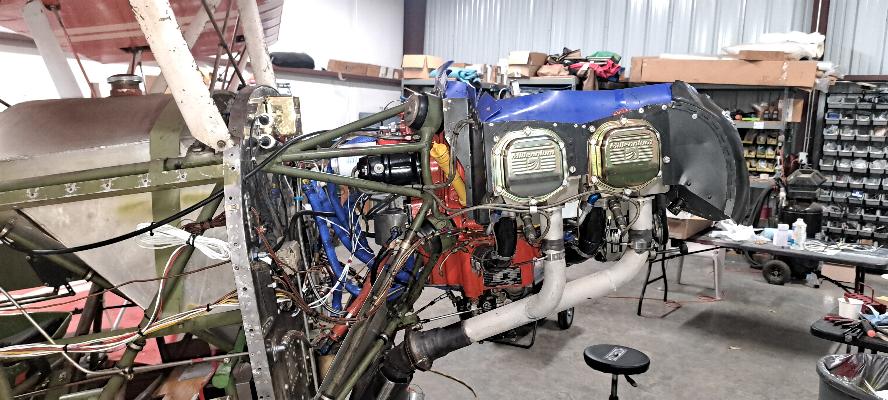
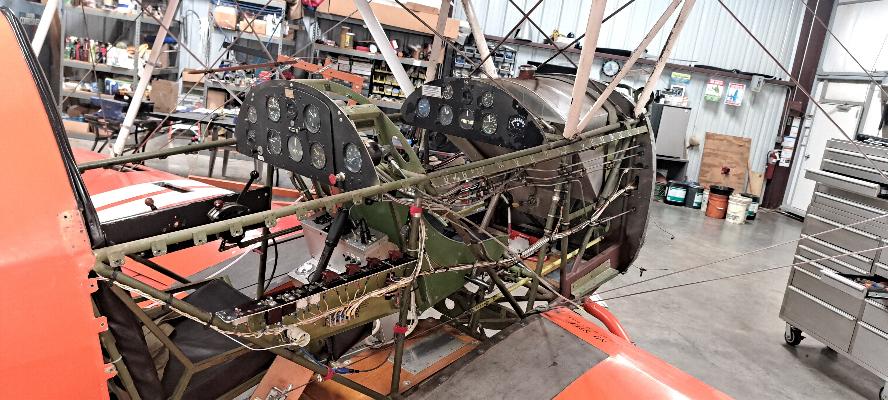
I've got the cooling baffling back on the engine now, and the spark plugs and ignition harnesses installed. Yes, I do know what every one of those wires, lines, and hoses does.
12/26/2024 - I needed to gain access to the aft fuselage to route the wiring for the trim servos. I am waiting for some components to arrive to complete the wiring, so I'll do some more disassembly and strip some fabric. Interestingly enough, the fabric on this plane was quite heavy. It had a cover of Ceconite 102, then was taped, then a second cover of ceconite 102. I'll bet it looked great when it was new, but wow was this fabric heavy.


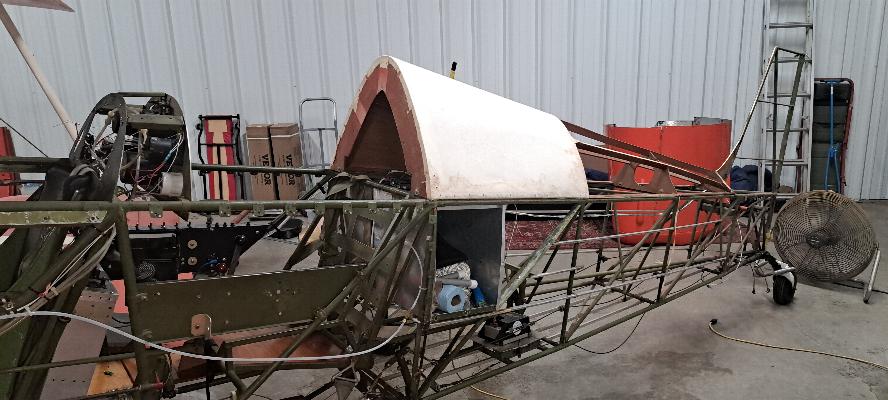
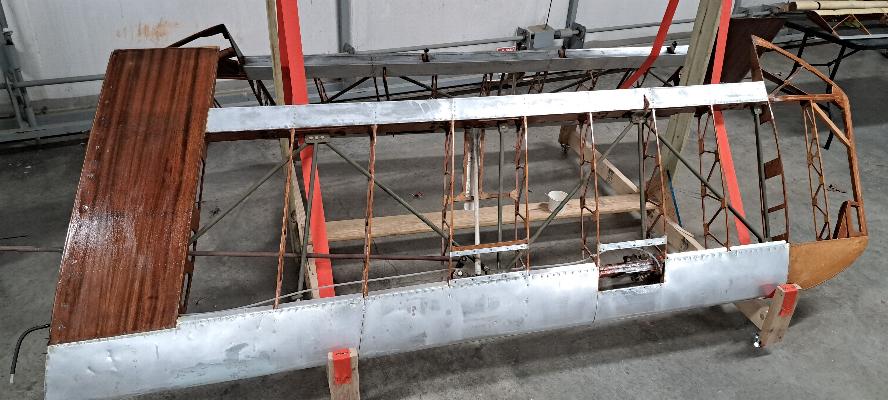
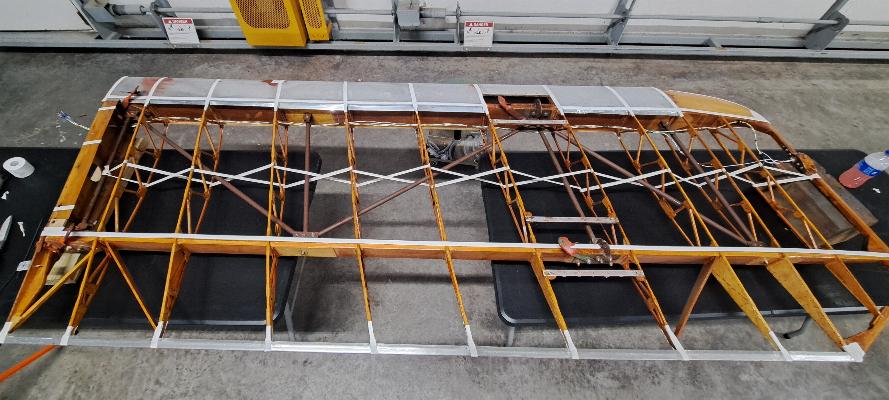
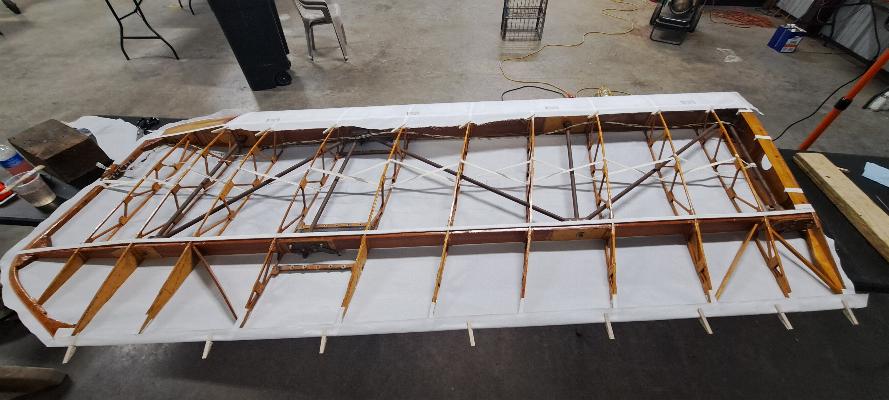
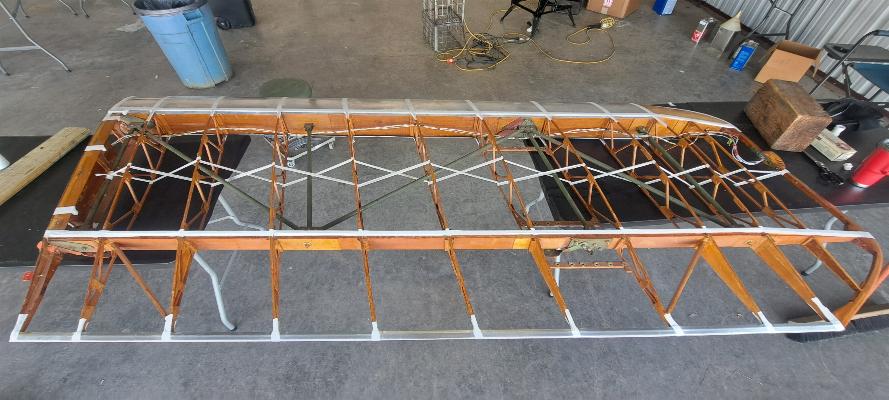
12/27/2024 - All the fabric is now peeled from the fuselage. The turtle deck has a covering of felt between the wooden turtle deck and the fabric. I have new felt, but this is in good shape, so I may just leave it as is.
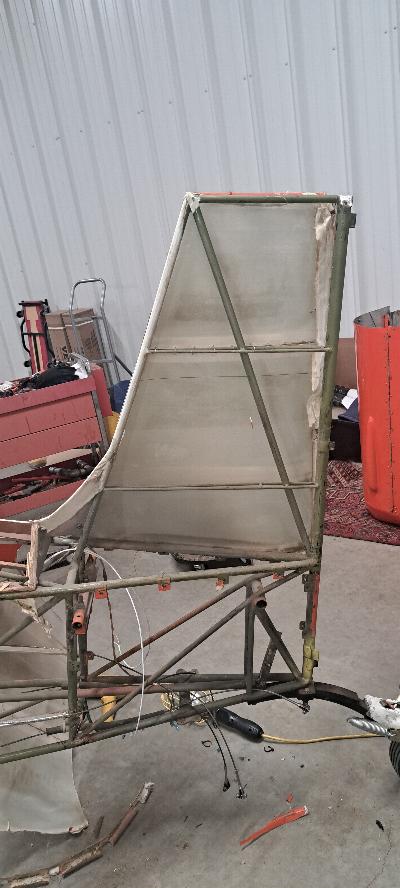
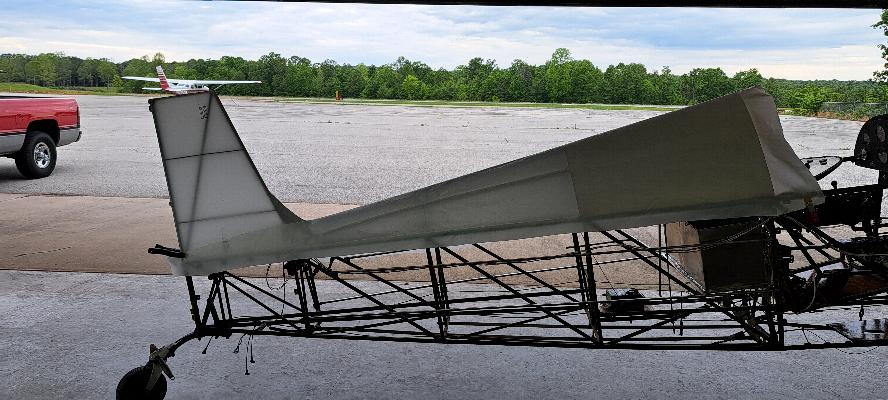
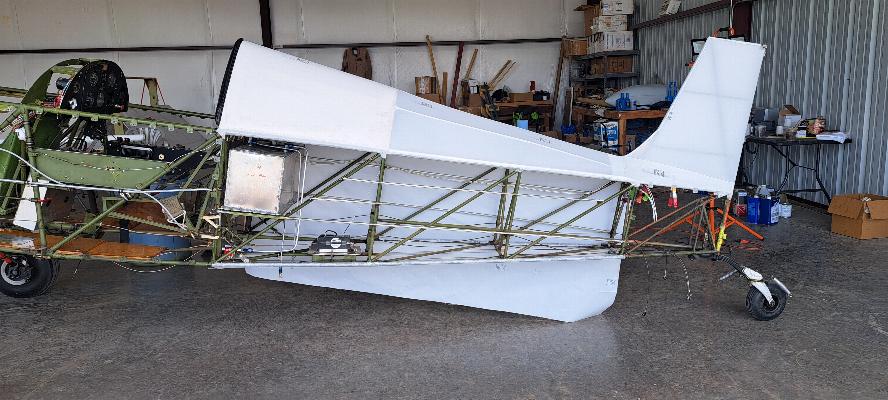
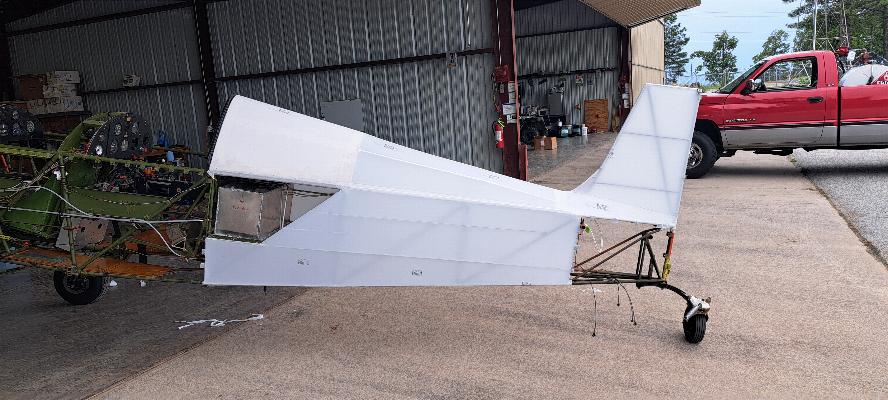
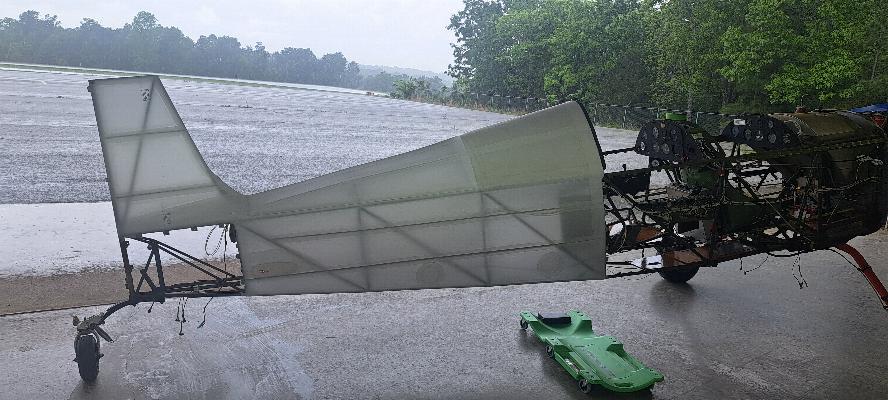
You can see the covering technique used on the tail to form the cover from flat sheets of dacron. First they covered each side of the vertical stab, then used flat sheet to cover the top of the fuselage down to the upper longeron. The bottom of the fuselage is another flat sheet, then a flat sheet used on either side of the fuselage. The cover appears to be done with nitrate/butyrate dope process on Ceconite fabric.
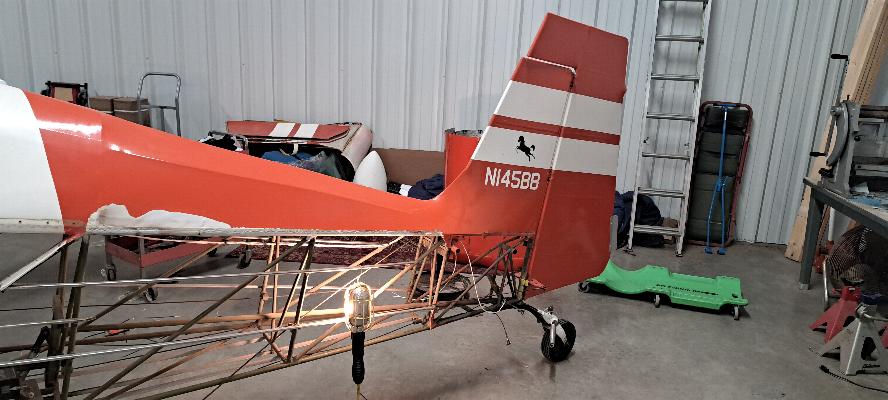
Bare fuselage from either side.
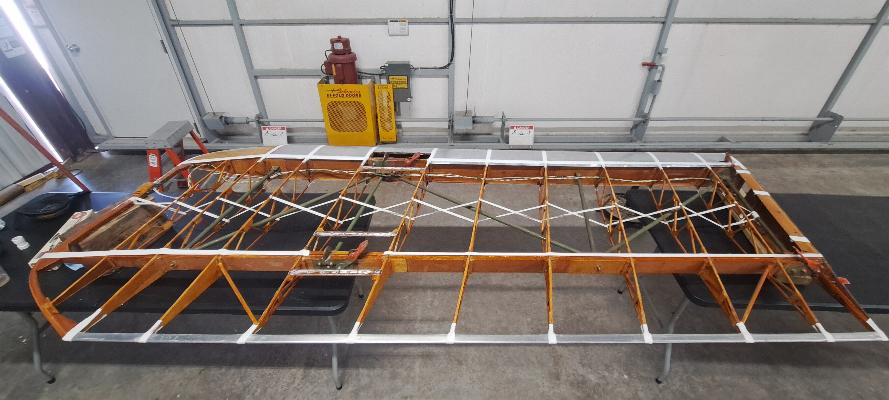
 12/28/2024 - Aircraft set up so I
can take some measurements for the rigging. Overall, it's not
bad, but definitely has some room to improve when I put it back
together again. This is also set for me to use the wing jacks you
see hanging from the back wall to remove the wings next week. I
hope to finish the electrical/electronics work on Monday, then will
start getting set up to pull the wings. I bought some cinder
blocks to attach under the tail to ensure that the plane doesn't dump
over onto it's nose when I remove the weight of the wings.
12/28/2024 - Aircraft set up so I
can take some measurements for the rigging. Overall, it's not
bad, but definitely has some room to improve when I put it back
together again. This is also set for me to use the wing jacks you
see hanging from the back wall to remove the wings next week. I
hope to finish the electrical/electronics work on Monday, then will
start getting set up to pull the wings. I bought some cinder
blocks to attach under the tail to ensure that the plane doesn't dump
over onto it's nose when I remove the weight of the wings.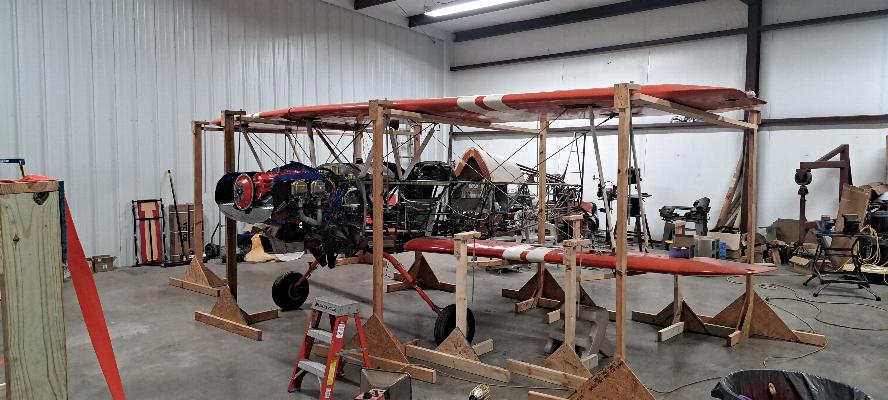
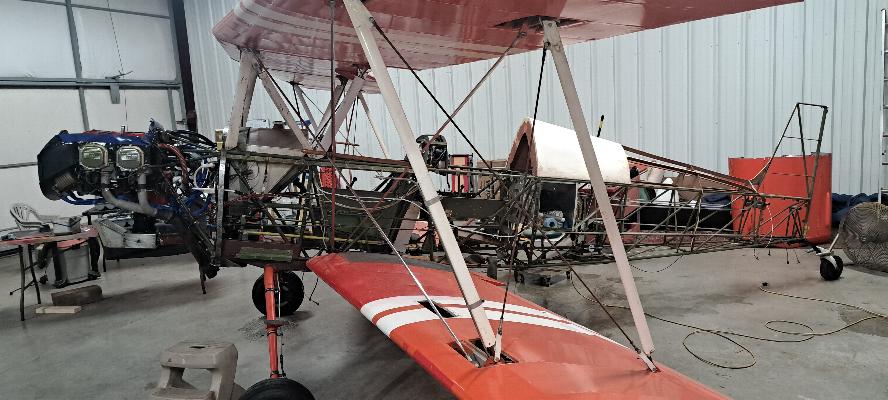
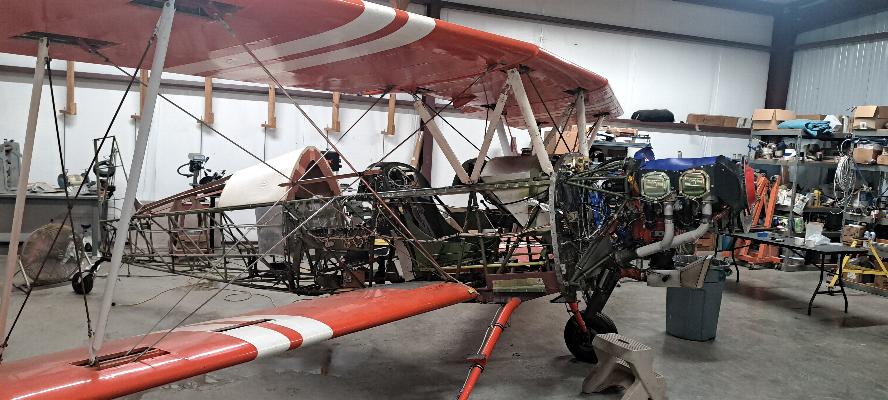
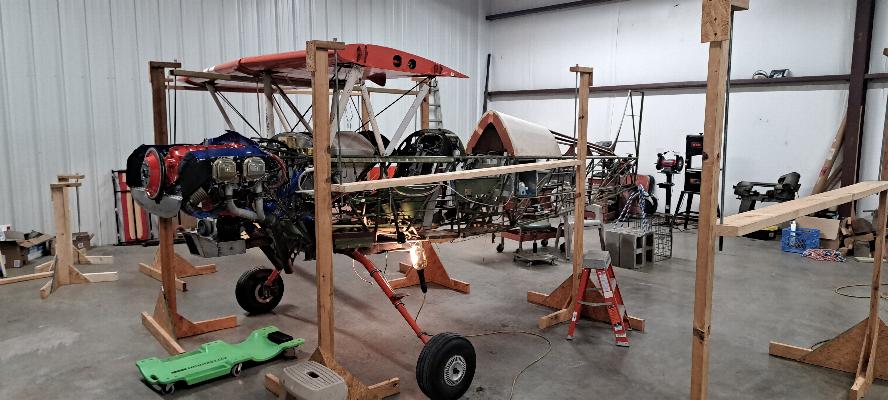
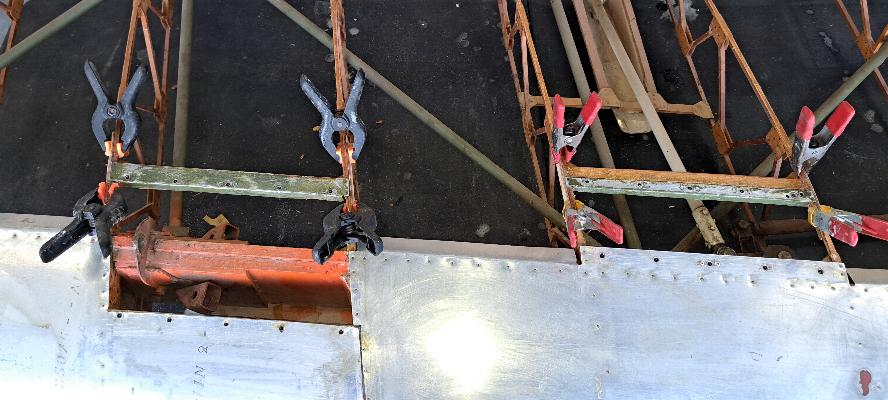
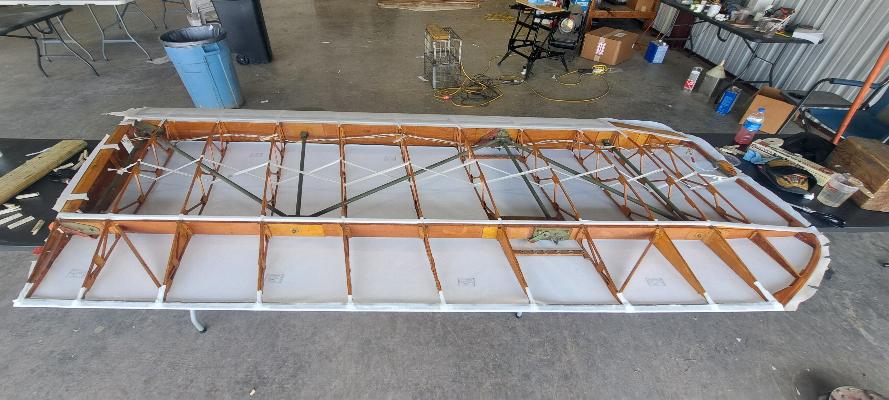
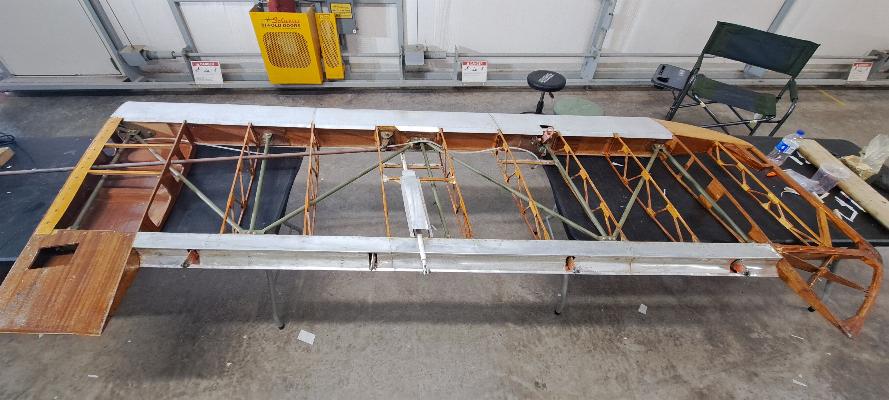
12/30/2024 - Today is the day to pull the wings. These wooden structures are often seen in the background of other pictures hanging on the back wall of the hangar. These are the wing jacks I built for installing and removing wings. I've used them several times in the past. With these jacks, I can install or remove the wings by myself. I only need help to move the wings from the jacks to the wing cradles. With the jacks in place, you might note that some of the bracing has been removed, but the flying wires are all still in place.
The wings are off. On this plane, the lower wing had to come off first to gain access to some of the keepers for the upper wing. The reverse will be necessary for reassembly.
Right side wings removed. My help all left once the left side was off. I could get this far without help. They will come back and help me move the wings tomorrow. I'll get started removing the upper center section before they arrive.
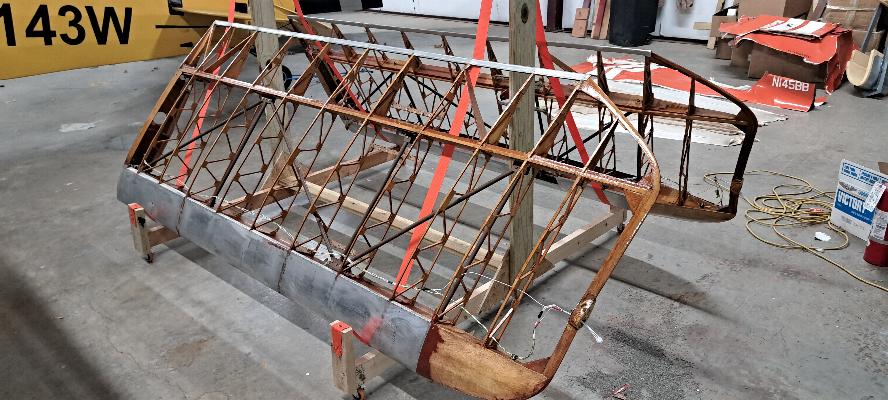
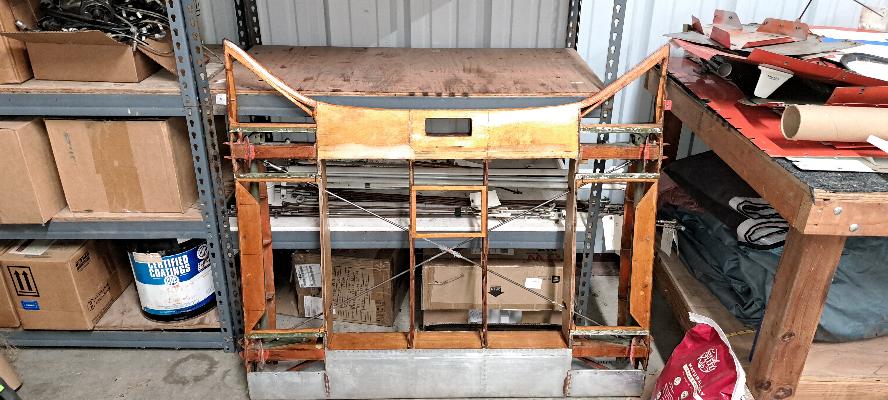
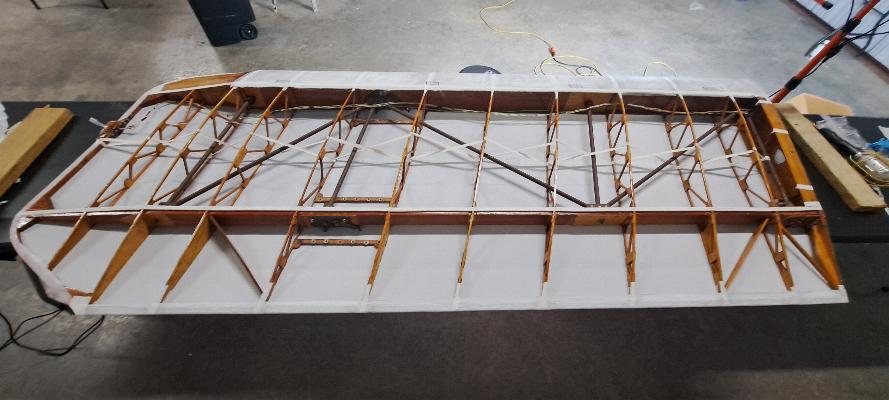
Bare fueslage from the left side.
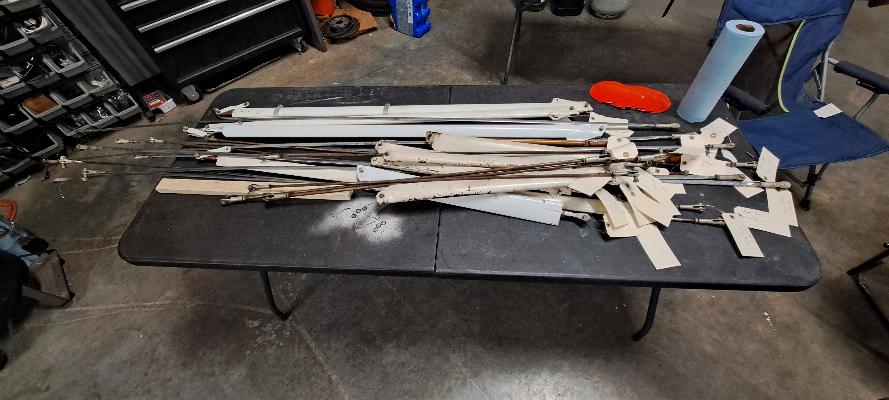
12/31/2024 - Last day of 2024! This is all the hardward for the Flying Wires, Landing Wires, inboard and outboard Cabane Struts, and various wire braces that hold the wings and centersection in place. All but the flying and landing wires (which are stainless Steel) will need to be bead blasted, primed and painted.
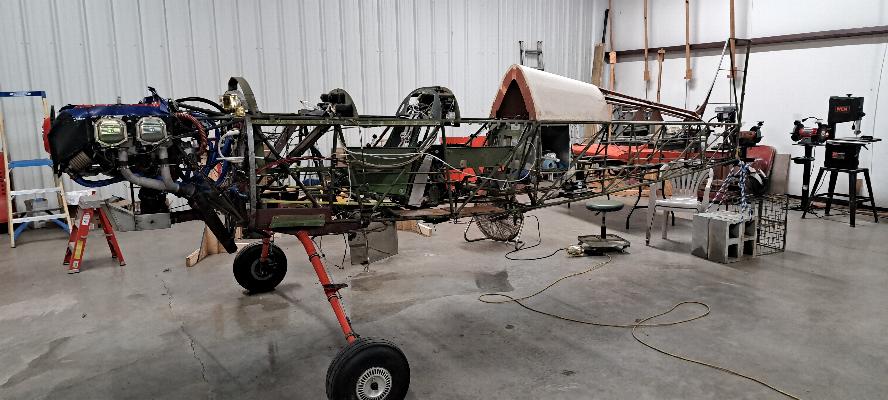
And the fuselage. Note that the fuselage fuel tank is now missing. It's laying on the floor in the middle of this photo. I removed it so I can install the fuel sending unit with it out on the bench. Also notice the fan and wet floor. Yes, there was some fuel left in the tanks and it did spill all over the floor. I quickly doused the kerosene heater and put out the fan to evaporate the fuel. Fortunately, 100LL doesn't stink or leave a residue like car gas.
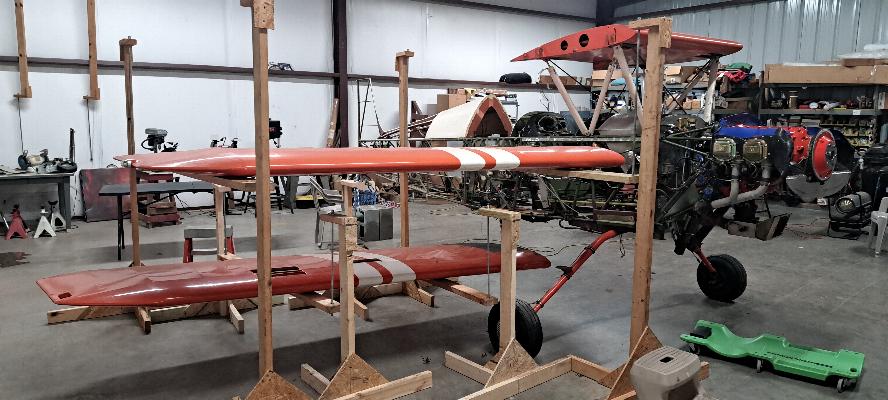
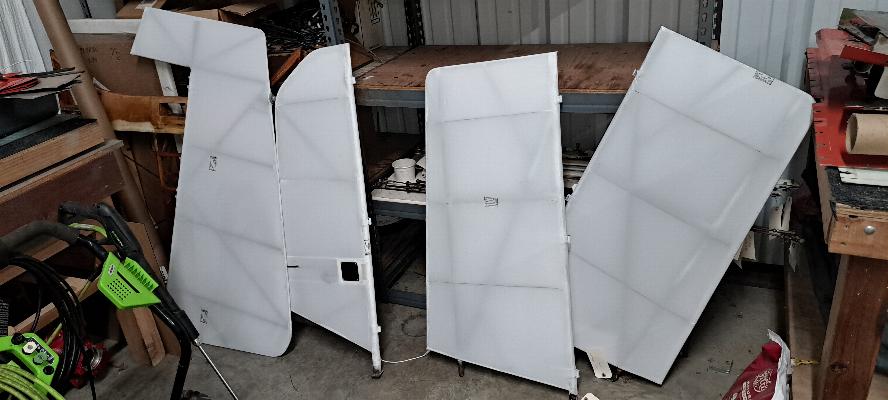
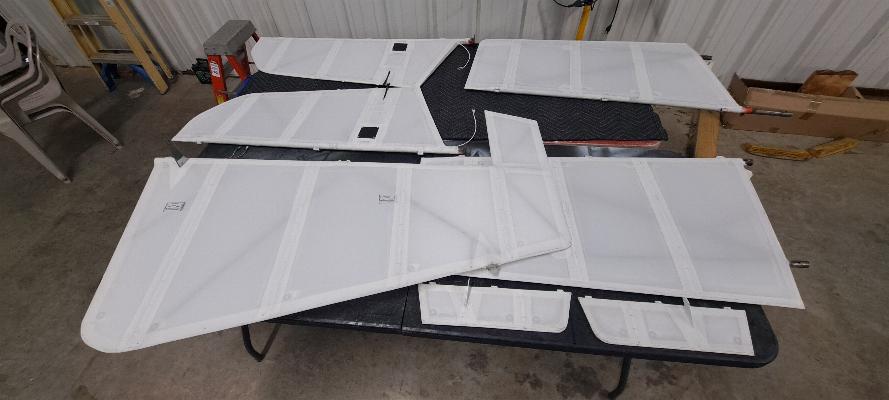
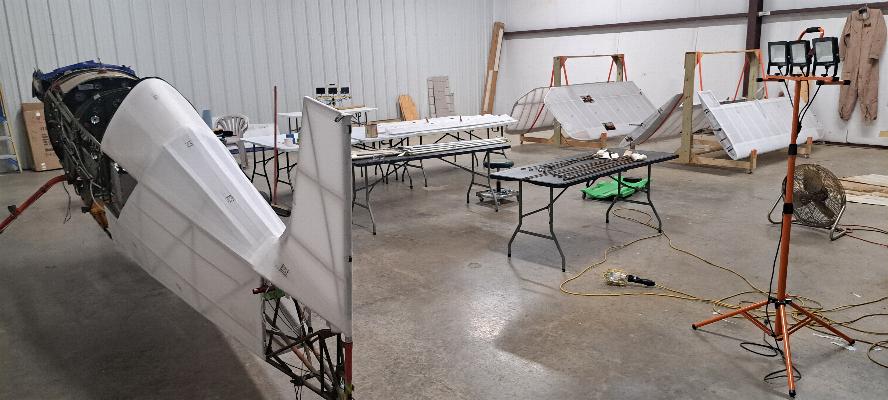
The wings in the support rack.
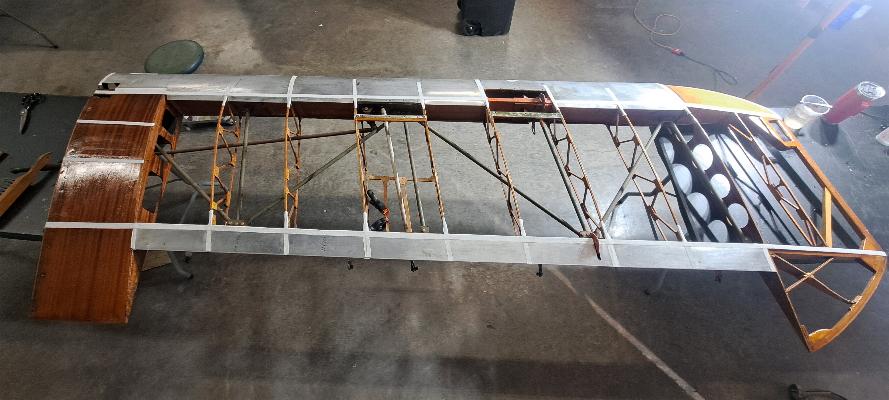
3/11/2025 - I am finally getting to the fabric work. Today I stripped all the fabric off the wings. No close ups yet, but that will happen as I do some minor repairs. Overall, the wings are in pretty good shape. The left lower wing will need some repair work. The plane was ground looped and hit the left wing tip in 1985, also when they replaced the landing gear with Cessna Cardinal gear. The wood work on the left wing tip needs a little bit of attention. Also, the inboard leading edge on the left wing is going to require some filler. I had an encounter with a tall tree on short final a few years ago that caused some minor damage to the sheet metal on the leading edge. It is going to require just a tiny bit of bondo to smooth the surface before recover. The wings need a bit of cleanup, but overall, I don't see any wood rot or rodent damage.
Interesting in that I found there was no reinforcing tape under the rib stitching on this plane. While it had 1" interval stitching inboard and 2" outboard, I could just grab the fabric and tear it off pulling the stitches right through the fabric. I'm leaning towards doing a bit wider rib stitching when I cover, but will definitely be using reinforcing tape under the rib stitching.
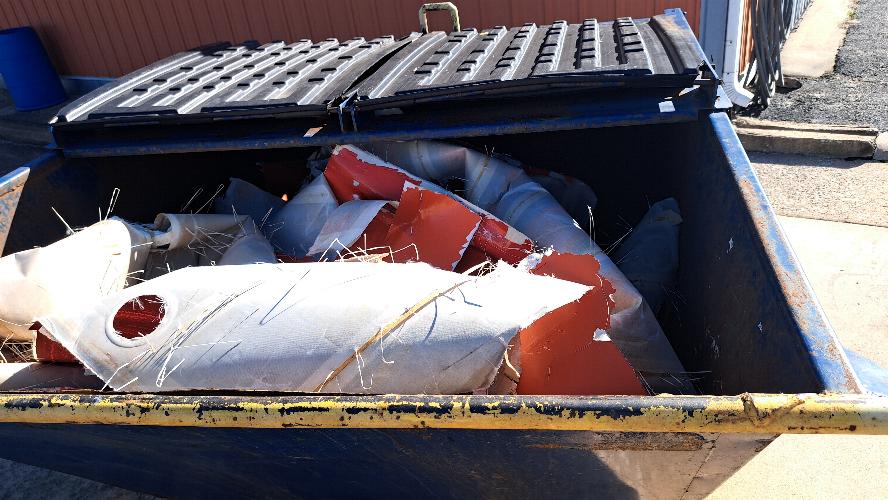
Dumpster full of my airplane.

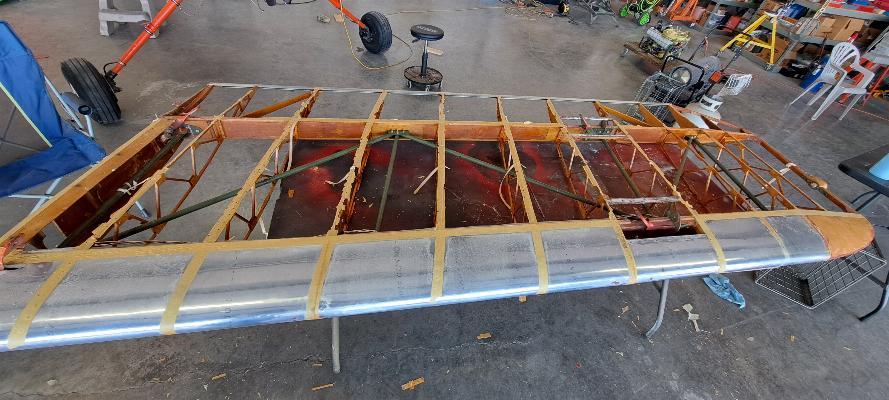
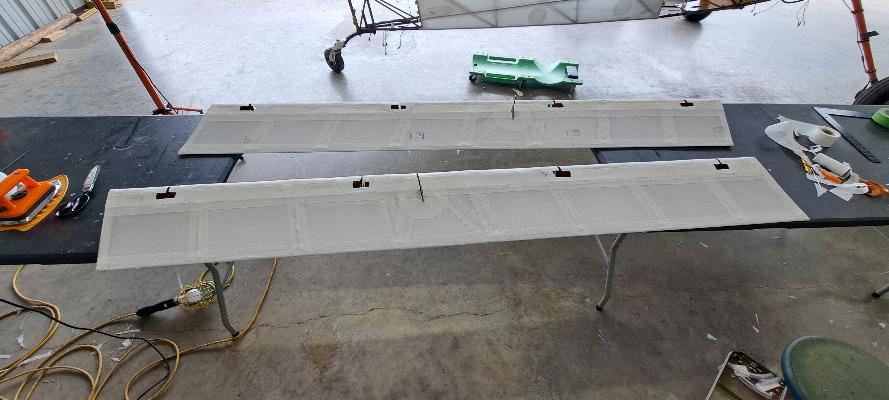
3/12/2025 - Time to start cleaning up the wings to get them ready for cover. I spent most of the day scraping the wings with a razor blade to peel off the decades old tape used to cover hundreds of tiny nails in the structure. The photo above is before and below is after. I'll still need to sand all of it and will varnixh the wood surfaces that will be exposed to the fabric cements with an epoxy based varnish.

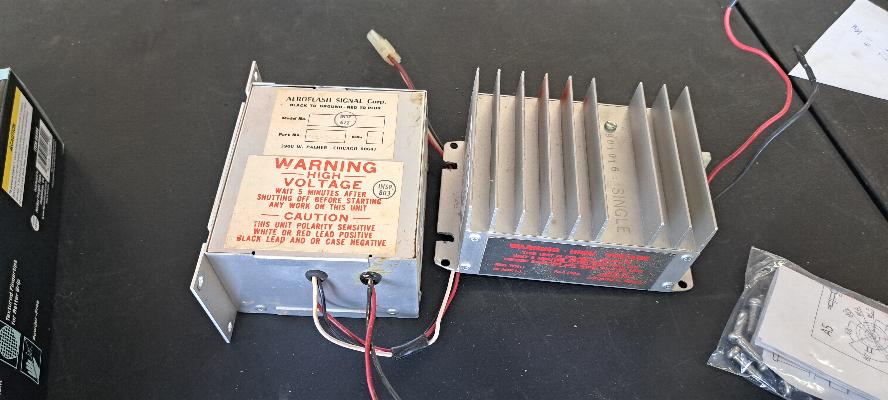
These strobe power supplies were also mounted at the tips of the upper wings with no way to remove them without cutting into the wing. Now they are out. Anyone need some AeroFlash Strobe power supplies? These were replaced with LED strobes a couple of years ago.
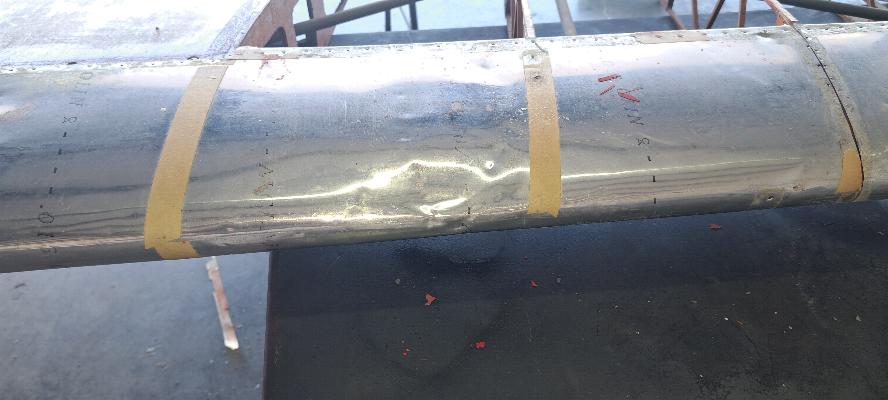
One more minor repair to do. I had an unfortunate encounter with the top of a tree on short final a couple of years ago leaving this damage to the leading edge metal. I'll use a bit of body filler, then sand back to profile.
3/13/2025 - No photos to show today. I did fill the leading edge dent shown above. I also did numberous small repairs to the wings. These wings have ribs made of 1/4" spruce amd 3/32" plywood. Strong as ribs, but after 45 years, they have a few bumps and bruises that required some minor splicing and epoxy work. I also scrubbed and sanded the dope off the contact surfaces of two of the wings. I hope to finish cleaning up the wings tomorrow. I also have a couple of nut plates that need to be riveted in to complete the repairs.
3/14/2025 - I made a trip to Searcy, AR to pick up a bunch of covering supplies from Jesse at AirTech. I did a lot of small repairs including the ones above. The rest are very similar where I scabbed a small piece of plywood to the side of a rib to reinforce or repair the rib. While the wings looked to be in decent shape, they are 45 years old and did have a lot of small nicks and bruises that needed some attention. I also stripped the fabric from the ailerons below. I haven't done a close inspection of the ailerons to get them ready for cover, but my initial impression is that they look pretty good. Three wings are now sanded and scrubbed with acetone to remove the old dope, so are ready for cover. I hope to get the 4th wing ready tomorrow.

3/15/2025 - The wings are all cleaned up now. I need to coat the wood with an epoxy based varnish, then they will be ready for cover. It seemed like every time I looked at the wings, I would find another crack that needed to be repaired. I think I have the last of them fixed and ready for cover.
3/16/2025 - I took a little bit of time today to varnish all the wood surfaces in the wings, both to seal them as well as to protect the finish by using a two part spar varnish that will not disolve and bleed through the the fabric glue. Upper wings above in the other hangar with the Cub and RV. Lower wings below in my maintenance hangar. Below that is the center section, also varnished and ready to go. Inter-Rib Lacing goes on next, then I'll start taping the ribs for the fabric. I failed to take photos, but also stripped the fabric from the rest of the tail feathers, so now all the old fabric is off. I also prepped the new Aux fuel tank mount and the elevators (with new trim tabs) for primer. Hopefully I can shoot them tomorrow (and maybe remember to take pictures!)
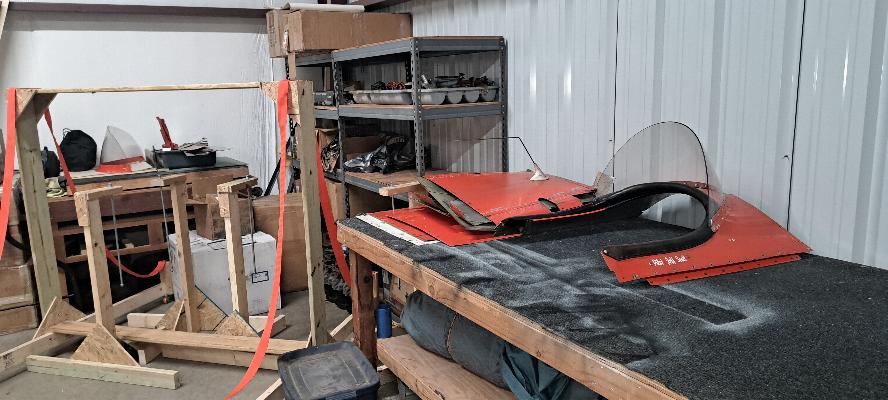
BTW, the certified coatings can you see in the photo is left over from covering the Cub some 13 years ago. Yes, that dope is still good and I still use it for spot repairs as necessary. The blue tarp looking thing folded up on the shelf of the bench on the right is an inflatable paint booth. When I get serious about painting, I'll inflate it in the maintenance hangar and will do my painting inside it.
AirTech covering process
I am covering this time using the AirTech process. Why? AirTech has a much nicer finish than the traditional dopes and even most paints, although I could have just bought their finish coat and used with any other process.. But the main reason is the amount of work. Using the traditional Nitrate/Butyrate process, I shot the Cub with 5 coats of clear nitrate to encapsulate the fabric, 5 coats of clear butyrate for build and fill, 5 coats of butyrate with silver paste mixed for the UV coat, then 5 coats of PolyUrethane paint to get it to cover the silver/gray UV coat (The gray was still showing through after 3 coats). That is 20 times that I painted every fabric part on that plane. It was on the 19th coat that I mixed the catalyst incorrectly and orange peeled the wings. My attitude with painting is that every time you pick up a spray gun, you are taking the opportunity to screw up a perfectly good project. I'd like to keep those opportunities to a minimum! With the AirTech process, you glue, stitch and tape just like any other process. But as soon as it is taped, you switch to the primer coat. You spray two heavy coats of high fill white primer. Sand lightly. Then spray one more coat of white primer. Then you switch to your color coat. Since the primer is white, you are spraying your color coat over white. That makes the colors really pop, and white is effectively a blank canvas that covers quite easily. Many are only shooting 2 color coats, and some are getting good coverage with just one coat. That totals up to spraying everything 5 times vs the 20 times I did with the Nitrate/Butyrate process. As much as I dislike painting, I'm all for only spraying 1/4 as many coats.

3/21/2025 - My first fabric covering in many years. I covered the trim tabs. They haven't been shrunk, stitched or taped yet. I was just trying to feel out how the glue works in the AirTech system. I'm still trying to make friends with this system, but I'm sure it will all work out as understand the process better. I figured by doing the trim tabs first, I would have to practice all of the skills necessary, and if I messed them up, it's such a small amount of fabric and glue that it would be an inexpensive lesson.
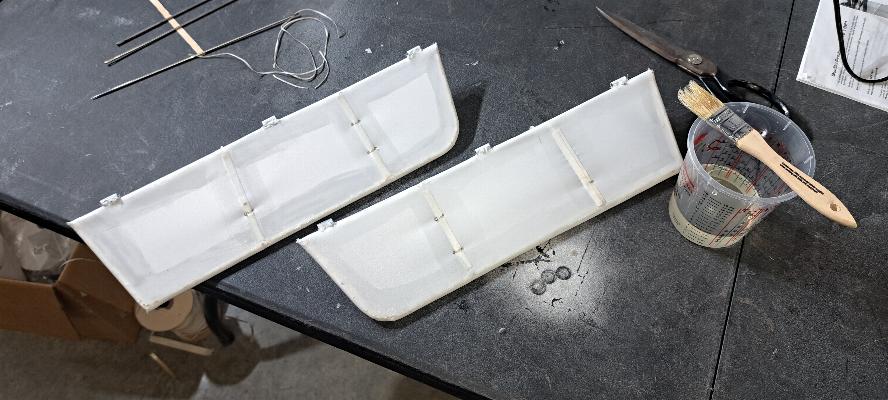
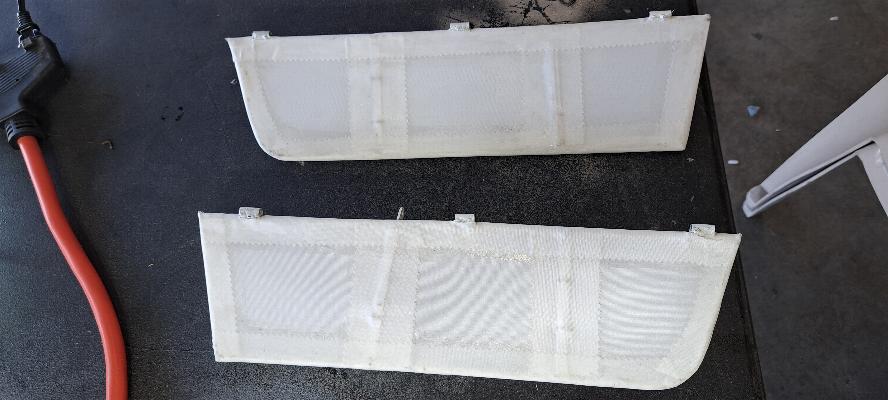
3/26/20025 - I continued working at making friends with this covering system. Here you can see reinforcing and rib stitching in the trim tabs. Below they are finish taped.
I also covered the horizontal stabilizers today. I've only done the first shrink and still need to stitch and tape. The fabric gets shrunk at least twice and up to 4 times if necessary. First shrink is at 225°. Second at 250°. And the third is at 275°. It can be heated as high as 350° for more shrinkage if necessary. Above that, the fabric will go slack and is ruined.
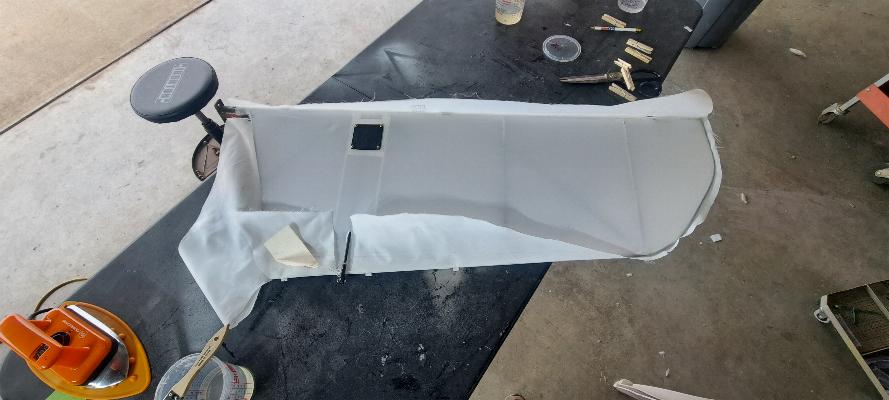
 3/27/2025 - I covered the rudder
and right elevator today. No stitching or taping yet. The
black square in the bottom of the elevator and small black rod exiting
the bottom of the elevator are the Ray Allen trim servo and actuator
rod for the trim on the right elevator. There is another servo in
the left elevator as well. It seems like my work on this is
moving a bit slowly, but there are some complexities to covering these
smaller parts that don't exist in the larger parts. Also, I had
the control rod exiting the top of the elevator rather than the bottom.
My mistake. I had to move the control rod exit to the bottom
surface and replace the top fabric, so got to do half of that elevator
twice. But my work is improving and getting faster with practice.
I can see that the covering, painting and reassembly is going to
be a very long process.
3/27/2025 - I covered the rudder
and right elevator today. No stitching or taping yet. The
black square in the bottom of the elevator and small black rod exiting
the bottom of the elevator are the Ray Allen trim servo and actuator
rod for the trim on the right elevator. There is another servo in
the left elevator as well. It seems like my work on this is
moving a bit slowly, but there are some complexities to covering these
smaller parts that don't exist in the larger parts. Also, I had
the control rod exiting the top of the elevator rather than the bottom.
My mistake. I had to move the control rod exit to the bottom
surface and replace the top fabric, so got to do half of that elevator
twice. But my work is improving and getting faster with practice.
I can see that the covering, painting and reassembly is going to
be a very long process.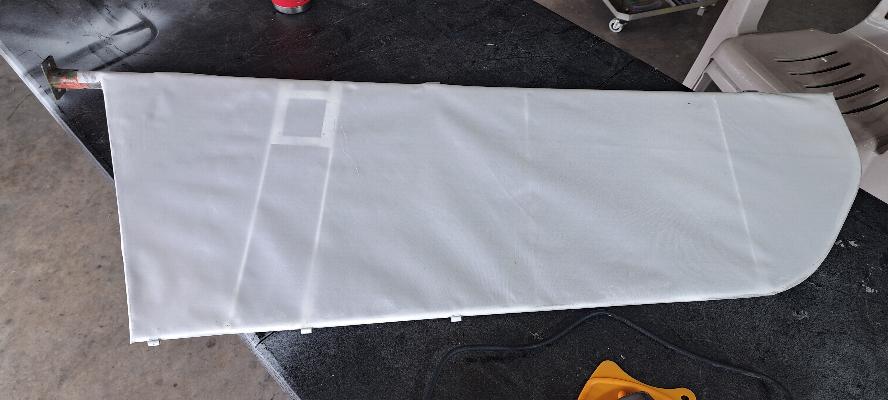
3/28/2025 - Covering the left elevator. The fabric is glued onto the bottom, but not taughtened.

The first taughtening with an iron at 225°, then the hole cut to insert the Ray Allen Trim Servo.
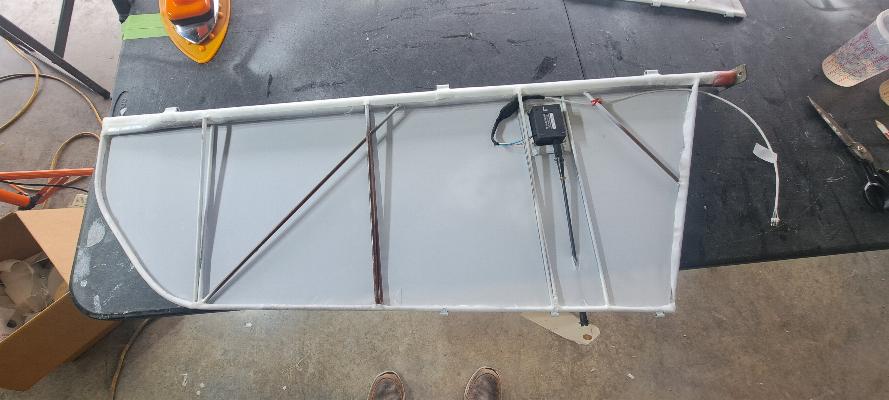
From the top side, with the servo installed and the control arm exiting back through the bottom fabric where it will attach to the trim tab.
I have the top side fabric tacked on, but you're looking at the bottomg side before I trim the fabric and stick it down.
Top side ot the same elevator before the fabric is taughtened.
Fabric had it's first shrink with the iron, reinforcing tape added over the ribs and rib stitching completed on this elevator. It still needs to be taped, then will be ready for primer. Note the book in the upper left of this photo. Yes, I was struggling to relearn the Modified Seine knot for rib stitching. I've got the knot down now, but am having some issues with the old rib stitch I'm using. I can't pull all the slack out from between the stitches, although the stitches themselves are locking down tight. I'll switch to my new roll of stitching cord tomorrow and see if that doesn't improve things a bit.
3/29/2025 - Giving myself the night to think about it, this morning I had no problems with the rib stitching knots I spent today stitching the rest of the tail and did the final shrinking of the fabric. The fabric was shrunk at 250, 300, and 350° for a final set. It's all tight as a drum head now! The glue joints were all sealed down at 250°. That's a lot of ironing! The lines you see penciled in on this stabilizer are markings where I need to paint on two coats of fabric glue for taping over the stitching. All of the tail parts are now marked out and ready for me to start applying glue next time I'm at the hangar. This is a much slower and more tedious process than I remember it being. But, it has been 14 years since I last covered a plane. My hands are a wreck from all the pulling on the rib stitching. Glad they will have some time to heal before I get back to any more stitching.
3/30/2025 - I got started taping the tail feathers. I have all of the ribs taped and will finish doing the outside edges tomorrow.
3/31/2025 - Finished taping the perimeter of the tail feathers. Both horizontal Stabilizers, both elevators, both trim tabs, and the rudder are all completed except for the addition of drain grommets.

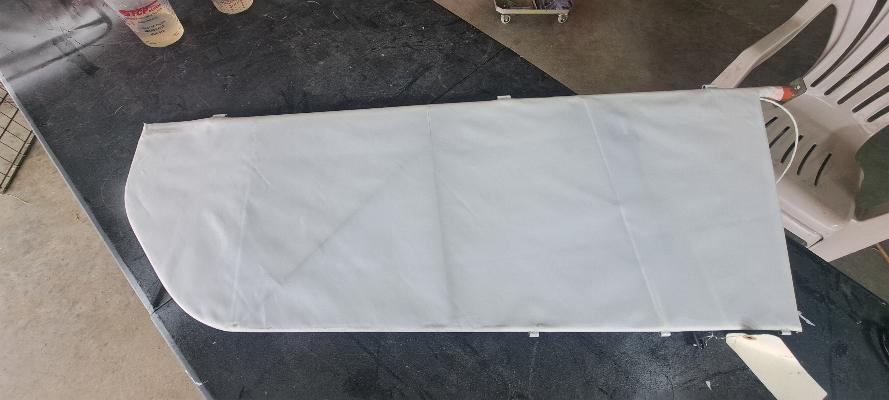
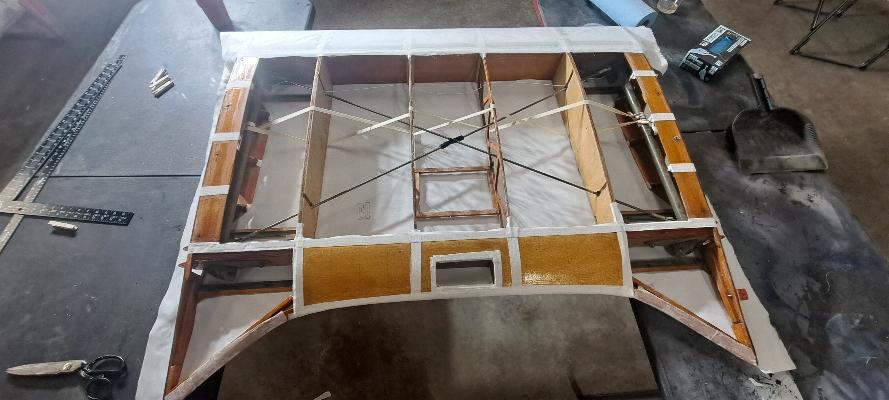
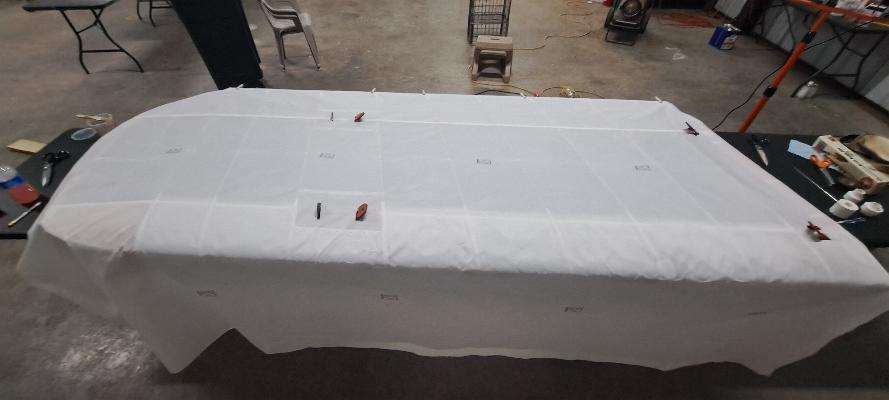
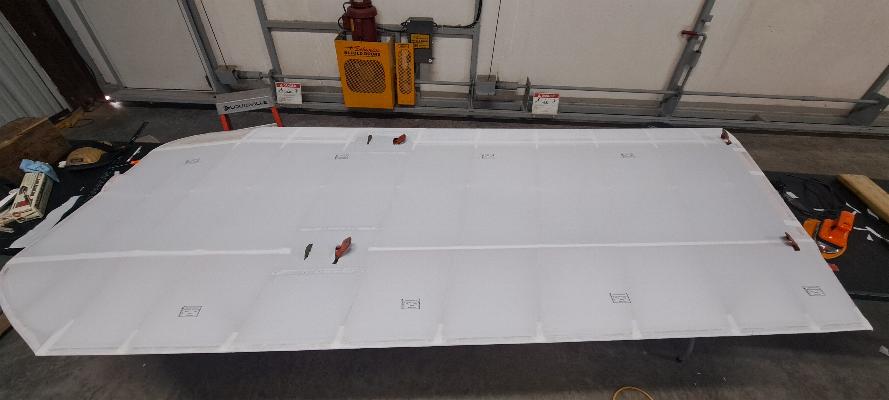
4/3/2-25 - I'm covering the center section today. The photo above is a flat sheet with 4 slits in it for the center section mounts. This is the bottom side of the center section.
I have tacked the fabric at the ends and trimmed around the edges.

I mistakenly cut out the access panel in the center of the center section. That was only meant to be cut if needed, so I put a patch over it.
The panels are cut out for the cabane struts and cross brace mounts as well as the handle that is just above the front seat to assist the passenger in getting in and out of the cockpit. I went over the fabric with an iron at 225° to draw it up some and seal the glue, but haven't really shrunk it yet. It will get three passes of shrinking later.
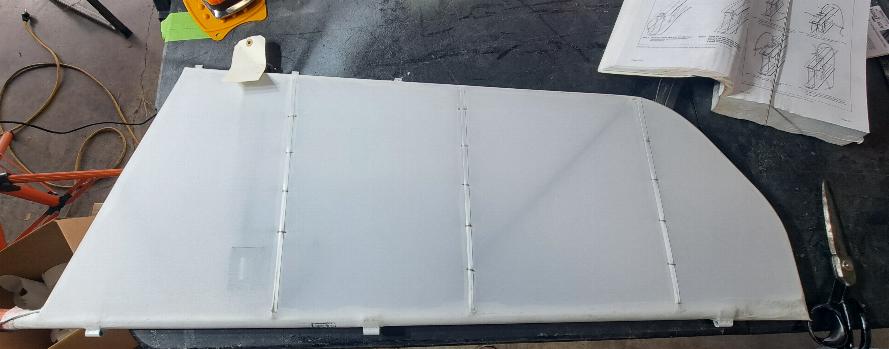
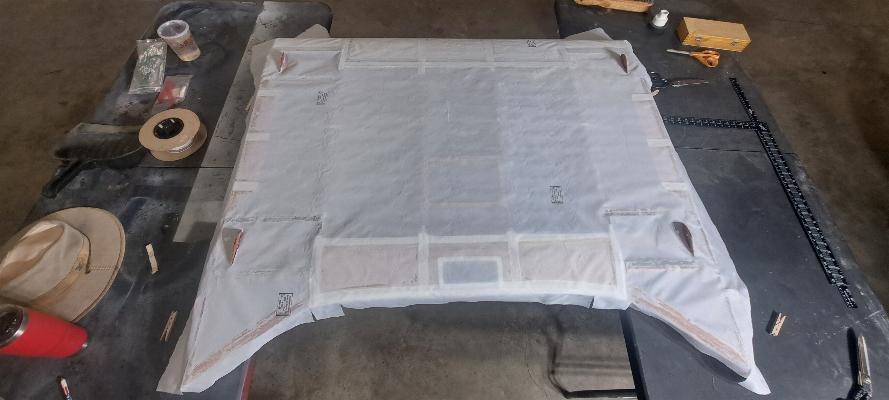
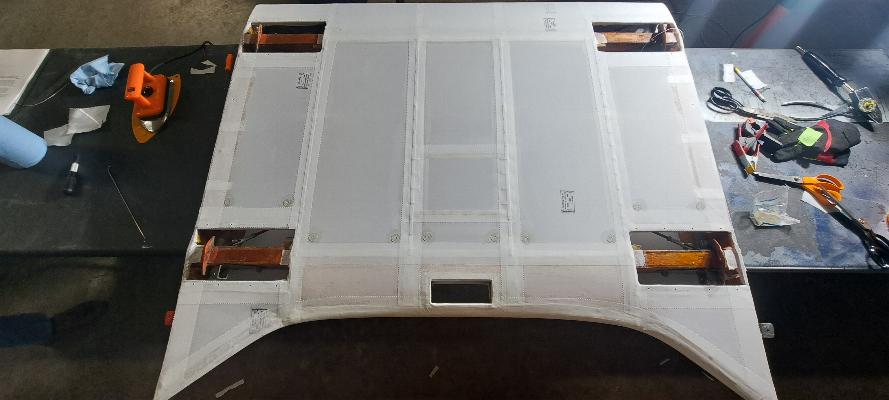
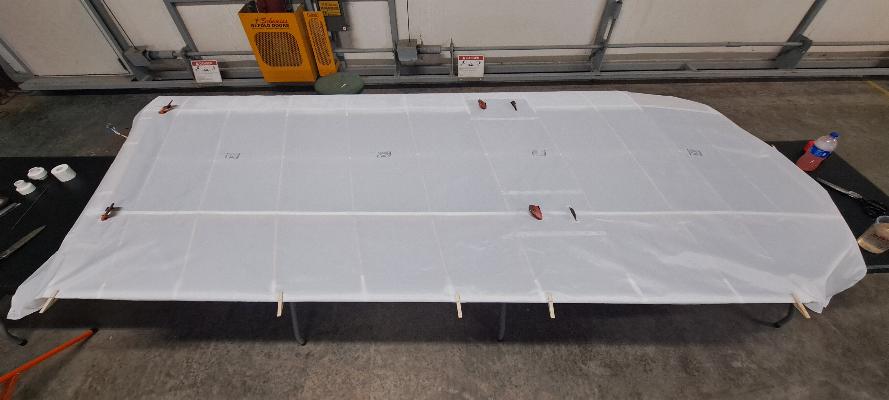
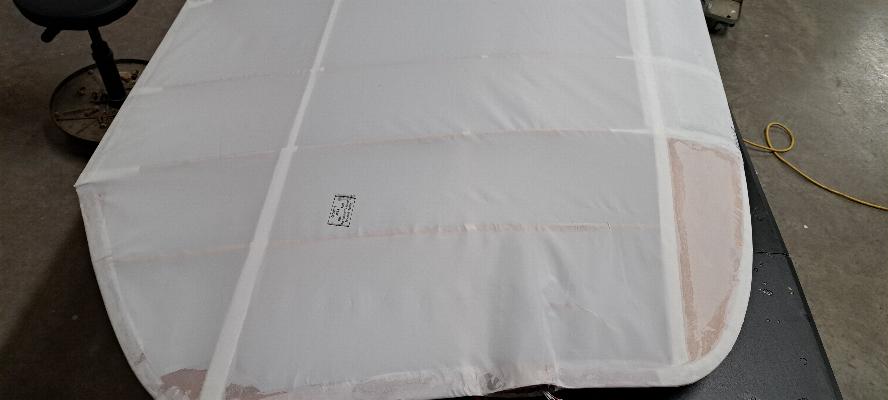
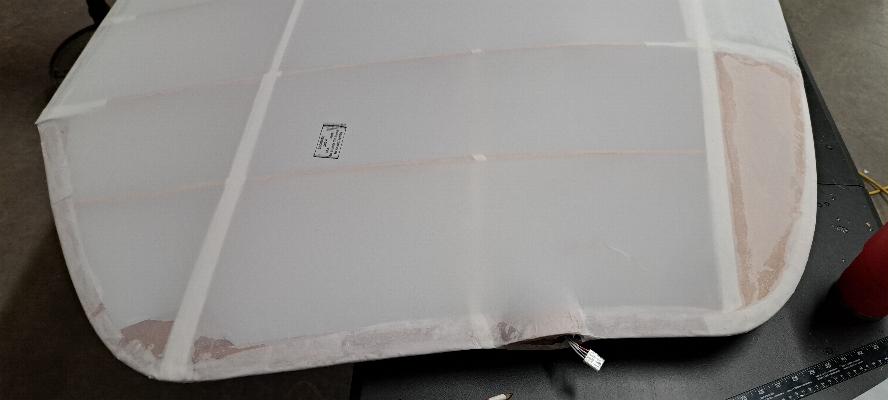
This is the top side of the center section. All the white tape you see is medical tape I use to cover all the nail heads in the wood. It keeps them from protruding back up through the fabric if a nail works loose.
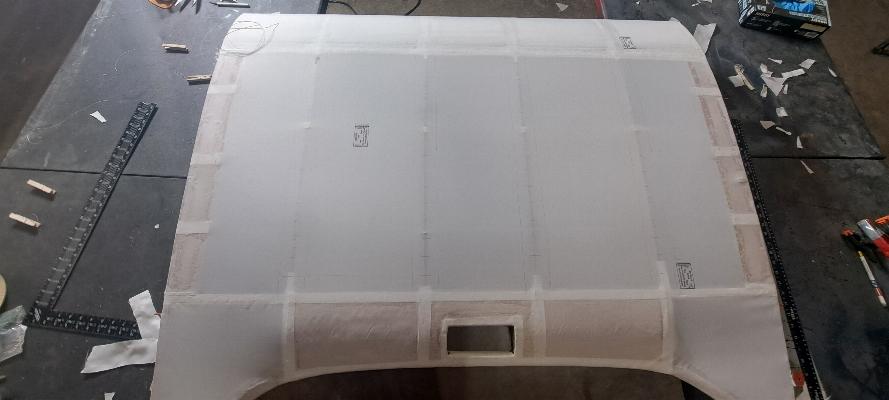
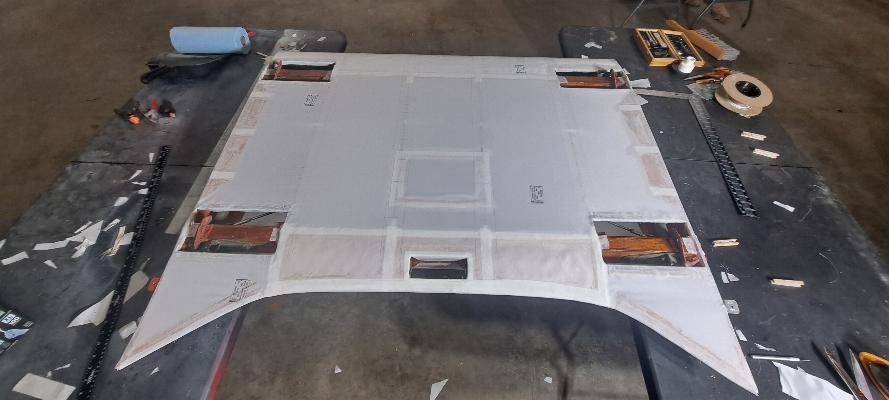
Top of the center section all glued and trimmed. If you look closely, you'll see my markings on this for the rib stitching. This section gets stitched at 1-1/2 inch intervals. You'll see the same markings on the bottom side a couple of photos up. That will be tomorrow's sewing project.
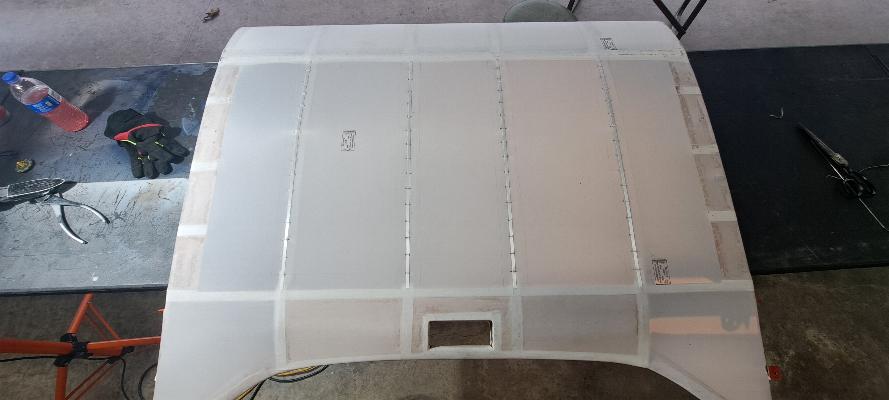
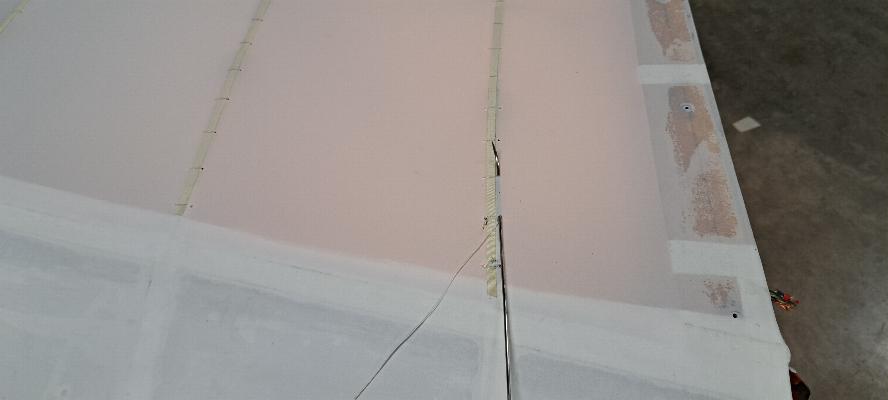
4/4/2025 - I shrank the fabric at each heat setting (250, 300, & 350°F), then poked the holes for the rib stitching and stitched the center section. Tomorrow I'll tape the center section.
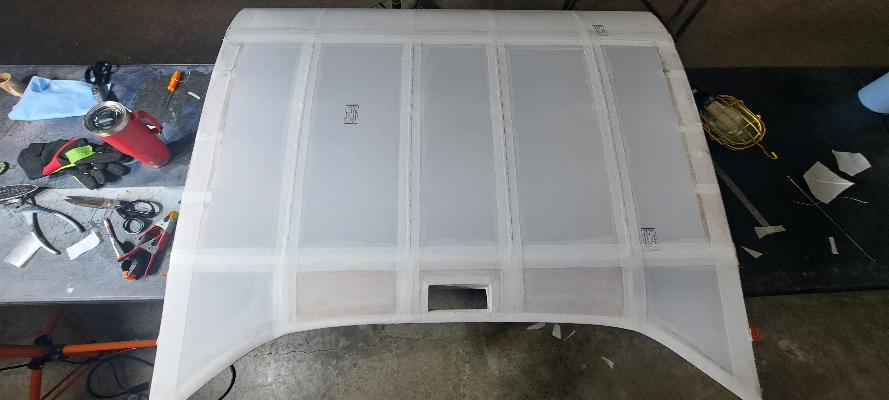
4/5/2025 - I applied the finish tapes and drain grommets to the center section. It is now complete and ready for primer.
I decided to add an access cut out to disconnect the trim servo linkage on both elevators should one of them ever need to be removed or repaired. They are unlikely to need service, but sure as the world, if I failed to provide access points, one would fail. Normally I would buy some .030" acetate sheet and cut it to make the perimeter support for the access panel. A small sheet of .030 acetate from Aircraft Spruce is $140!!! I ordered 12 x 12 acetate sheet on Amazon, but found that it was thin acetate for presentation covers. I cut the pattern that I wanted and stacked up 7 thin sheets and bonded them together with the fabric glue, then glued them in place and covered with fabric to make the cutout.
I also added the drain grommets to all the tail feathers. So, all these parts, horizontal stabilizers, elevators, trim tabs, rudder, and the center section are all completed and ready for primer. I need to take a couple of days to work on an engine project and do some work for the EAA Chapter this week, then will be back to covering the wings next. If I get ahead with the inventory and orders on the engines, I might get started on the wings this week.

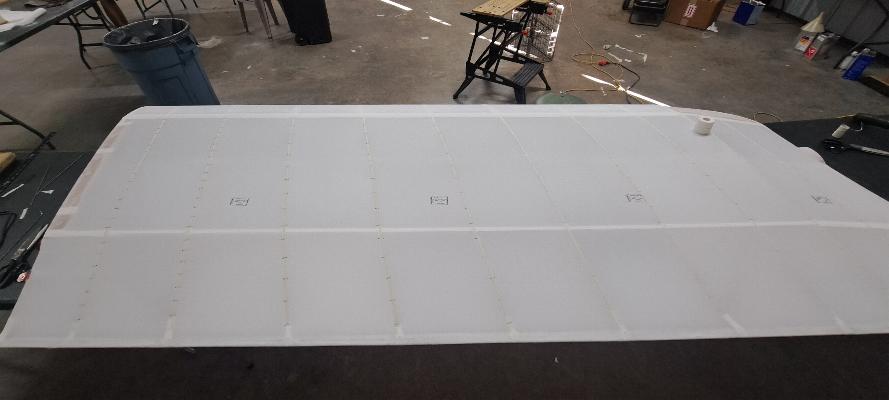
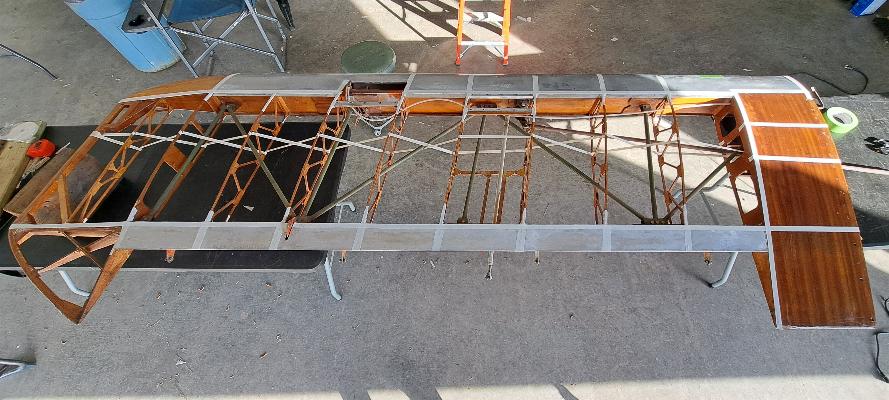
4/8/2025 - Starting the fabric work on the left Upper wing. I use medical tape over any sharp edges and over top of the many nail heads that could be prone to working their way out, which would cause damage to the fabric. Photo above is the upper side of the wing.
4/8/2025 - Time to cover this wing. I'll be starting with the bottom side as shown above. In the photos, the wing looks to be horribly warped. That's because I'm using the .5 size on my phone camera, so it's a bit of a fish eye lense to get the whole wing in. The wing is actually pretty straight with a few small exceptions where it has some damage from shrinking the original cover 45 years ago.
10' of fabric draped over the bottom of the wing with slits cut for the flying wire and strut attach fittings.
The front is tacked down with glue and the back held in place with clothes pins.
After glueing the back and tacking down the edges, I flipped it over and have the ends held in place with clothes pins.
Ends are now glued down.
I flipped it back over and cut out the access panels for the flying wire and strut attach covers.

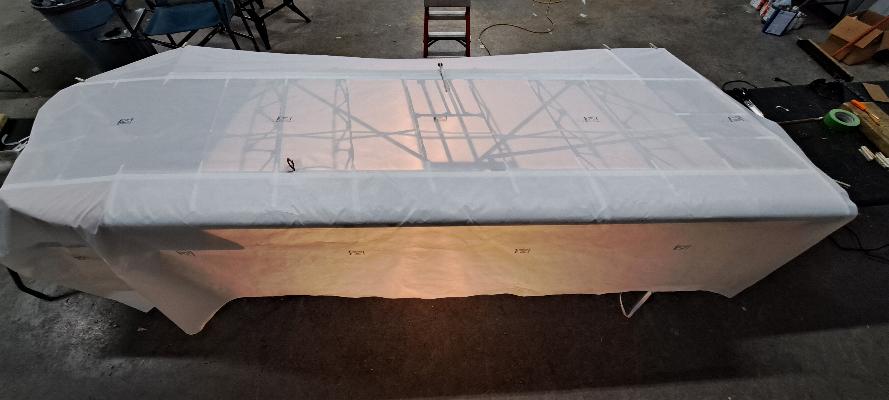
Now covering the top of the wing. Again, 10' of fabric draped over the wing.

And now it is all trimmed and glued, then lightly shrunk at 225° and the glue sealed down at that temperature. I'll shrink it 3 times tomorrow, then will be ready for the rib stitching.
4/10/2025 - Today was shrinking, installing stitch reinforcing tape, and rib stitching. First off today was to iron the wing 3 times. Once at 250°, once at 300°, and once at 350°. Above I've got a light bar under the wing so I can clearly see the internal structures while installing the rib stitch reinforcing tape. Below is after a bunch of rib stitching. I have all but the last two ribs stitched now. You can see the much tighter stitching pattern at the inboard end of the wing where it is in the prop wash. That gets 1-1/2" stitch spacing while the rest of the wing gets 2-1/2" stitch spacing. Each stitch goes through the wing out the bottom side, then back up through the wing to the top side. Then Each stitch gets tied off with a modified Seine knot. Then the stithc cord is pulled back down under the surface and poked back up through in position for the next stitch. It is a labor intensive, slow process. I figure it takes about a week to cover, shrink, stitch and finish tape a wing.


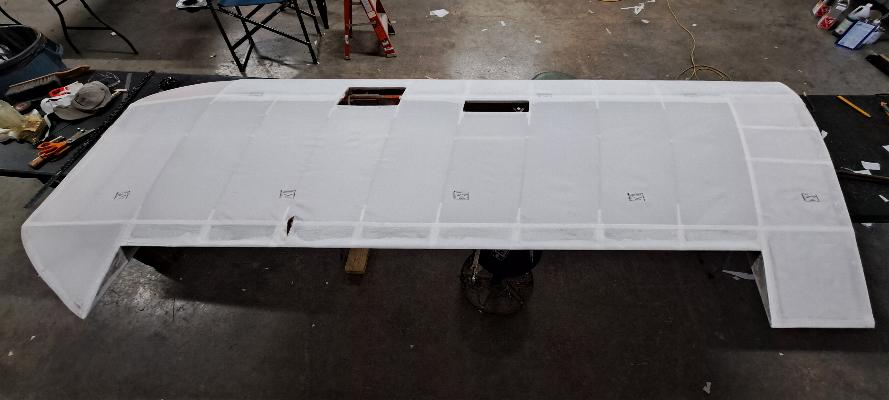
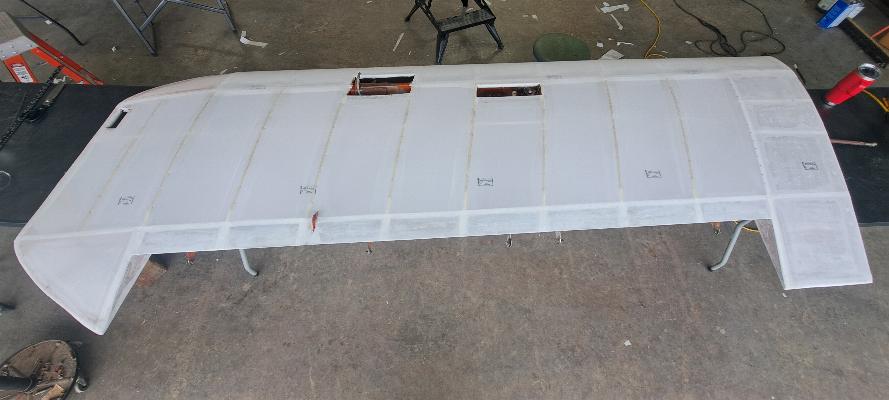
4/11/2025 - Completed the rib stitching on the left upper wing. I've painted the areas that will get finish tapes with fabric glue. I'll start installing the finish tapes tomorrow.
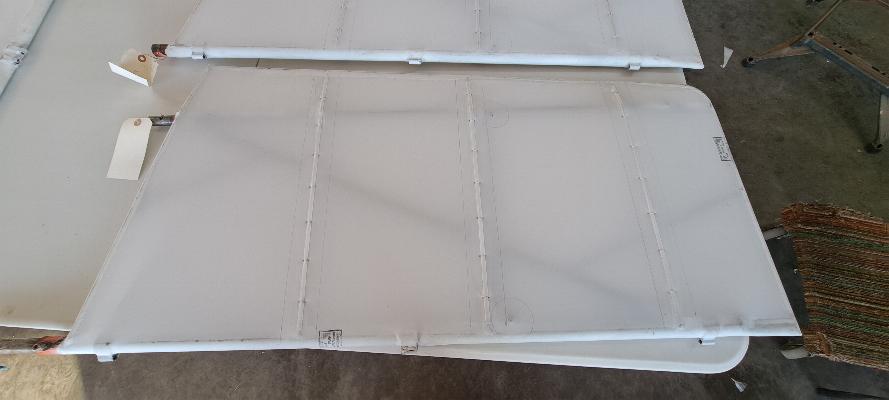
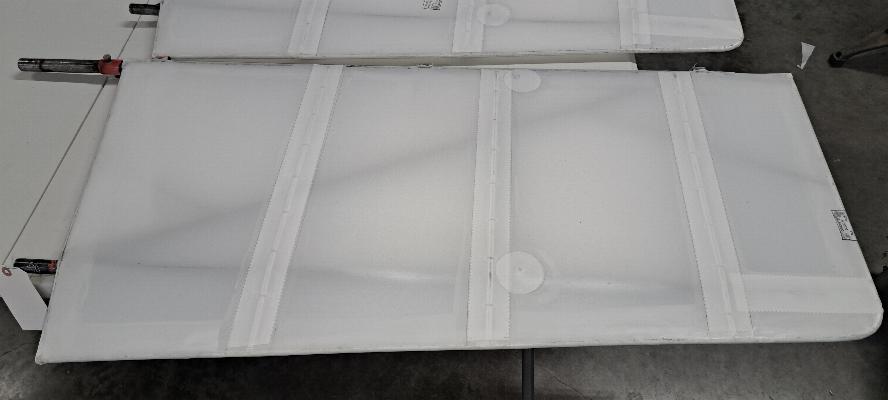
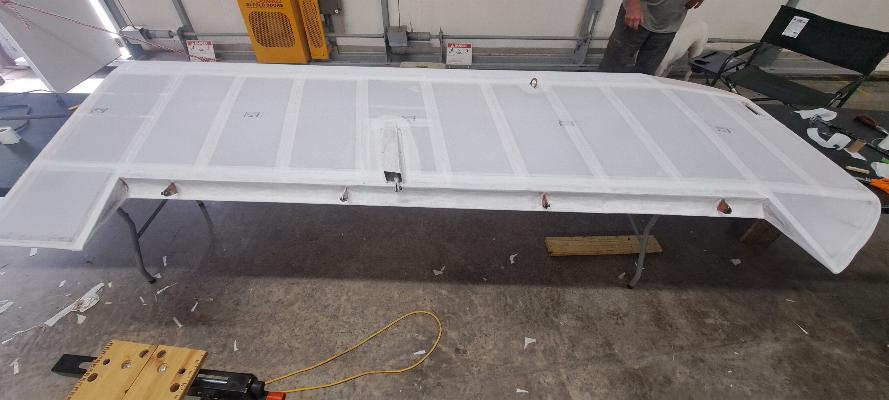
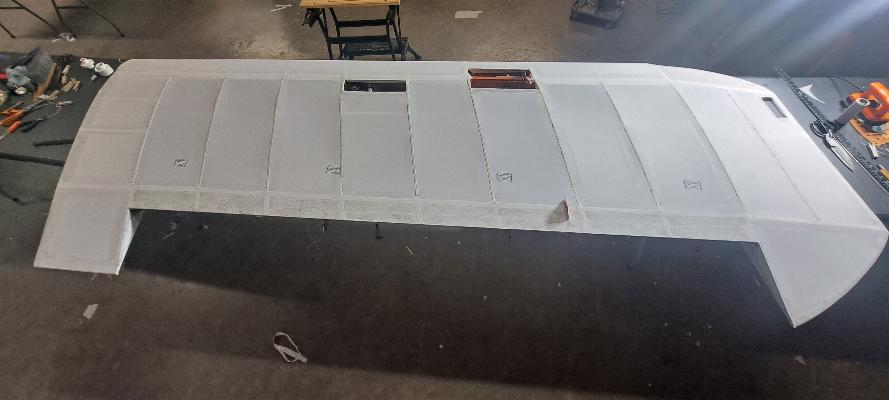
4/12/2025 - Left upper wing covering is now completed and ready for primer (minor exception will be the addition of inspection holes and drains/vents.. Bottom side above and top side below with the next wing (right upper) in the rack.
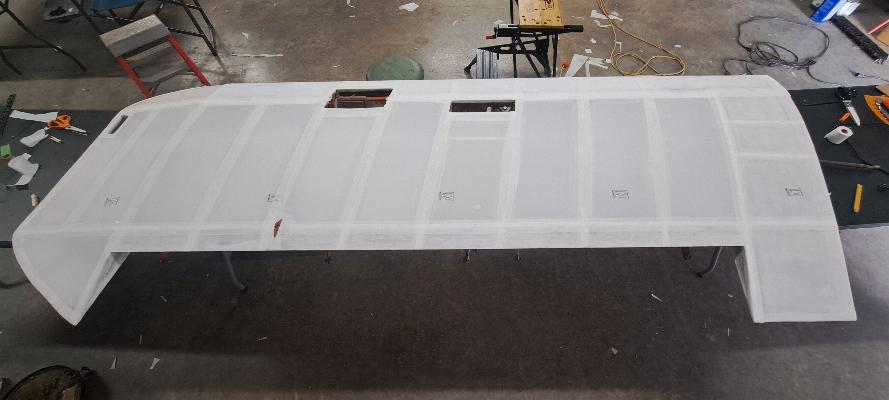
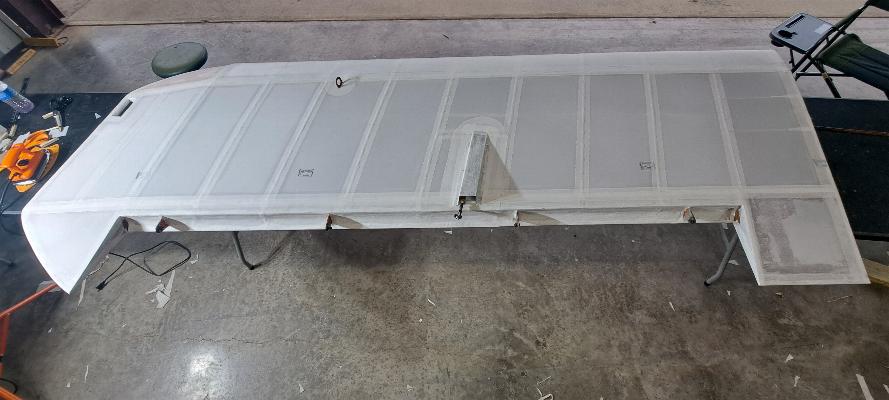
4/14/2025 - Covering the upper right wing. Phot above is the top side, and below is the bottom side. In these photos, I had just installed the interrib lacing.
Flat sheet of Dacron (Ceconite 102) laid out over the bottom side of the wing. I made cuts for the flying wire and cabane strut mounts, then covered as before.
Wing is flipped over and ready to cover the top side.

Fabric is laid out on the wing and trimmed.
Back to the bottom side. Both sides are covered and wrinkles removed with an iron at 225°. I'll let the glue set overnight, then tomorrow will shrink the fabric three times, then will install reinforcing tapes, paint on more glue for the finishing tapes, measure and mark the wing for rib stitching and hopefully will get started on the rib stitching. I should finish the stitching on Wednesday and will do the finish tapes on Thursday. Then this wing will be ready for primer.
4/15/2025 - I wanted to show an example of shrinking the fabric. In the photo above, thanks to the compouond curves, I just couldn't get this fabric to lay flat. I had already ironed it at 225°, which is usually enough to pull out any wrinkles. Yes, it looked even worse before that. In the photo below, I had ironed the fabric at 250°, which did a good job of taughtening the fabric and pulling it into shape to match the compound curves of the wing. In the third photo, it has been taughtened again at 300° and 350° to set the fabric. The difference from the first two photos is readily apparent. The change to the last photo is visible, but not readily. However, in the third photothe fabric is quite tight.

This is the 12" curved needle I use for rib stitching. You can see why I use a curved needle in this photo as it makes it easy to run the stitching cord under the fabric to the next stitch.
End of the day today. The wing has 5 ribs stitched and 5 more to go. I should be able to finish it tomorrow and move on to finishing tapes.
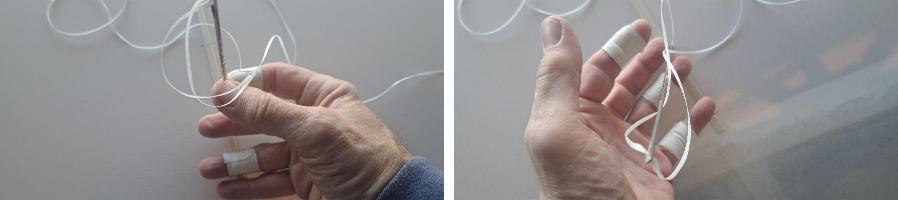
4/16/2025 - Hands taped for rib stitiching. If one is stitching properly, there is a lot of pulling on the rib stitch cord to get the stitches tight. With the beeswaxed rib stitch cord, that tears the skin and causes blisters rather quickly.
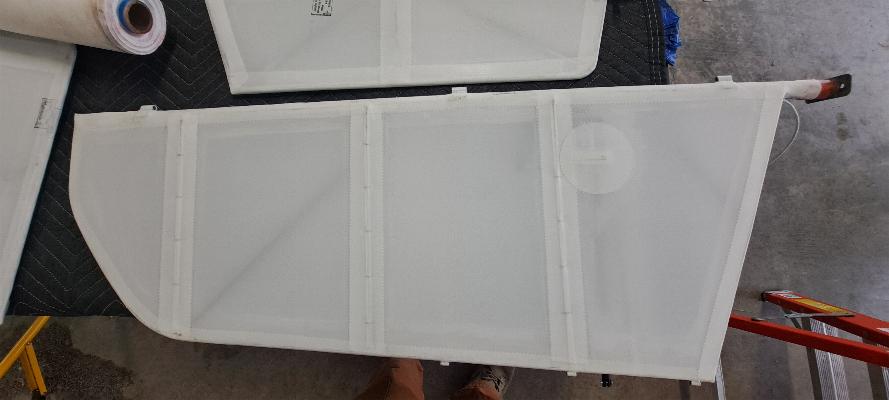
4/17/2025 - Right upper wing is now completed and ready for primer. Two down, two more to go! Note the drain/vents are on the trailing edge of the wing and an access cutout is installed out towards the wing tip. I haven't decided whether to install more access cutouts or not. Right now, I'm thinking not since there's really not much inside the wing, and the wing has large access panels where the flying wires and cabane struts attach. Anything inside the wing can be pretty easily accessed with a boroscope.
Starting on the left lower wing. This view is looking at the bottom of the wing.

Interrib lacing is now in and snugged up to pull the ribs straight. The fairing for the aileron control was removed and will be reinstalled later. Athletic tape has been placed to cover all the various nail heads and sharp points that could damage the fabric. All points where the fabric will contact the wing have now been painted with two coats of fabric glue.
Upper side of the same wing, also all prepped for fabric. I'll get started installing the fabric tomorrow. The large wooden area on the right side of this photo is the step pad for climbing in and out of the cockpit. That will be covered with 2 layers of fabric, then coated with non-slip wing walk material. The plastic line running just behind the front spar from the inboard edge of the wing most of the way out is the tube that runs from the Pitot tube to the airspeed indicator. The pitot tube gets mounted to the front of the left front strut brace that connects between the upper and lower wings.

4/18/2025 - A layer of fabric is on the wingwalk/step pad.
Flipped over upside down with fabric draped over the wing and held in place with some clothespins on the trailing edge. Also note a slit in the fabric where the tiedown ring sticks through.

Same as above, but the photo is taken from the trailing edge. It's pretty obvious where I'll need to cut out for the aileron.
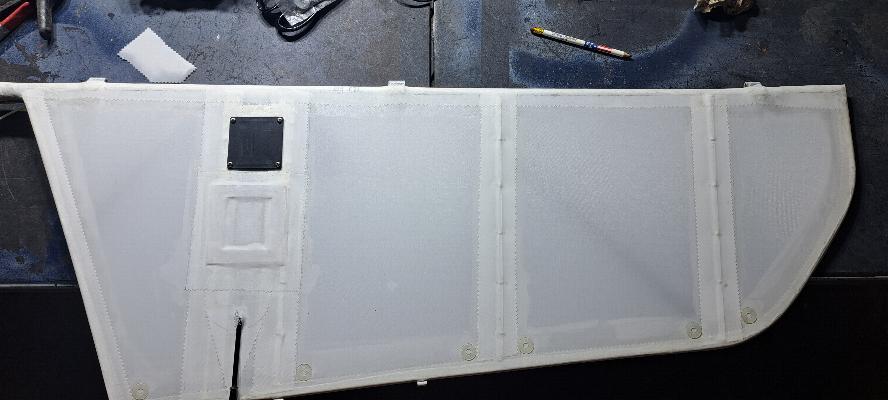
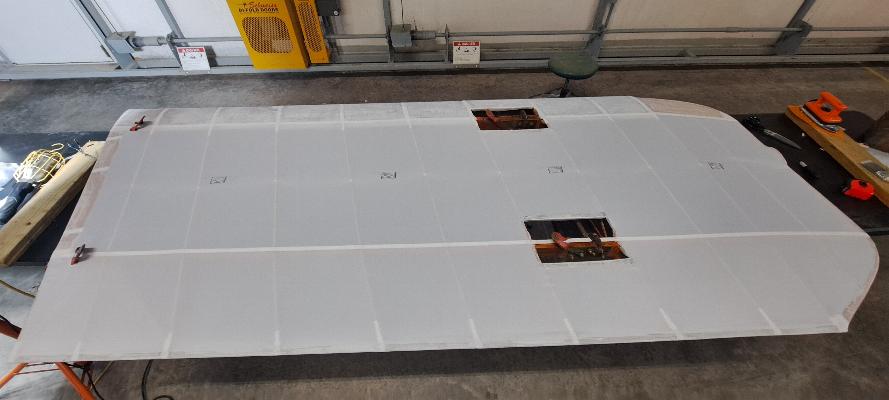
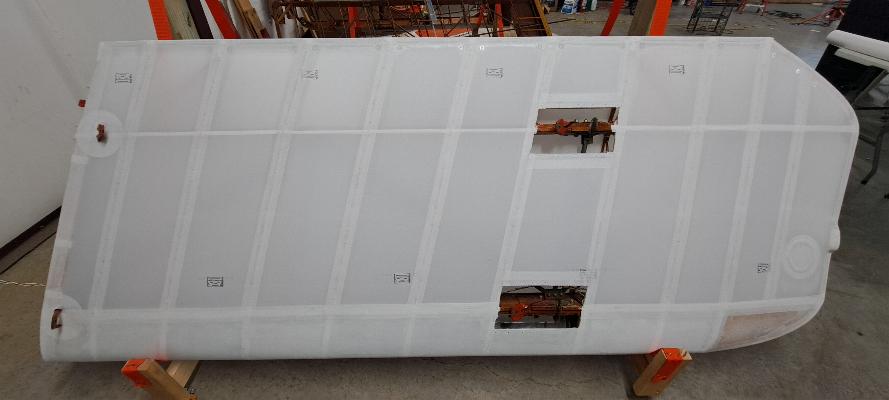
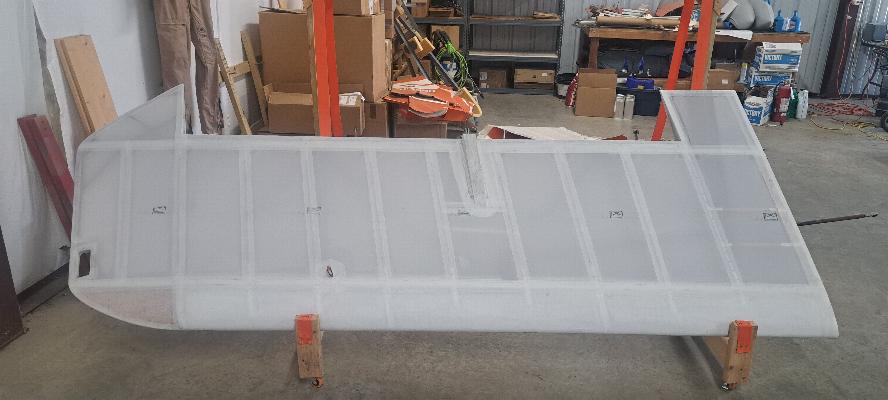
Both sides covered, trimmed and glued. This photo is the top side of the wing. The aileron section is cut out and fabric attached all the way around on both sides of the wing. The big hole in the front is an access cover where the landing wires and front of the outboard struts and wire braces all attach. The second hole is an access panel to gain access to the aileron bellcrank for maintenance. The small fitting protruding through the fabric towards the trailing edge is the attach point for the outboard. strut and wire braces. Tomorrow, I'll shrink the fabric and will get started with the rib stitching. I would like to think I'll complete the stitching on this wing tomorrow, but that would be pretty ambitious.
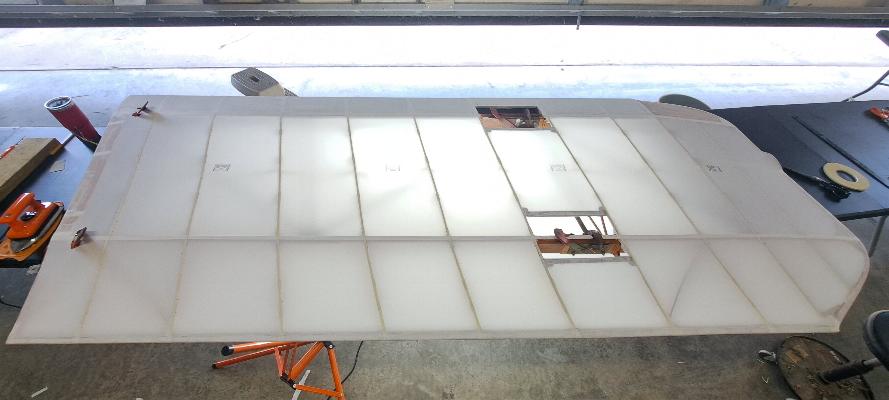
4/19/2025 - I made it. All stitched in a day! I spent most of the day ironing and sewing. I shrank the fabric 3 times with the iron, so the fabric is now properly taughtened. Then I did a lot of sewing, stitching the fabric onto the ribs. The photo above is the top of the wing and the photo below is the bottom. In the photo above, the rib at the far right side is part of the step pad, so is impossible to access to rib stitch. I used a different reinforcing tape on it, then nailed through the tape with tiny spar nails into the rib. The fabric is also glued to the step pad, so it should not lift up. I also nailed the fabric to the bottom of the same rib in the photo below at the left side. Both sides of the wing have been prepped with glue for applying the finishing tapes, which I'll do either tomorrow or Monday.

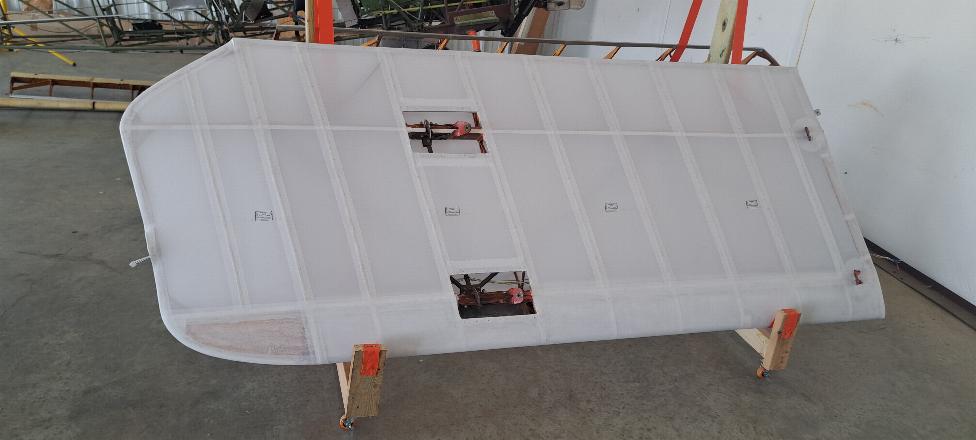
4/20/2025 - Easter Sunday - Bottom of wing (above) after adding finishing tapes and installing the aileron control rod fairing. Below is the top side of the wing. I still need to iron the edges of all the finishing tapes and add the drain/vents, then should have this wing completed tomorrow. One more wing, two ailerons, and the fuselage are left to cover.
4/21/2025 - Left lower wing completed and back in the wing holder. Below is the right lower wing almost ready for cover. I have the nails all taped, but haven't put in the interrib lacing yet. The covering will go on hold for a bit while I enjoy some company at home, and build a couple of engines.

4/29/2025 - Why the engine photos? This is the project that's keeping me away from the fabric work for now. I need to build these two O-360s. However, when I went to start assembly today, I found that one set of main bearings was incorrect, so had to order them again. That means this project goes on the shelf for a few days while I wait for parts, so I'm back onto the fabric work on the Charger.
 So, this afternoon I cut
and fitted the fabric to the fourth wing. I didn't take a lot of
photos since they look just like the other wing, only backwards.
So, this afternoon I cut
and fitted the fabric to the fourth wing. I didn't take a lot of
photos since they look just like the other wing, only backwards.

4/30/2025 - Today was rib stitching the last wing. Below, the rib stitching is completed. I'll do the finishing tapes tomorrow. I'll still need to stitch the ailerons and one or two rows of stitching in the vertical stabilizer.
5/1/2025 - The last wing is now ready for primer. Still have to cover the ailerons and aft fuselage, but since the main bearings were delivered for the engine builds today, I'll switch modes and will start building engines again tomorrow. the biplane project will likely be on the shelf for a couple of weeks.

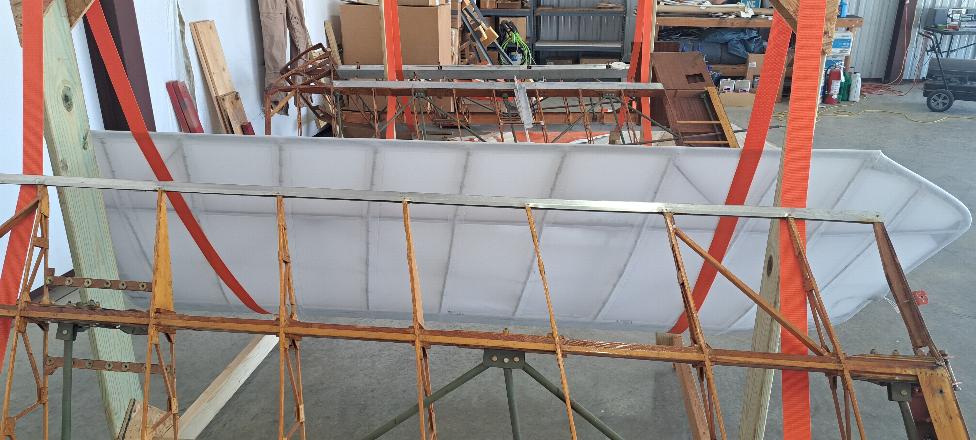
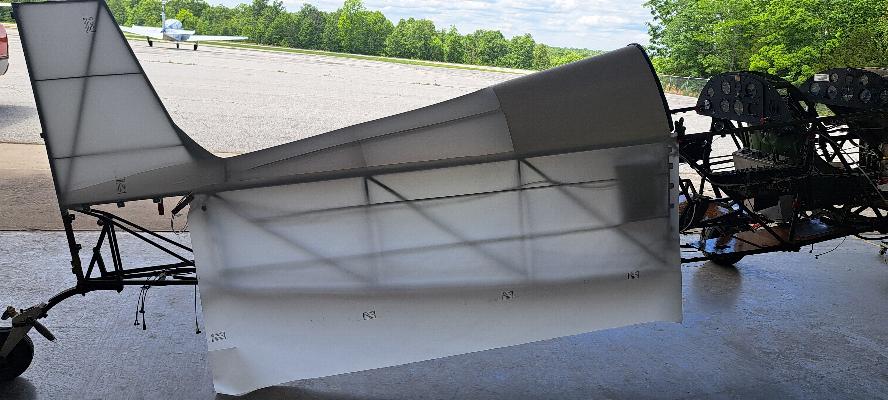
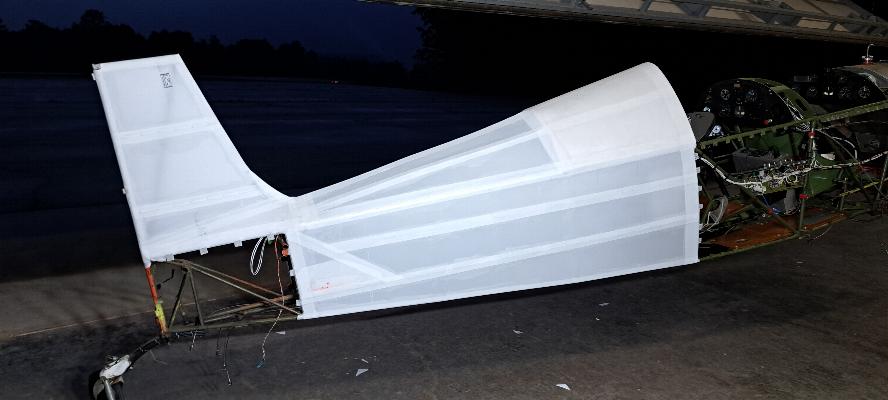
5/5/2025 - Covering the aft fusleage. The compound curves created by the vertical stabilizer creates some challenges in covering the aft fuselage using flat sheets. The first cut is a single piece that wraps around the back end of the vertical stab, then is glued to the leading edge after trimming.
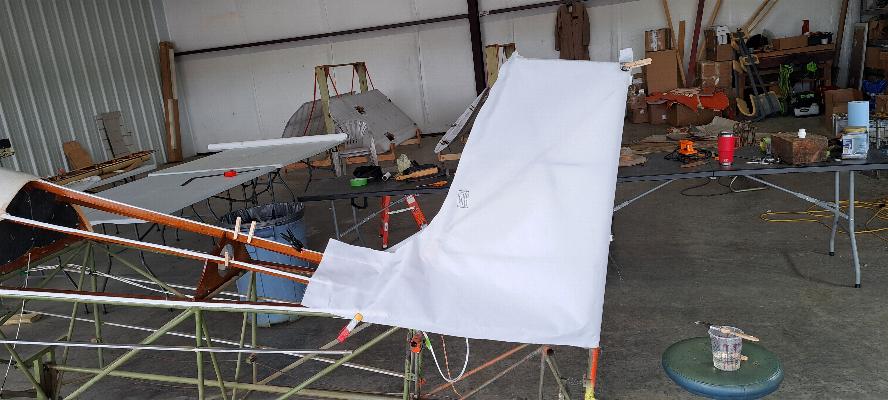
Trimming the leading edge of the stabilizer.
Gluing the fabric in place around the edges.

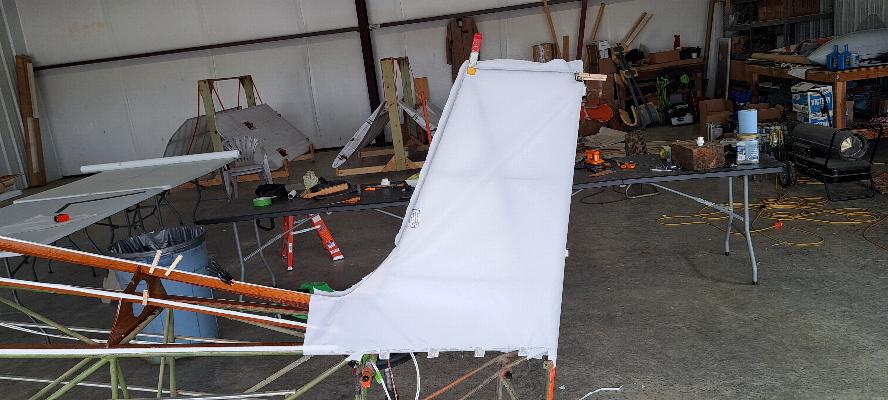
Both sides are glued in place now. You can see lots of wrinkles created by the compound curves in the tail.
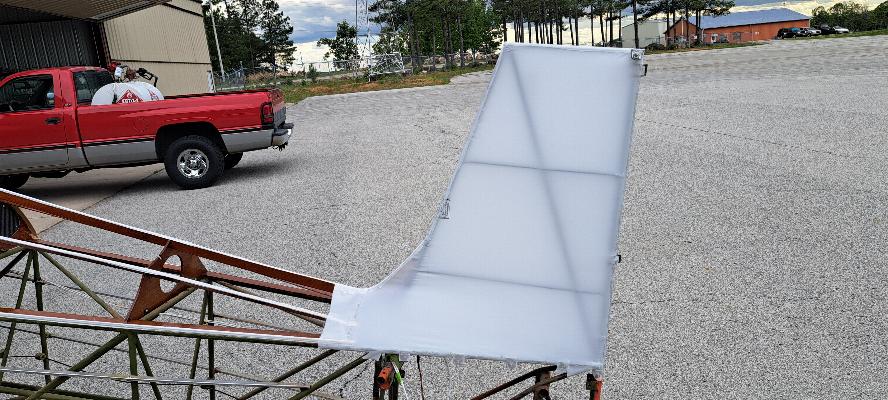
I had to shrink the fabric at both 225° and 250º to get a reasonable fit to the tail. I'll still need to shrink it two more times to properly taughten the fabric.
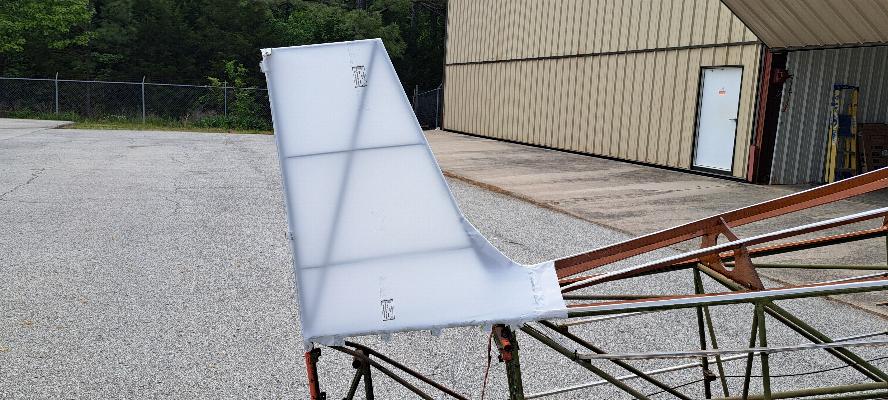
Both sides glued down with first shrink done. This is where I quit until I have the whole tail ready.
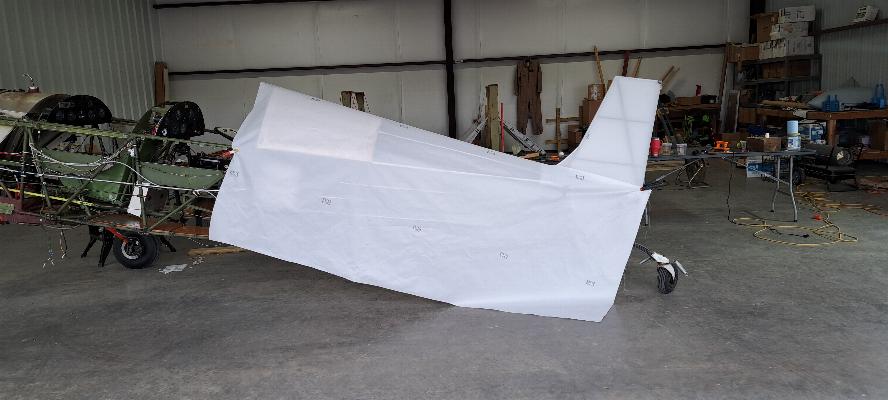
covering the turtle deck and aft fuselage from flat sheet. The photos above and below are the single sheet draped over the fuselage.
Fabric trimmed. It's closer, but will require more trimming.
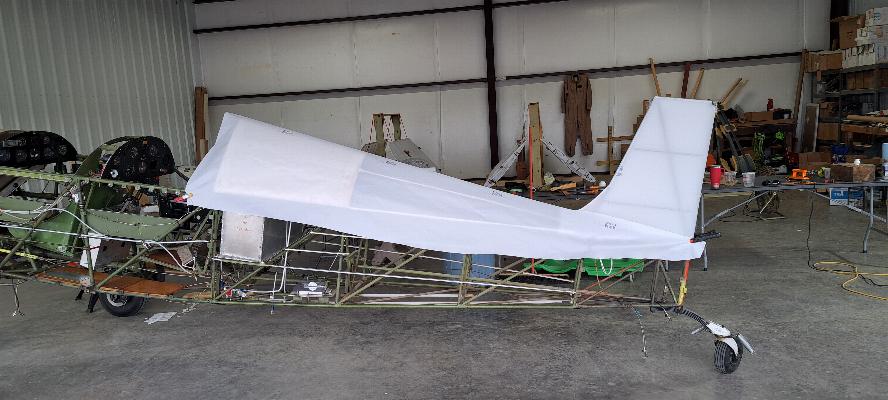

Trimmed and glued around the edges. That's all for today. I'll iron the glue and will shrink it very mildly at 225° tomorrow before covering the belly. Note that the fabric covering the turtle deck extends all the way back to the tail post on either side of the vertical stabilizer. That creates an overlap of the turtle deck fabric over the vertical stabilizer fabric that's about 18" long with the two layers glued together. That makes for a strong bond that will not fail. When completed, the edge of the overlap will have finishing tapes over it.

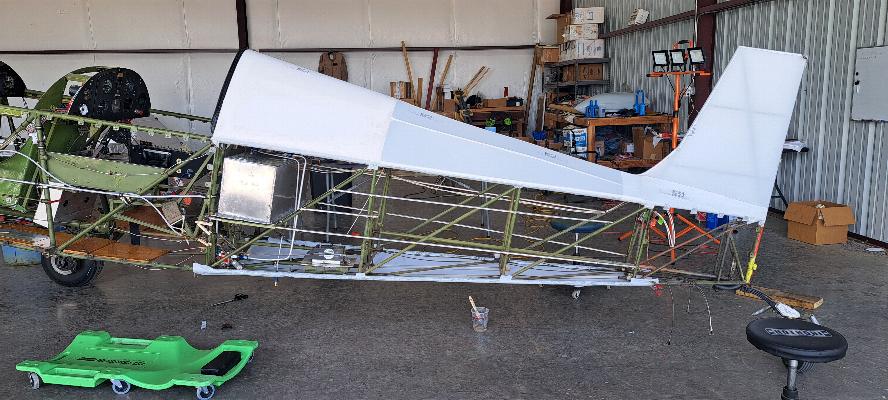
5/6/2025 - I started off this morning by putting fabric on the belly. You can see the clamps still at the back. This was relatively easy to hang in place with spring clamps, then glue the fabric wrapped onto the lower longerons
The next sheet of fabric is clamped front and back, then glued overlapping the bottom edge of the top piece of fabric that is wrapped around the upper longeron. The edge of the upper fabric was prepped by painting with two coats of glue before gluing the side sheet to it.
From the other side.

The upper edge is all glued. Then I trimmed the lower edge and glued it over the edge of the bottom piece of fabric that had also been prepped with two coats of glue.

Trim and glue the rest of the edges, and it's done.
The other side with the rear access hatch that used to be the baggage compartment, but now holds the auxilary fuel tank. There is am access door that mounts over top of that big hole. Tomorrow we move on to taughtening and finishing tapes.
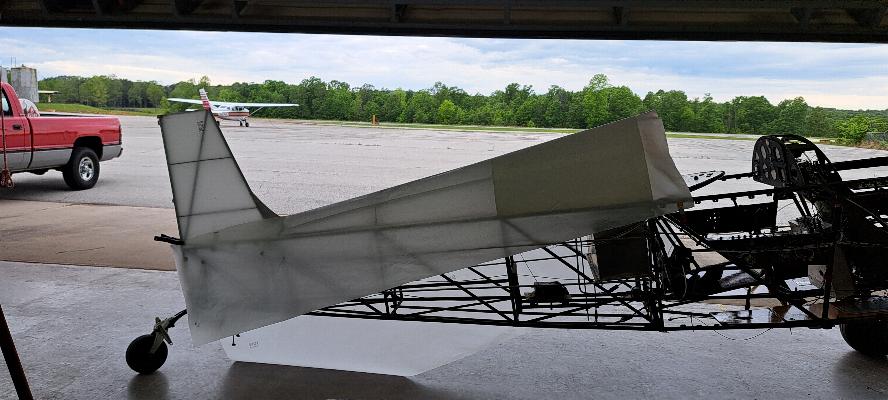
5/7/2025 - The fabric has been taughtened, stitching is completed on the vertical stabilizer, and all the finishing tapes have been applied. I am genuinely surprised at how much glue and tape the fuselage took. It was a lot. I also ran into problems while shrinking the fabric in that the top seam pulled loose on both sides of the fuselage. I was able to reglue it and it held while I did the remainder of the shrinking and I was able to pull out the wrinkles created by the seams coming loose. I applied 3" wide finishing tapes over those seams to ensure a good wide mechanical bond. I still need to install some inspection holes and the drains. The red mark towards the bottom is where I need to cut a hole for the rudder cable to exit. I have a piece of 1/8" HDPE behind that and will mount a fairing to the HDPE backing on the outside to cover the cable exits.
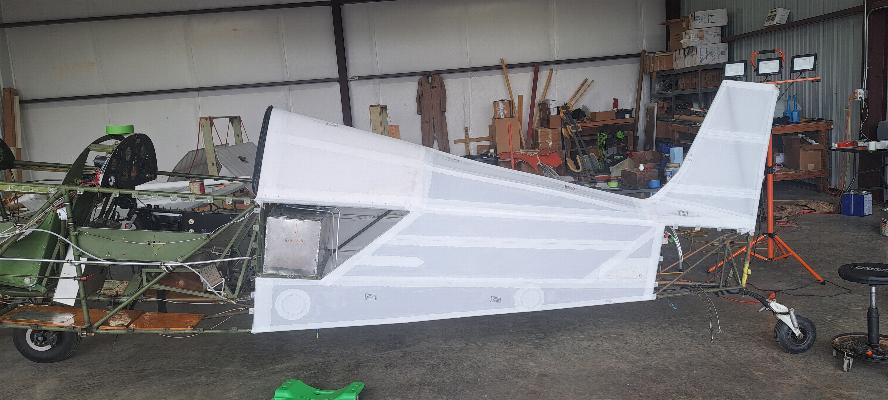
5/8/2025 - Fuselage fabric is done and ready for primer now. I'm back to doing engine work on another project for a few days.

5/12/2025 - Time to do the last piece of fabric; the ailerons. I glued and covered today did a "pre-shrink" at 225°F. In the top photo, one aileron has been preshrunk and the glue lines ironed, and the other hasn't. In the photo below, both have had the initial 225° pass with the iron performed to set the glue lines and take the initial wrinkles out. It still needs to be taughtened at 250°, 300°, and 350°F, then stitched and finishing tapes added. They should be completed minus the last pass of the iron over the finish tapes by tomorrow afternoon. The parallel engine build project has one engine completed and the parts are here for the second, so once the ailerons are done, I'll have to divert back to the other hangar for a few days to build one more engine.

5/14/2025 - Ailerons are now covered, stitched and taped, so that concludes the fabric work for the plane. All the fabric is ready for me to move on to the primer.

This photo shows the current state. The fabric work is done. But, before I start spraying primer, I need to clean up some metal parts to prepare them for painting.
Thsi page has become really long, so I'll create another page for Paint and Reassembly.