Paint - Ugh! Painting is the worst!!!
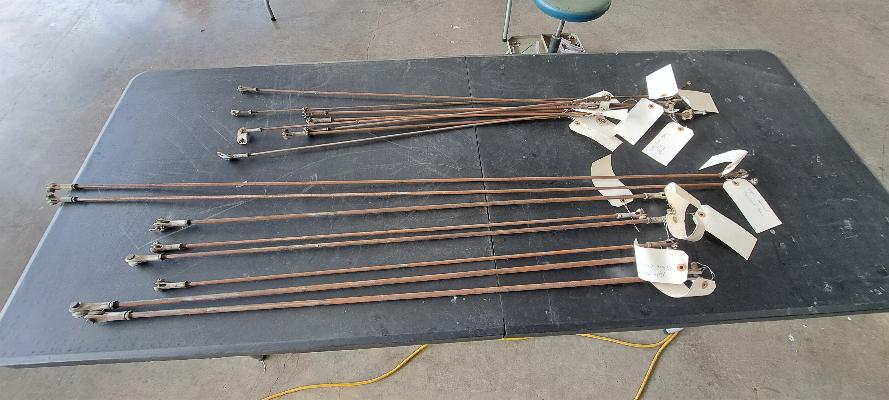
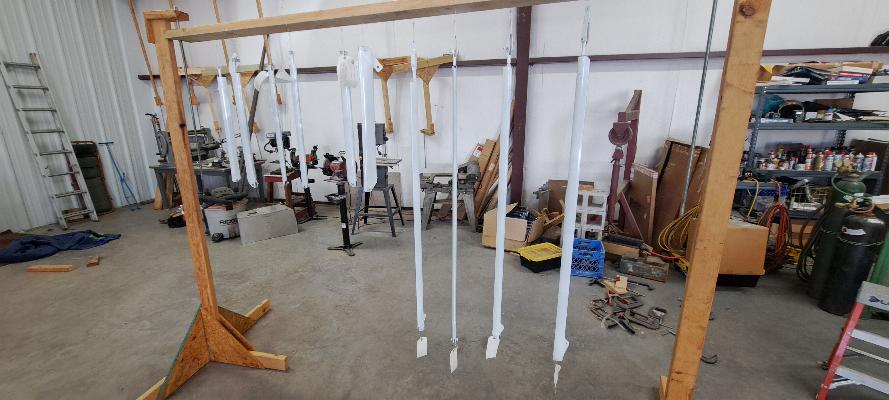
The photo above are all the cross braces and tail braces. They
are just as they look... rusty. They were never primed or
painted, so considering that they've been on the plane for over 40+
years, they look surprisingly good. However, they will all get
bead blasted, primed and painted. The shorter braces will fit in
the bead blast cabinet. The longer ones will have to be done
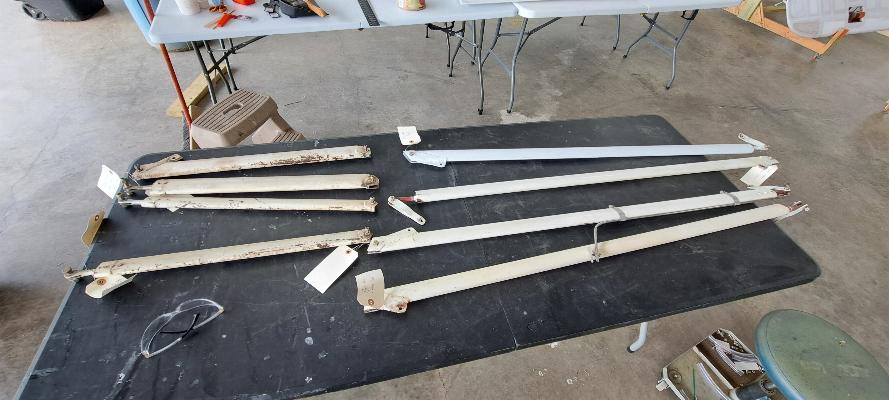
another way. The photo below has the various inboard and outboard
cabane struts. These were all painted 4130 steel, but are all in
need of being bead blasted, primed and repainted. The smaller
ones will fit in the bead blast cabinet. The longer ones will
need to be done outside. I do have a water bead blast adapter for
my pressure washer. I'm going to give that a try and see how it
works. Or, I may just end up buying some paint stripper and strip
them to prep for parimer and paint.
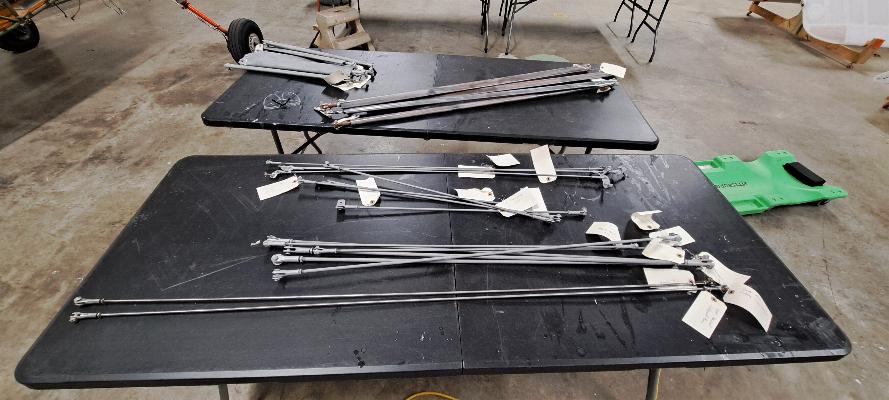
5/16/2025 - I'm stuck waiting for parts on the Scout engine build again, so
I'm back to working on the biplane this afternoon. I got some
quality time with the bead blasting cabinet and a large wire wheel and
have all the steel cross braces and cabane struts ready for primer.

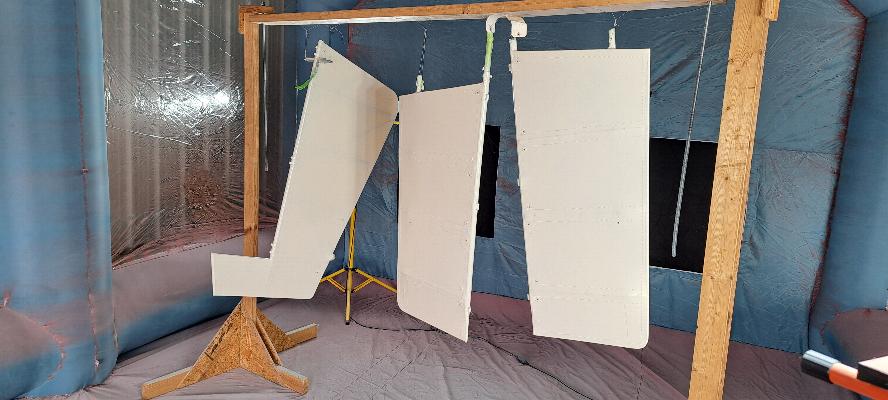
5/17/2025 - Primer and paints. The steel cross braces above and
the two photos below were hung from one of my wing jacks, then shot
with white epoxy primer, then two coats of Jet Black Acrylic Urethane paint.
That's the final color coat for them.
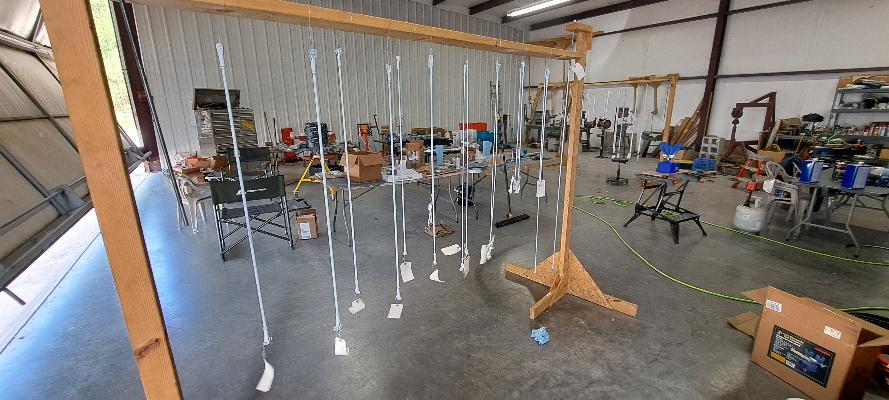


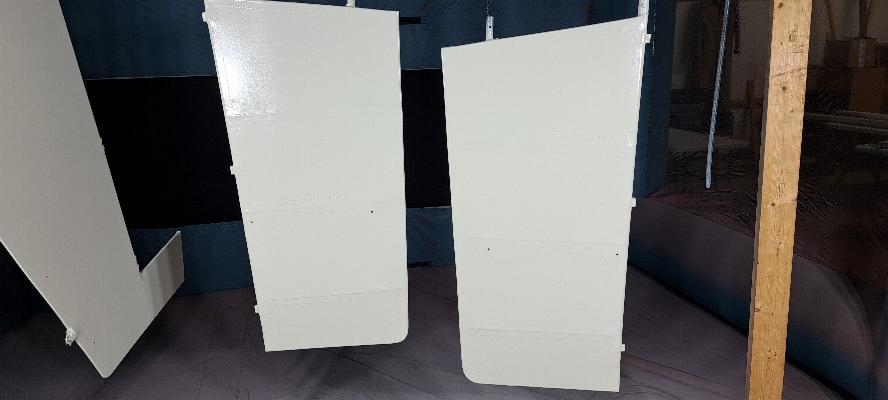
Above and below are the various center section (cabane) and outboard
wing struts. Above they are hung from one of my wing jacks for
painting. Below they have been shot with white epoxy primer.
They will be finish painted white as well, but I don't have the
white paint on hand yet. I hope to pick it up next week.
The tags you see hanging from all the struts and braces are
descripters for where they go on the plane. Without the tags, I
would be lost for some time figuring them out.
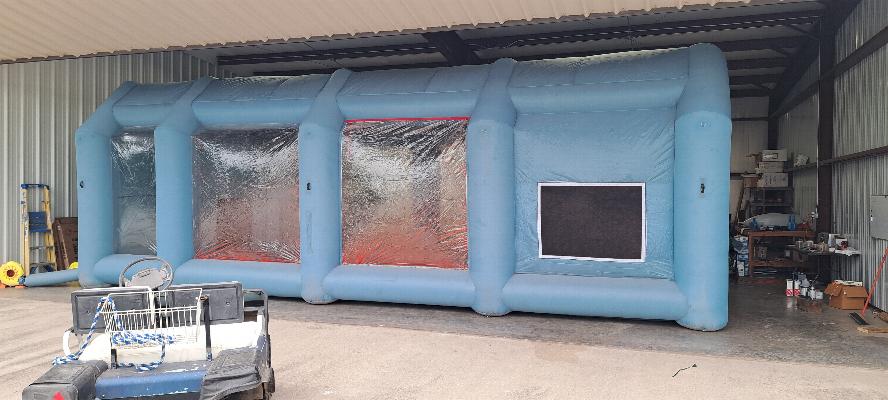
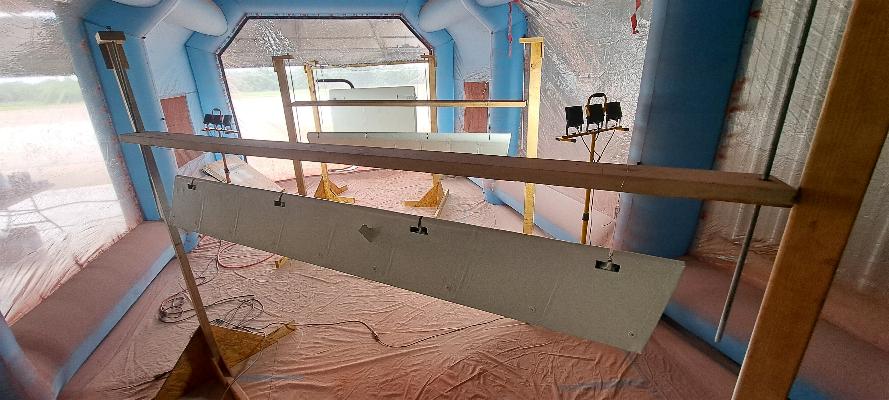
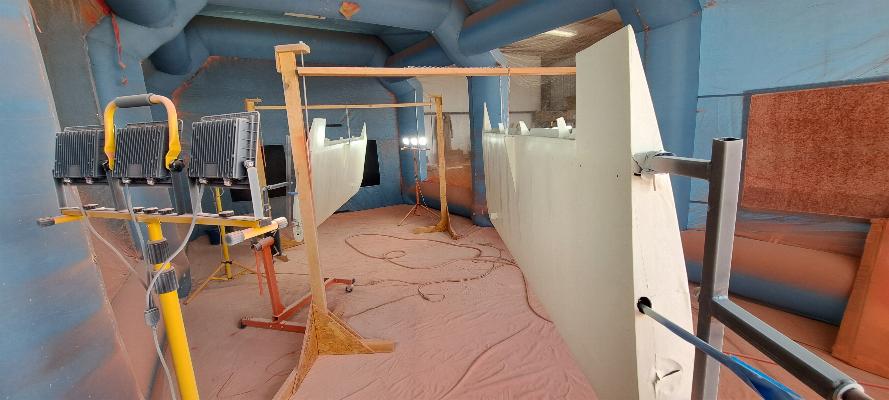
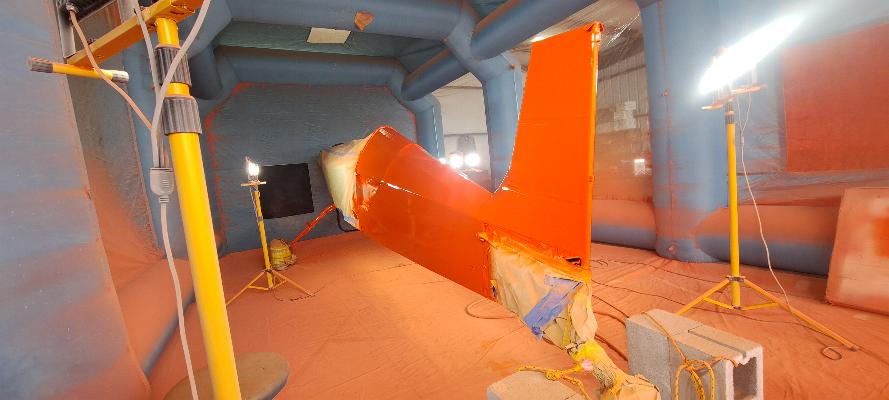
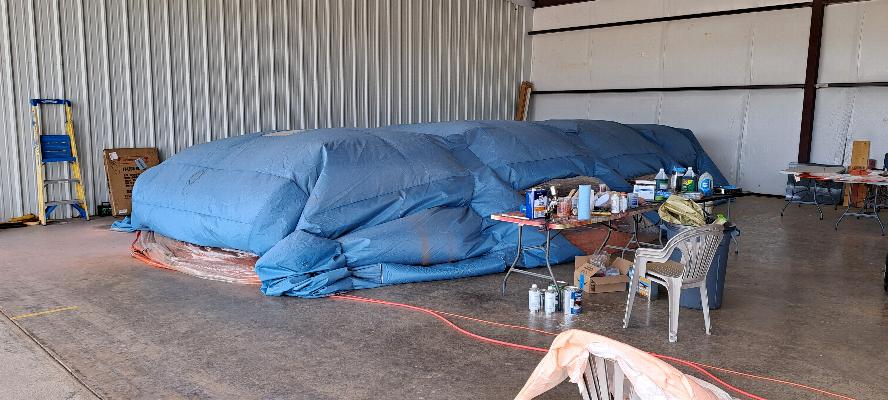
5/17/2025 - What is this? Why did I install a bouncy house
in the hangar? Well... not quite. This is an inflatable
paint booth. I acuired this second hand a couple of years ago in
anticipation of this project. Since it occupies nearly the whole
front half of hte hangar to where I can't get stuff in and out of the
door to the booth, I think I'll rotate it around 90° and put the
open end at the front of the hangar. I'm going to be spending a
lot of quality time in here over the next few weeks.

5/22/2025 - I finally have some of the paint and was able to get
started painting in the booth. Today it was just the cabane
struts I shot with Insignia White. Later in the day I flew the RV
to Searcy and picked up more Insignia White, The matched Orange Paint
and more catalyst, cross-linker, and reducer.
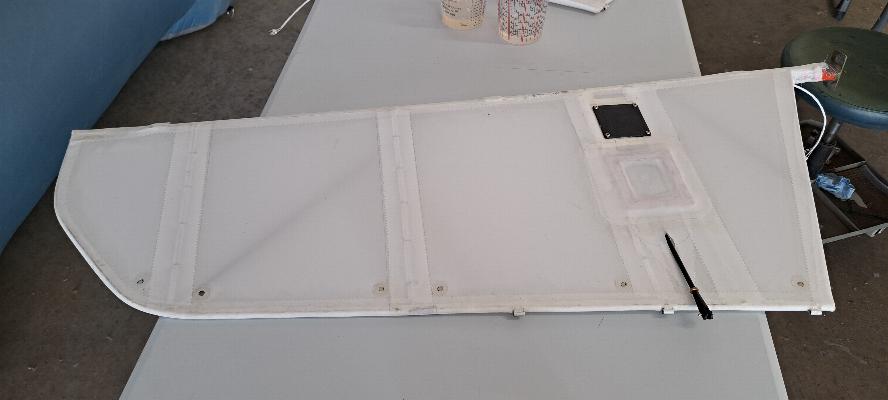
I also used my soldering iron to poke a hole in the fabric for every
vent reinforcement I had installed on the fabric. This elevator
is an example, but I did the fuselage, all 4 wings, the center section,
elevators, rudder, horizontal stabs, and even the trim tabs. Good
ventilation inside the part is critical to curing the primer after is
has soaked through the fabric. So, I opened all the vent holes.
I'll start preparing some parts of the tail feathers for primer
and paint tomorrow and we'll see how soon I can get started shooting
them.

5/23/2025 - I shot the first two coats of primer on the tail feathers.
You can see in the reflected light, there is some orange peel in
the surface. I'm having some difficulties with spray gun setup.
Not quite sure why as I have used these guns before. Spraying the
primer exposed a few places where I didn't get the edge of some
tapes glued down properly. I will say, these are the first parts
I covered and I modified my process for sealing down tapes when I got
to the wings, so hopefully I won't need to fix tapes on the wings and
fuselage. I'll need to deal with the tape edge issues tomorrow
and have a couple of runs I'll want to sand out. Then all of the
surface gets wet sanded with 400 grit and shot with one more coat of
primer. With the AirTech covering system, once the tapes are on,
you spray the primer directly onto the raw fabric. It soaks into
the fabric to seal it, then the second and third coats act as the UV
protection. Once the primer is on, you shoot the color coats and
you're done. If I get the repairs and sanding done, then shoot
the next coat tomorrow, I'll be ready to switch to the color coat
(Orange Crush!) on Monday.
5/24/2025 - No new photos as it looks the same. I fixed the tapes
that had edges lifting, sanded with 400 wet, then shot another coat of
primer. It did not go well. The primer just wouldn't flow
out. It looks like it was going on too dry. Seems strange since it was cool and
wet today. Consequently, the finish is a bit pebbly. I
should have dumped the paint back into the mixing cup and added more
reducer, but didn't. I kept adjusting the gun hoping I could get
the primer to flow out. It didn't. This will require a bit
of sanding to smooth out, then I'll have to decide whether to shoot
another coat of primer or not. It's repairable, but will require
a bit of extra sanding. And this is why I really don't like
painting.


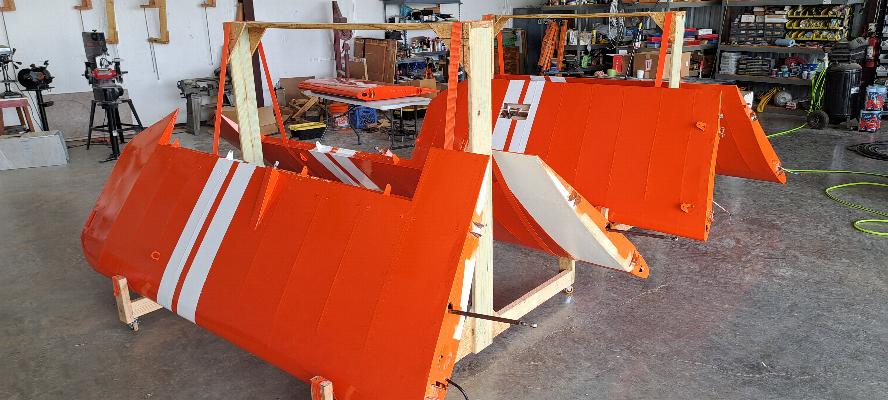
5/26/2025 - Another step backwards. The photo above shows the
horizontal stabilizers. They are symmetrical and could be
interchangeable from left to right... almost. I found that the
center elevator hinge is different by 3/16" between the two stabilizers,
which makes them not quite the same. Why would I care?
Because I got them switched around and ended up putting the
vents/drains in what turned out to be the top of both
stabilizers.  I thought
I would just swap them around, which wound make that the bottom, but
the center hinge being offset a tiny bit killed that plan. So, in
the picture above I have pulled the acetate drains off the fabric,
sanded and glued on little patches. In the photo below, I shot
another coat of primer, so the previous holes are now hidden. I
used less catalyst and more reducer in the paint. It did shoot
better, but you can see in the light reflection in the photo below,
it's still not smooth. That panel really is the worst of them,
and will require more sanding before painting. I can't imagine
I'm going to have that slick wet look shine on these parts, but that's
why I did them first, before the fuselage and wings. Definitely
on the learning curve here.
I thought
I would just swap them around, which wound make that the bottom, but
the center hinge being offset a tiny bit killed that plan. So, in
the picture above I have pulled the acetate drains off the fabric,
sanded and glued on little patches. In the photo below, I shot
another coat of primer, so the previous holes are now hidden. I
used less catalyst and more reducer in the paint. It did shoot
better, but you can see in the light reflection in the photo below,
it's still not smooth. That panel really is the worst of them,
and will require more sanding before painting. I can't imagine
I'm going to have that slick wet look shine on these parts, but that's
why I did them first, before the fuselage and wings. Definitely
on the learning curve here.
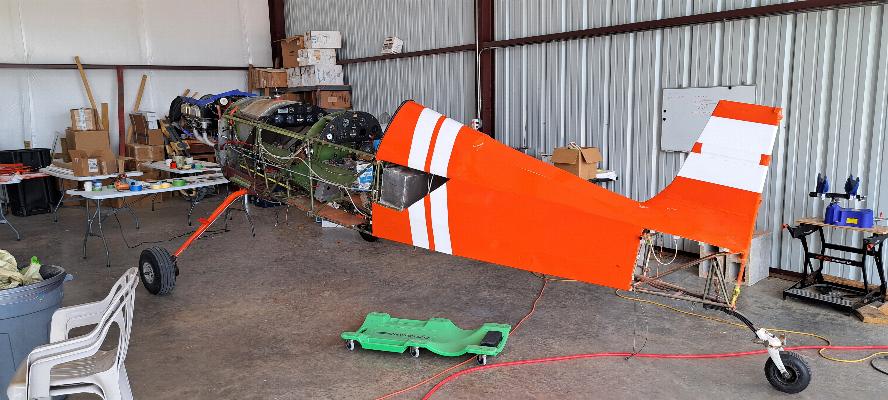
5/27/2025 - What can I say? It's ORANGE! Not the best
finish, but that is really based in my inability to get the first coat
of primer right and me being too lazy to sand it back completely
smooth. Paint on top of a rough primer just accentuates the
underlying issues. Really nice paint to spray. I'm not
happy with either of my spray guns. I can't seem to get this
gun to spray the full width of the spray fan. So I'm
covering with narrower passes. Other than having a large hopper
on the spray gun, it's like painting with a touchup gun. The
paint does a nice job of blending the narrower passes, but would be
better if my gun was working better. These will hang in the paint
booth for the next 48 hours to cure while I build some jigs to hold the
wings in the booth. Hopefully by Friday I'll be spraying the
wings. I found that I had 100% coverage with just one pass on the
paint. I shot a second coat, but honestly think one coat would
have worked out just fine. A second coat is just a second
opportunity to foul things up. These parts will get a return trip
to the paint booth to be masked and the trim painted on with one of my
touchup guns.

5/28/2025 - I wasn't happy with all the orange peel in the orange
paint. I discussed the spray issues with the other mechanic here
and concluded I had an air supply/pressure issue. I addressed
that issue and found I could get my spray guns to spray the way I was
expecting. So, I used some Scotchbrite to scrub down the surface
of most of the tail feathers, and resprayed them. While it wasn't
a 100% fix to make a super smooth finish, it did clean up the finish a
lot, and more importantly, now I know what the setup issue was with my
guns and why they weren't spraying right. Hopefully the rest of
the plane will go on much smoother.

5/29/2025 - Yesterday's painted parts are out and today the ailerons
and center section went into the paint booth. After yesterday's
discovery of my paint gun setup problem, today the primer sprayed on
nice and smooth. It will need to be scuffed with scotchbrite
tomorrow, then will get two more coats of primer, then likely paint on
Saturday. This looks like it should come out with that AirTech
mirror finish. The parts I removed from yesterday have a very
shiny orange peel finish.
5/30/2025 - 4 coats of primer with sanding between coats 2,3,&4.
Even the dull primer looks nice. It will get a light
scuffing with scotchbrite in the morning before I paint. I can
hardly wait to see how this paints tomorrow.

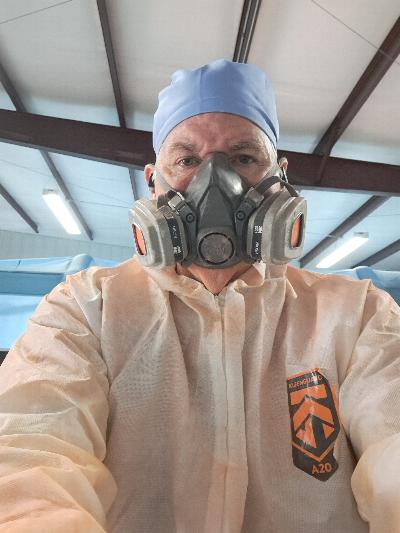
6/3/2025 - These photos are a couple of days old. I didn't
realize I hadn't posted them yet. Above, my paint uniform.
Below, the paint quality is significantly improved, but not as
much as I would like.


6/3/2025 - Started on the upper wings today. As usual, once I
thought I had this process figured out, something else goes sideways.
This time it was the filter in the gun got plugged up. Not
sure why I had lumps in the primer to plug up the gun, but I did.
I dumped the primer into a cheap Harbor Frieght gun I have on
hand and finished shooting the primer on the near wing with it. I
need to buy some more paint filters for my guns. Yes, I do filter
the paint when I mix it as well. This time I mixed up a much
larger batch for all the surface area of two wings, and apparently some
set along the edges of the mixing cup while I was spraying the first
batch. It's nothing I can't sand out when I wet sand the wings
tomorrow, but things would sure be a lot easier if I did things right
the first time.

6/5/2025 - Adventures in painting. Always finding new and
creative ways to foul up a paint job! This time it was fish eyes.
The vendor had recommended that I clean the surface wtih ZEP
ammonia free glass cleaner prior to painting. So, after sanding
the primer yesterday, I cleaned it with ZEP cleaner. That
left a soapy film on the surface that I was not expecting. So, I
wiped the wings down with a damp rag, then came back and wiped it down
with Alcohol. I left it overnight, then started today spraying.
As soon as I started, I could see fish eyes popping up everywhere
in the paint. I immediately stopped, then wiped down the wings
with alcohol again. I was able to paint without anymore fish eye
issues other than the area I had painted when I discovered the problem.
That required a bit of cleaning after the paint dried, then I
sprayed a second coat. The second coat actually came out
reasonably good. There are a few spots on the left wing that show
signs from the fish eye issue. Note to self: "Never use ZEP
glass cleaner again when painting." It's probably great for
glass. Not so much for prepping a surface for paint. I hope
to mask and shoot trim on these wings tomorrow.

And then there is fixing the paint problems from the last couple of
weeks. I sanded all the tail surfaces and the center section to
prep for one more coat of paint. I wet sanded them with 600 wet
using my orbital sander. Hopefully I have knocked the lumps down
enough that the next coat will flow out a bit smoother.

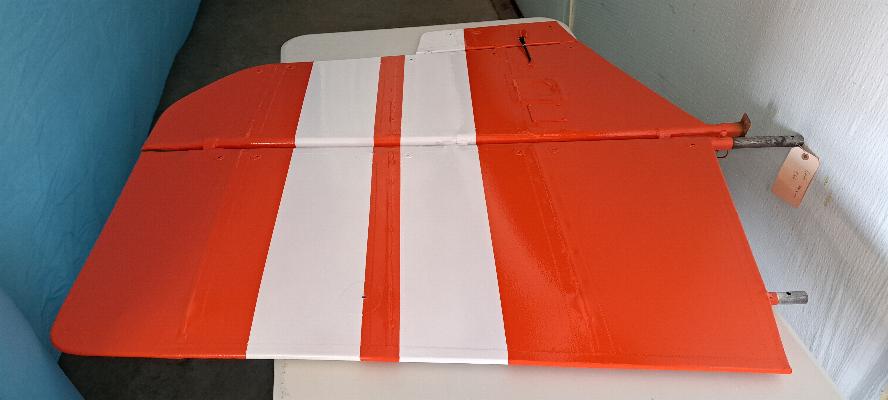
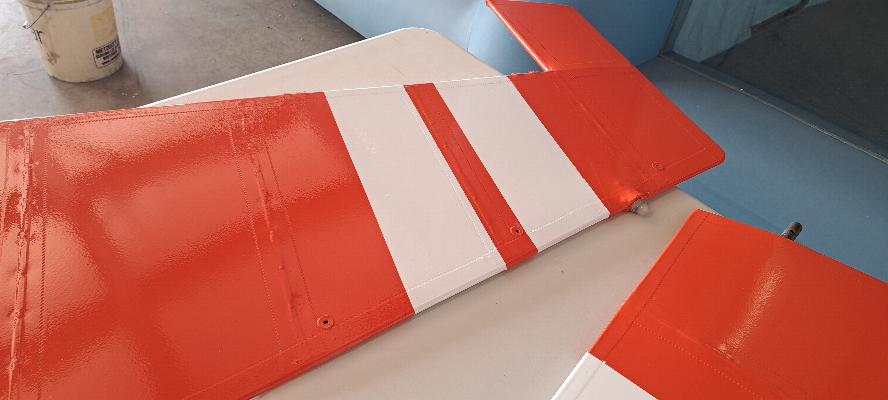
6/6/2025 - Painting the trim on the upper wings. Above I have the
fine line tape outlining the trim. Below I tape off overlapping
the fine line tape to widen it out so I can tape on the kraft paper to
protect the rest of the wing.


Wins all masked off before spraying.

Insignia white trim sprayed on, then 90 minutes later, I pulled the masking.

This is really the first pieces I've painted that are an acceptable
finish. Everything else will get a new finish coat sprayed in the
next day or two.

6/7/2025 - The wings came out of the booth and the center section,
elevators, and horizontal stabs went back in to get another coat of
paint. They are better, but the rough paint underneath definitely
shows through a bit. These will come out of the booth tomorrow and the
ailerons, and rudder will go in to get a final coat.

6/8/2025 - I got in two painting sessions today. This morning I
took the elevators, horizontal stabilizers and wing center section out
of the paint booth and hung the rudder and ailerons to respray the
finish. They were cured hard enough that I removed them from the
booth late this afternoon after I masked off the elevators, horizontal
stabilizers, and trim tabs for trim. Then I sprayed the trim on
the masked parts. Above is the fine line tape on a stabilizer,
elevator, and trim tab. Below are the same parts from both sides
completely masked with the trim shot on them. They will cure
overnight, and come out of the booth in the morning so I can start on
the lower wings. You can see in the photo above that the rough
texture from the first paint came through the new finish. It
looks a bit rough, but is much better than it was. As I tell
people, the paint may be lumpy, but it's shiny lumps!
Trim painted on.

bottom side of horizontal stab, elevator and trim tab.
6/9/2025 - The lower wings moved into the paint booth today and
received the first two coats of primer. Tomorrow morning they
will get imperfections fixed, and wet sanded, then another coat of
primer.
I also shot the white trim on the rudder. Not sure
why this picture makes the paint look so rough. It has a bit of
orange peel to it, but nothing like it looks like in this photo.
5/10/2025 - I sanded the primer on the wings above, then shot another
coat of primer. No pictures, since it looks exactly the same as the photo two
above.

5/11/2025 - Wings ready for paint. The wing walk area is masked
off. No need to paint it. Painted wings below. This
is the first paint I've done that I was truly happy with the results.


6/12/2025 - Masked the lower wings and shot the white trim on them.
The off white area at the wing root is where the wing walk
compound will be applied.

Ailerons masked and white trim painted on. I'll pull the masking off tomorrow.


The fuselage is getting ready to roll into the paint booth. I'll mask off the gear once it's inside the paint
booth.
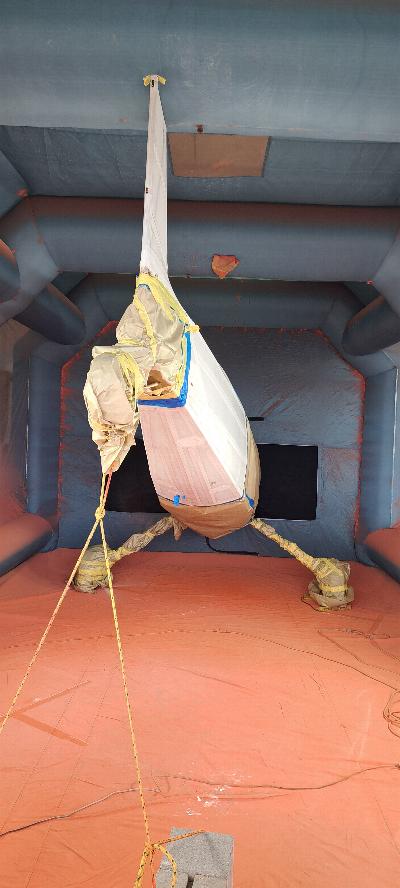
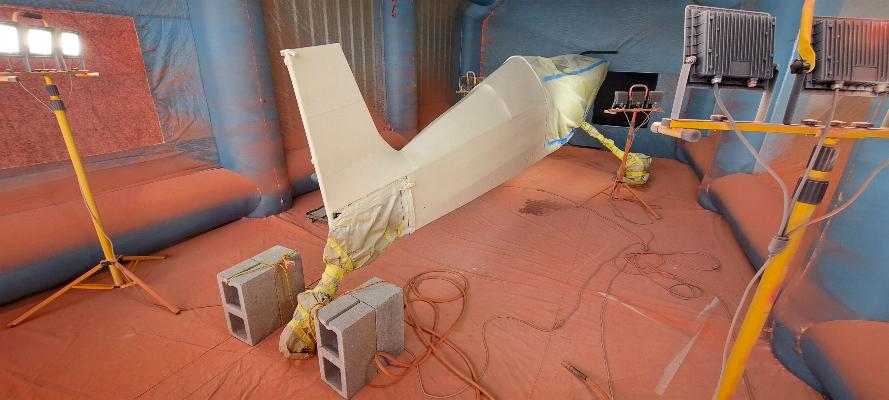
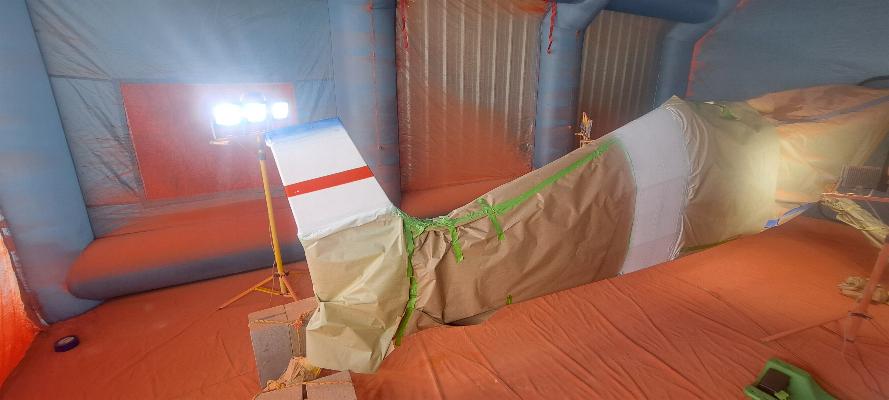
6/14/2025 - Fuselage in the booth and masked off for painting.
It's tippy with no wings on it. I have 4 cinder blocks on
the floor tied to the tail so I can tip it up to paint the belly, then
set it back down on the tailwheel to paint the rest. Photo below
has two coats of primer sprayed with a bit of sanding between coats.
It gets sanded again tomorrow and another coat of primer before
it's ready to paint.

5/15/25 - Not much new to see here, although I have sanded all the tape
edges and shot another coat of primer to fill along the tape edges.
I also unmasked the landing gear and scrubbed it down with laquer
thinner to prep for new paint tomorrow when I shoot the fuselage.
5/16/2025 - Two coats of orange on the fuselage. I have two
overlapping trim patterns to paint, so will have to shoot trim on the
fuselage the next two days.

Paint booth from outside the hangar. I really need to replace the
outlet filters as they are loaded with overspray. This booth came
from Vevor. They won't sell me the replacement filters.
There is another manufacturer of these inflatable paint booths,
and they won't even divulge the size of the filters. Why be so
secretive? Do you really dislike selling stuff that much?
Makes no sense to me. The filters are held in with Velcro
and are 3.3 x 5.9' (1 x 1.8M) in size. Email me if you have any ideas on how to get new ones.
Wings and center section sitting in the other hangar. One of my
challenges with this painting is the lack of power in the hangars.
Each hangar has exactly one outlet. Consequently, I've got
my compressor in this hangar (see compressor at the far right of this
photo) with 200' of air hose between the compressor and the gun.
I have a large pressure drop in the hose, which presented some
issues. Also, when painting larger items, such as the wings, the
compressor would get behind, so I would have to stop to let the
compressor catch up. As I would finish painting one side of one
wing, I would start to notice the drop off in pressure, so would finish
that side, then give the compressor a few minutes to catch up before I
could resume painting. This is about a 20 year old 5 HP Craftsman
2 stage (155 psi) oilless compressor. It's served me well for
many, many years, but is a bit light weight for this task.

I installed the trim tabs on the elevators today and connected the trim
servos. The servos are positioned in the full nose down position.
Seems to me I did that to make them easier to install the servos
in the elevators with the fabric installed. They won't move until
I get them connected to the trim control in the plane.

6/17/2025 - I shot the original trim back onto the fuselage today.
Masked for painting above, and painted below. I unmasked
the vertical stab as I have some trim to paint that overlaps the
original trim that I'll paint on tomorrow.
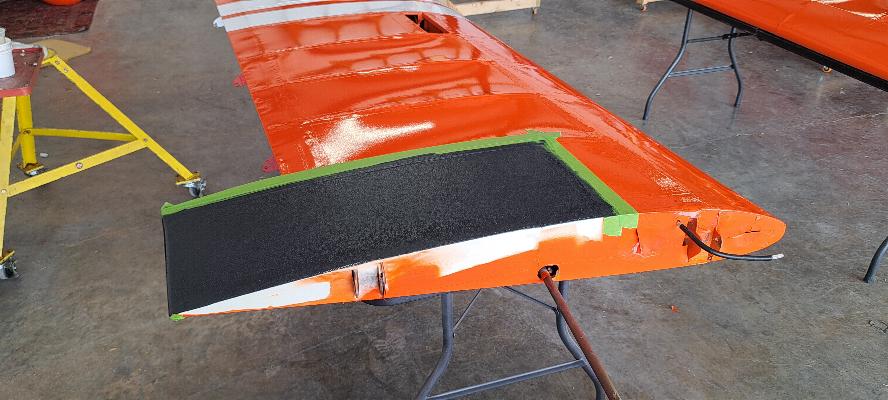
My wing walk compound arrived yesterday, so I painted the wing walk steps on it today.

Then I decided to install the ailerons. That didn't go well.
The photo above shows that the end of the aileron is actually
overlapping the wing tip, so there is no clearance. This simply
can not work and must be fixed. You'll note on the photo above
that I marked a line where the end of the aileron should be to clear.
Now what do I do?

This is why I take so many photos. I looked through my photos
until I found one of the aileron before it was covered. There was
a repair done to the end of the aileron that had created that hump.
Why did it clear before? I referenced another photo and
found the trailing edge of the wing had also sustained damage at some
point in time and the joint at the trailing edge of the wing tip bow
was badly damaged with the joint actually crushed.. I had
repaired the joint in the wing and straightened it out. I had
reinforced the end of the aileron, but had not created the extra hump
in it.
That was someone else's repair that was on there, but had fit
with the damaged trailing edge. What I failed to do was to check
to see that the repaired aileron fit properly with the repaired wing.
After studying the photos, I
concluded that I had plenty of material to simply cut away the hump in
the end of the aileron. I literally ran it through the band saw
to straighten out the tip of the aileron. In the photo above, I
used some Ceconite 104 light weight tape glued on to cover the cut
away area. In the photo below, I have brushed some primer over
the area. I'll sand it tomorrow and will either mask and spray,
or will touch it up with a fine brush to make the repair disappear.


6/18/2025 - Above: aileron tip repair completed and painted.
Fuselage trim paint completed. The white dot on the right
vertical stab has some small runs in the paint, so I'll sand and
reshoot it.
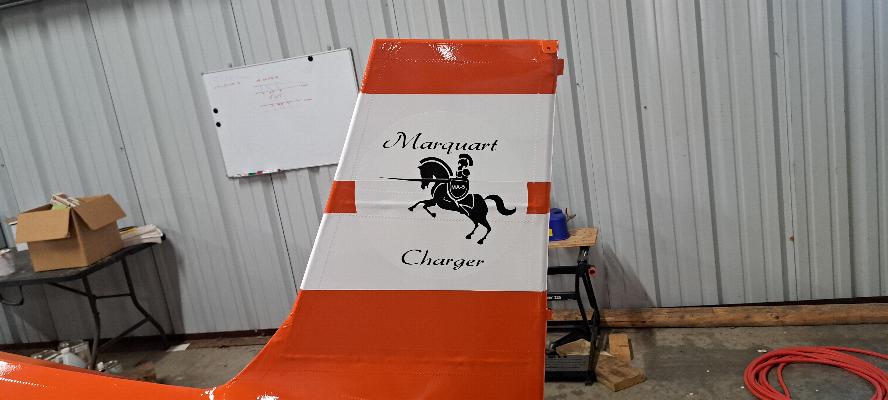
Custom Logo applied to the vertical stab.
Time to deflate the paint booth for a while. I'm going to work on
the other planes for a few days before I get back to the biplane
project. Next on tap for this project will be reassembly and
rigging.
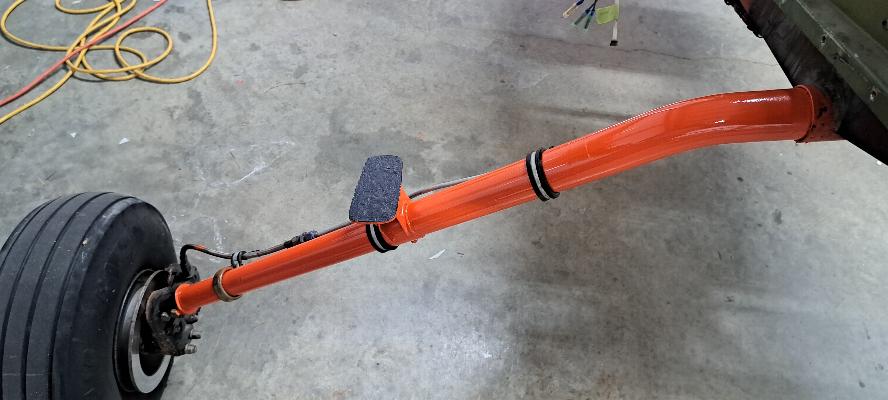
6/21/2025 - I painted new wingwalk material on the steps on the landing
gear and attached the brake lines back onto the gear legs.
Next week it's time to turn this pile of parts back into an airplane! Go to the Assembly and Rigging page to follow along.