FLAPS
Here's
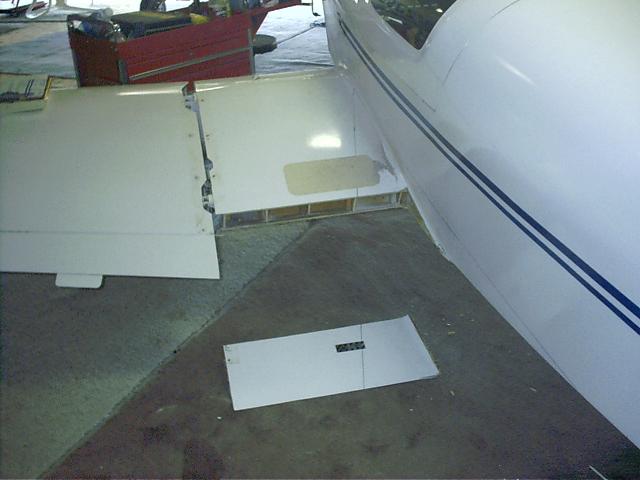
where I started. After a sleepless night, I took a die grinder and cutoff
wheel to cut the wing skin top and bottom, then worked with a hack saw blade to
cut the ribs while working the saw blade vertically through the wing. It
should be noted that the inboard wing stub skins were built with Safe-T-Poxy
using the same plyfoam techniques as used by Dan Diehl for the Diehl wing
skins.
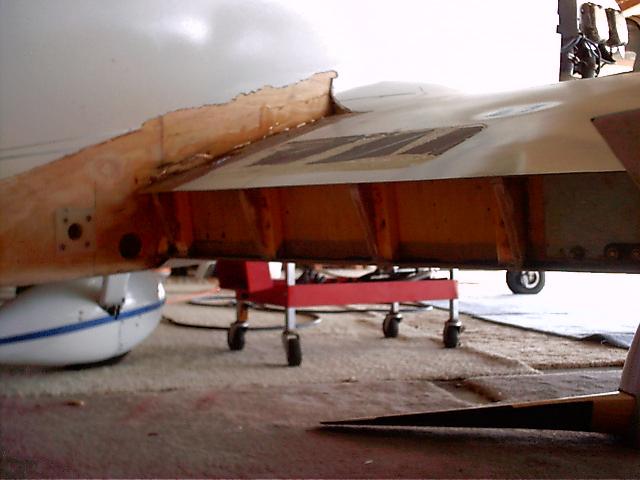
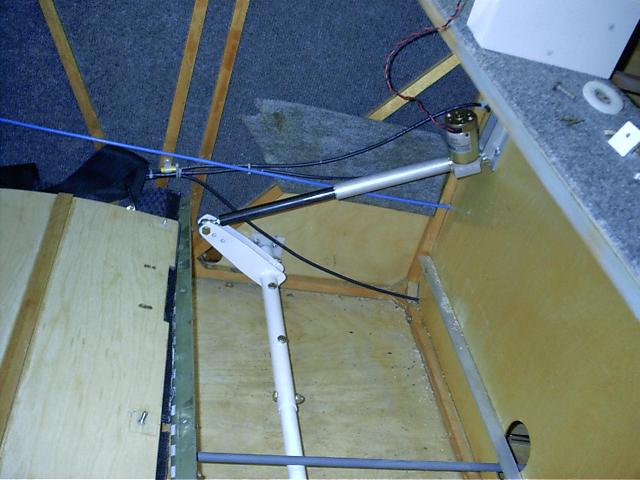
This
is a view of the rear spar after cutting the trailing edge off the wing
stub. The nylon bushing bolted to the side of the fuselage is the
bearing for the flap actuator torque tube. The small hole just in front of
it is where the cables were once run to aileron bellcranks behind the
spar. They were relocated in front of the spar by the gentleman that
started this
project.
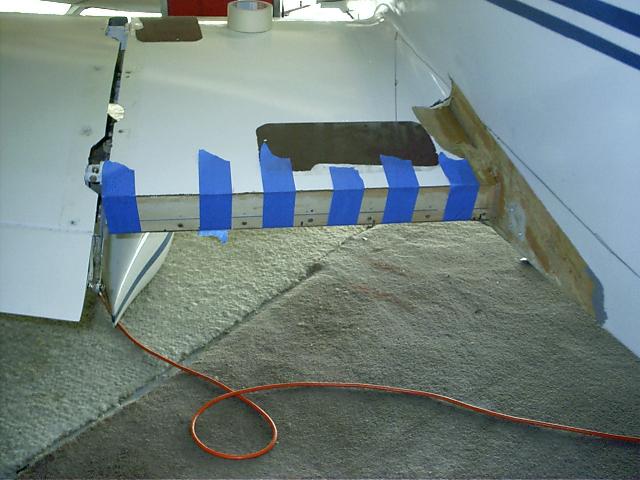
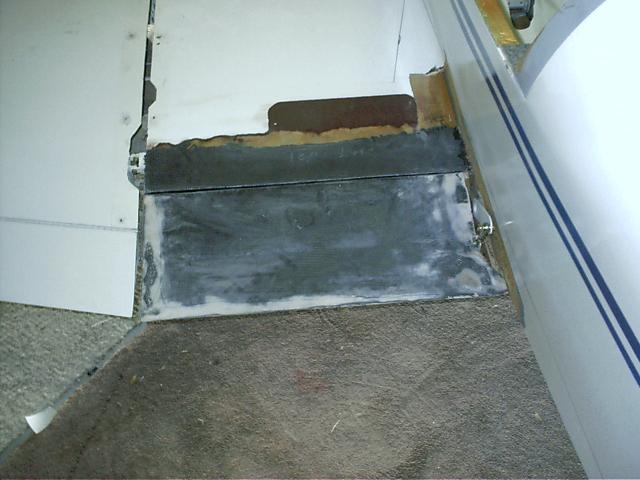
Bonding
the spar blank into the trailing edge of the wing. This has nutplates
bonded to the back side for mounting the flap
hinge.
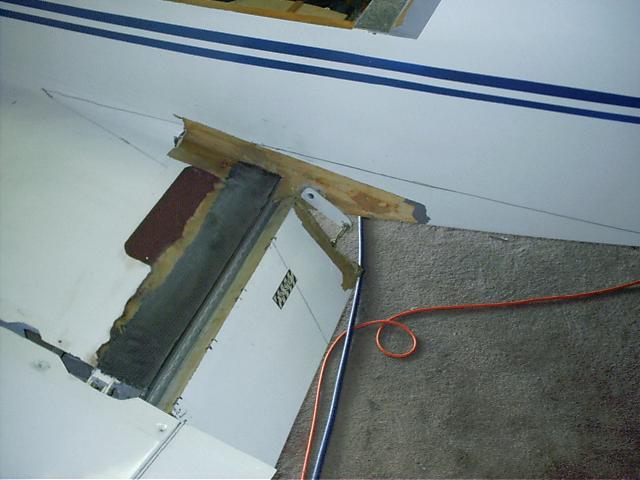
Test
fitting the flap back onto the wing. I bonded a spruce spar into the back
of the wing and front of the flap. You'll note that the spar in the wing
is already wrapped in carbon fibre. I'll do the same with the flap, but
will encapsulate the whole flap. I'm using a rolled piano hinge for the
flap
hinge.
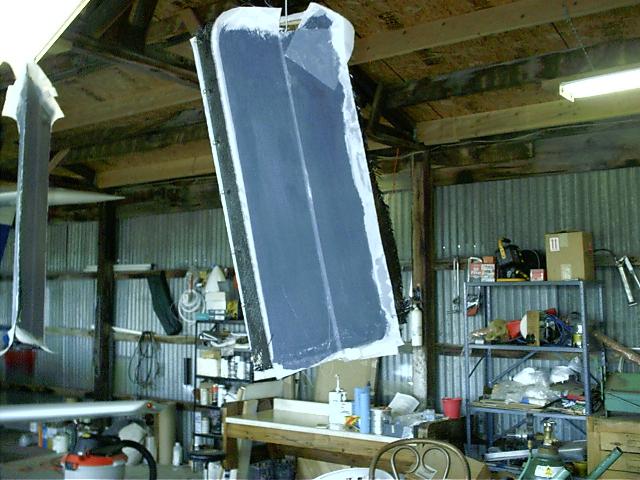
The
flap wrapped in CF and covered with peel ply (in this case, 6" dacron
tape).
The
linear actuator for the flaps and associated linkage. Trying to buy an
actuator was a frustrating experience. I did the research and decided on
what I needed. I found a company that made them, but they wouldn't sell to
the public. After 2 weeks of back and forth with their sales, they refered
me to a reseller. The reseller would be happy to sell me what I needed,
but only if I bought a minimum of 100 of them. I finally ordered an
actuator from Van's. It is bigger and heavier than I wanted, more powerful than I
needed, and cost twice what the one I wanted if I
only could have bought it. However, this one was readily available and
will do the job.
The flap attached to the wing and
actuator linkage. With this linkage sticking out the side of the plane, I
need a plan to hide it and fair it in as
well.
Flaps
fully extended to 37
degrees.
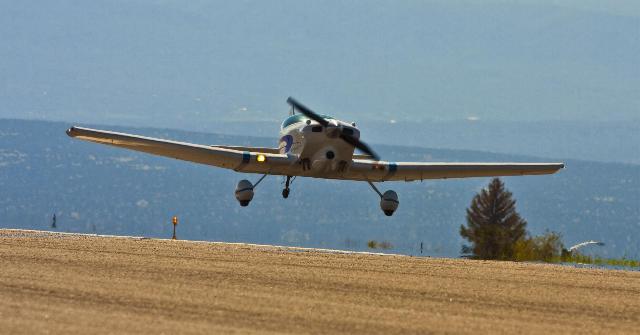
Aug 21, 2010 - Los Alamos, NM EAA Chapter 691 Spot Landing Contest - Not a winner. :o)
I posted these two photos to demonstrate the difference in attitude of the plane landing with and without flaps.
Notice in the top photo, that even though I am further away from the camera, you can only see the top of the
canopy, so my forward vision down the runway is just about nil. Also note that the tailwheel and mains are all
roughly the same hight off the ground.
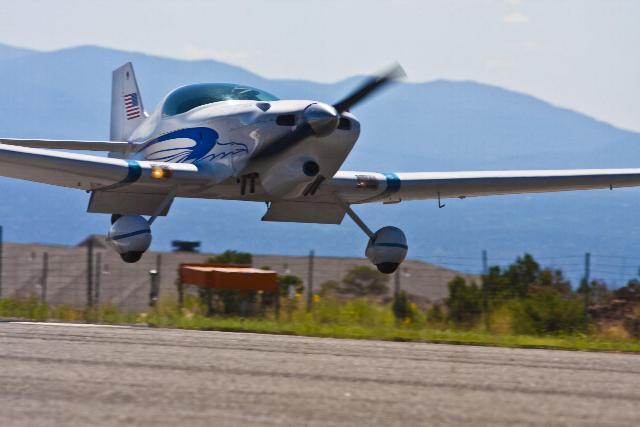
In this photo, with me closer to the camera, you can still clearly see my head, which means I can see down
the runway while landing. Also, note how much higher the tailwheel is as compared to the mains. These two
pictures were taken in roughly the same position and at the same approach speed during a the competition.